CNC Embroidery Key Guide
This guide will provide an introduction to CNC Embroidery using the Janome 15000 machine and Digitizer Embroidery software. We will make a small patch and cover:
- Introduction
- Important things to know
- Resources:
- Machine Interface elements
- Workstation Elements
- Key Guide

Introduction
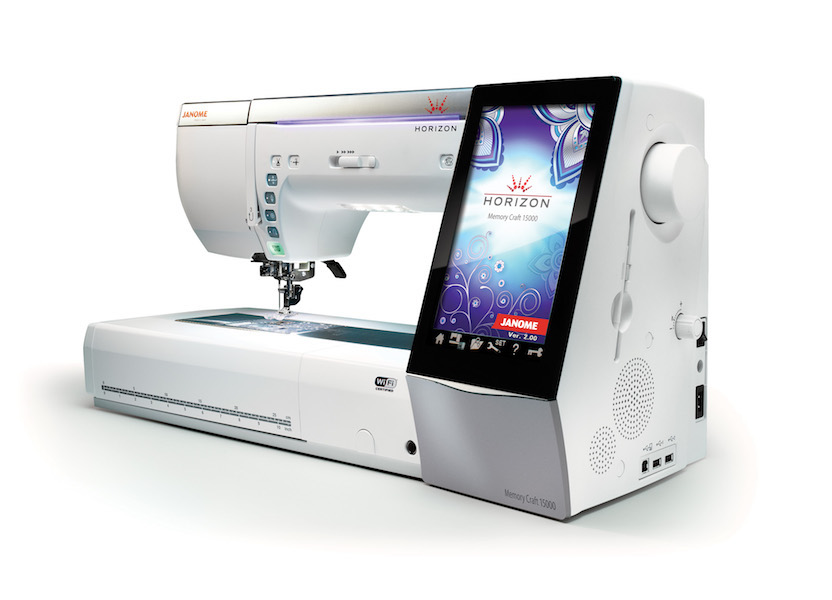
- This is by far the most complex machine in the lab with 100+ separate parts to accommodate various embroidery scenarios.
- At the same time it’s the only one that’s been designed as a consumer device rather than industrial machine. Janome has assumed that users of the machine already have sewing machine experience, and this experience is very helpful when working with the Janome 15000.
Important things to know
- No maintenance on the machine. If you think something is wrong, or not sewing correctly, ask a technician for help.
- Material: we provide good quality embroidery thread which works best for this machine. You are welcome to provide your own threads and encourage to bring your own material. As with any sewing machine, different materials require different stabilisers and will work more/ less successfully than others.
- To change between sewing mode and embroidery mode you will need to change the foot and sewing plate.
Resources
- Janome Instructional Video: MUST watch through this while working with the machine for the first few times.
- Janome MC15000 product page
- Official Janome manual
- On the screen interface there is a button with ‘?’. This has short videos showing you how to wind the bobbin, thread the needle etc.
- Guide on Embroidery stabilizers
- Digitizer V5 Embroidery tutorials:
- Conductive thread tutorail
- learn the lingo: machine embroidery
Workstation Elements
- Embroidery machine
- dedicated iMac
- iron + ironing board
- rotary cutter + mat
- magnetic pin holder
- pedal
- hoops:
- FA10
- SQ14
- SQ23
- ASQ22
- G2
- loan kit with extra accessories
Interesting projects
Key Guide
IMPORTANT: Have the Janome MC15000 Manual open while working with the machine. Refer to this before asking for help from a technician.
Materials/ tools required:
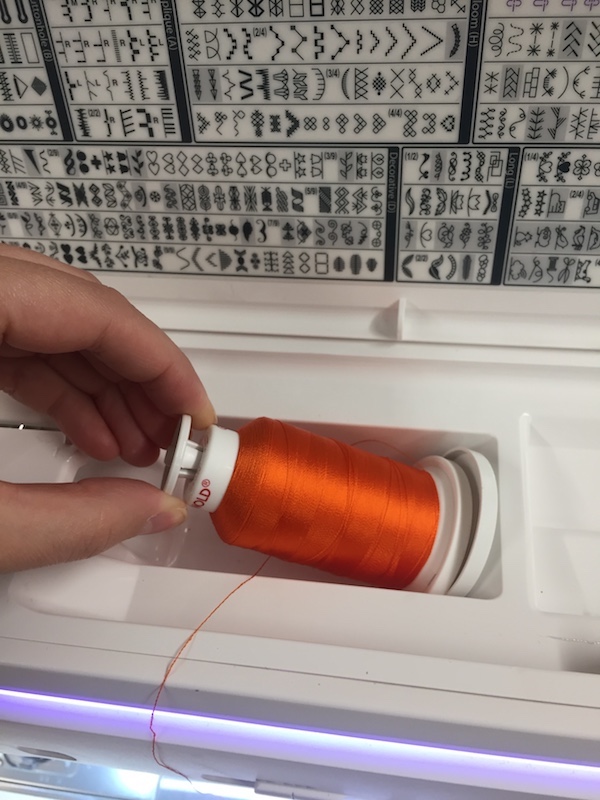
- Embroidery thread
- Empty bobbin
- FA10 Hoop
- Felt
- Tear away stabiliser
- Vector file with a design to embroider. Must fit within a 100mm x 40mm canvas.
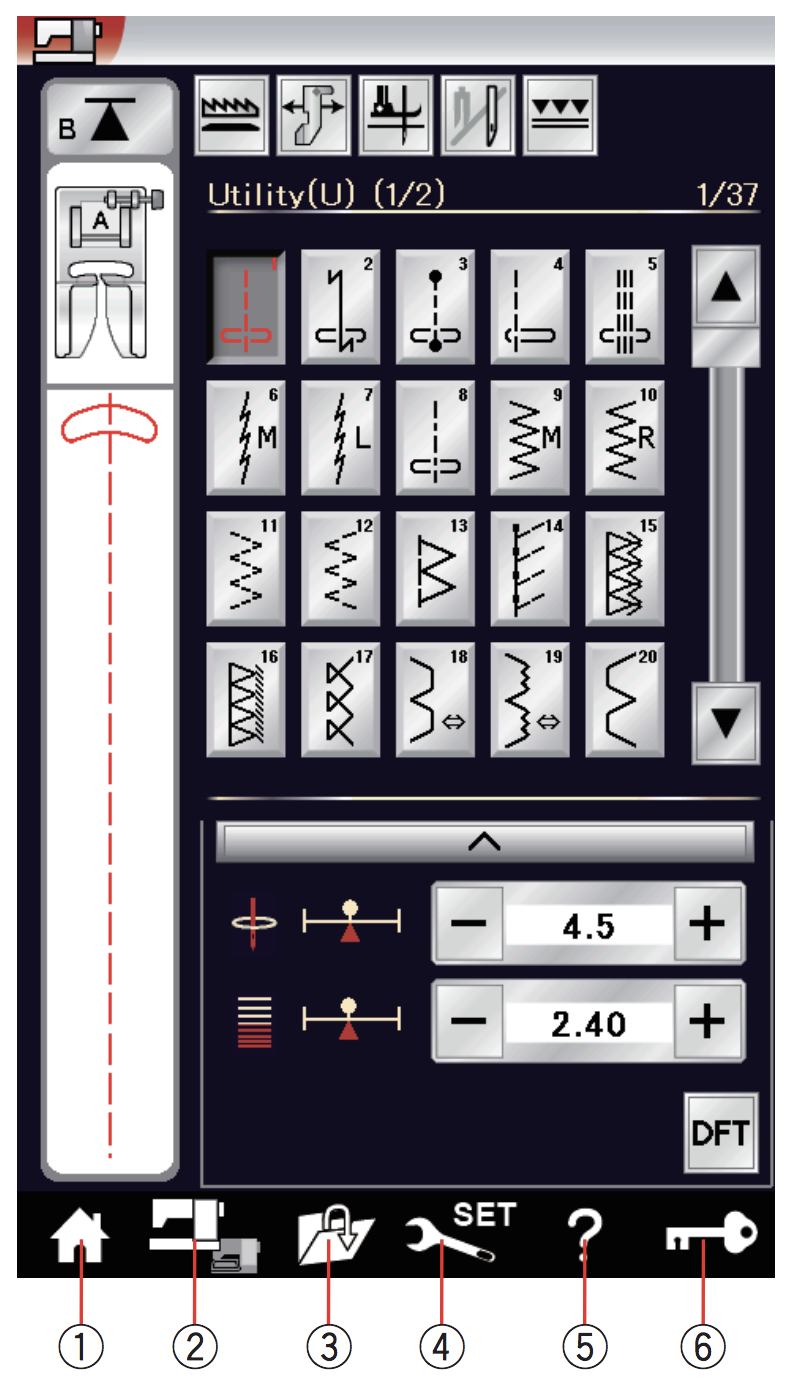 figure 1 Interface panel.
The Digital Embroidery Machine
-
Turn on the machine (right hand side)
-
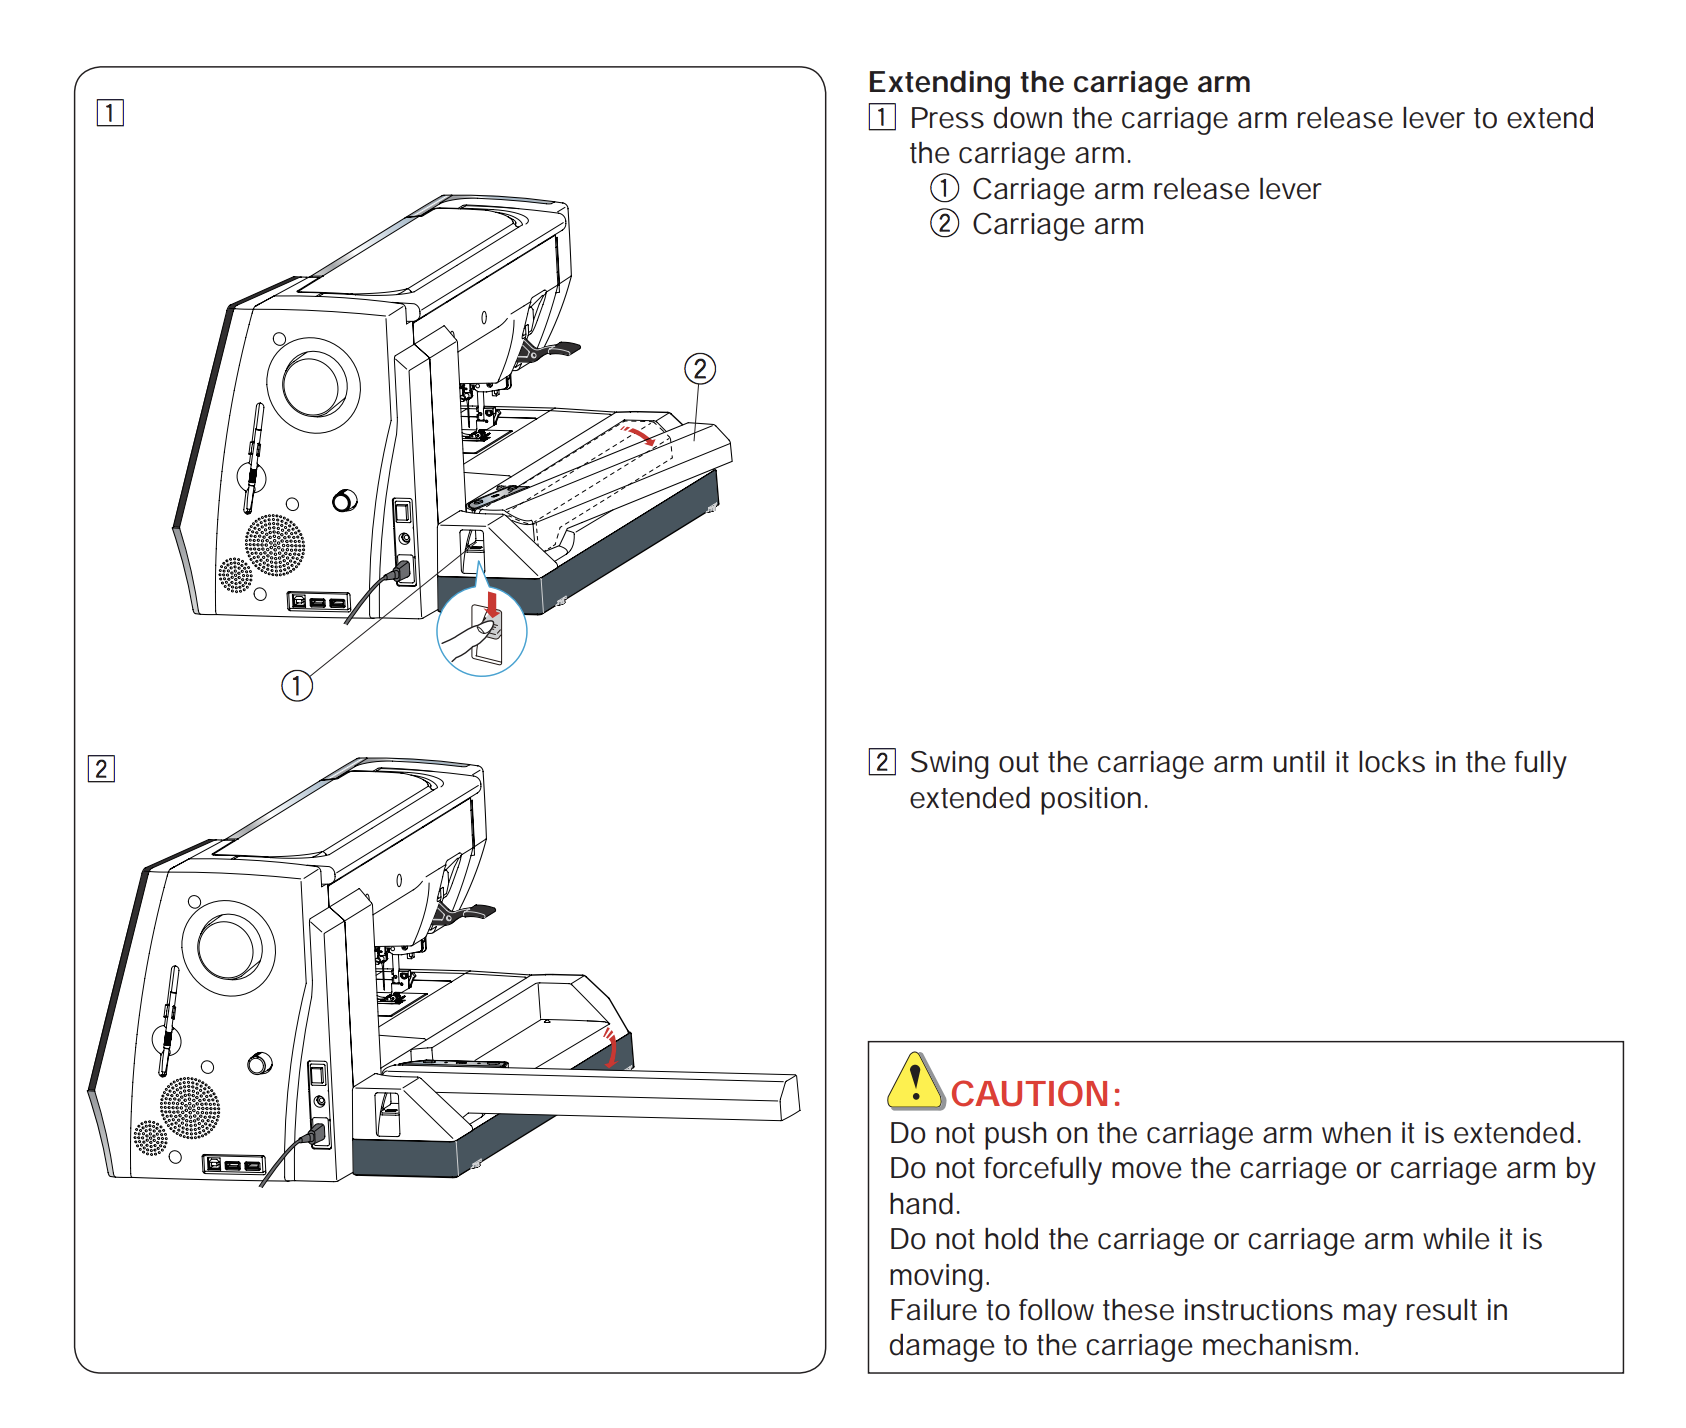
Open the carriage arm:
-
Switch mode to digital embroidery mode on the interface. Use button #2, referenced in figure 1.
-
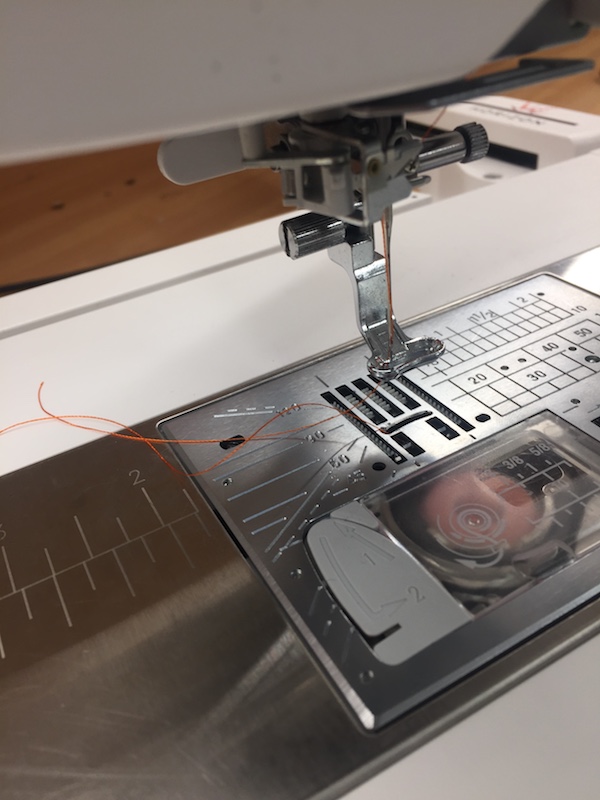
Wind the bobbin. Use button #5 on the interface, referenced in figure 1, to access the short tutorials. Watch “1. Winding the Bobbin”. Winding the bobbin & threading the machine is also covered in pages 14-16 in the manual.
-
Thread the needle. Use button #5 on the interface, referenced in figure 1, to access the short tutorials. Watch “2. Threading the Machine”. Ensure you attach the spool holder at the end of the spool of thread. The automatic threader does not always work - if it is not working manually thread the thread through the needle eye.
-
Thread the bobbin. Video tutorial starts at 8:27
-
Turn the hand wheel a couple of times to expose the bobbin thread. If the bobbin thread is not catching check you have threaded the bobbin properly. Refer to the previous videos and this wikihow article for more help.
-
Install the correct presser foot, tighten the screw to ensure the foot is not loose. Page 21 and 107 in the manual.

-
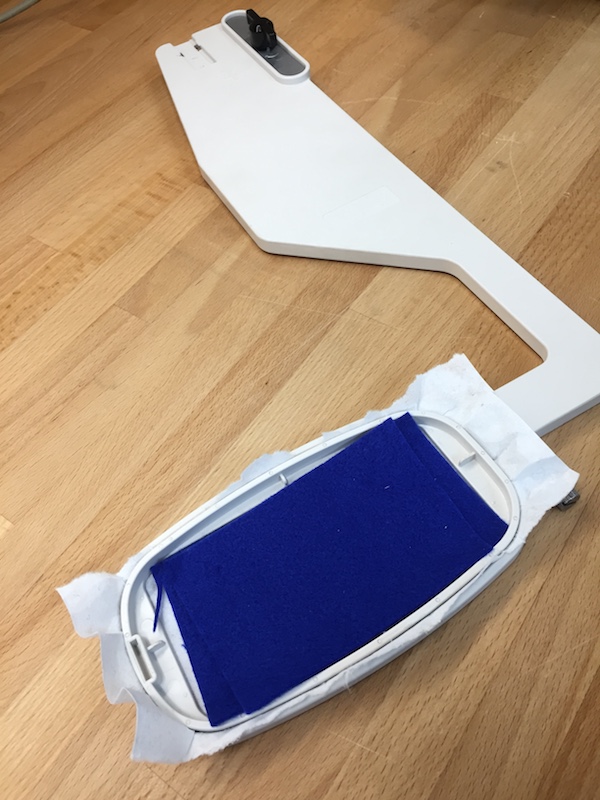
Fasten the stabiliser in the FA10 embroidery hoop. Page 112 in the manual.
-
Lay the 2 layers of felt on top of the stabiliser, but not in the hoop. For other materials you may need to fasten them in the embroidery hoop.
-
Attach the hoop to the embroidery machine. Page 113 in the manual.
VM + Digitzer
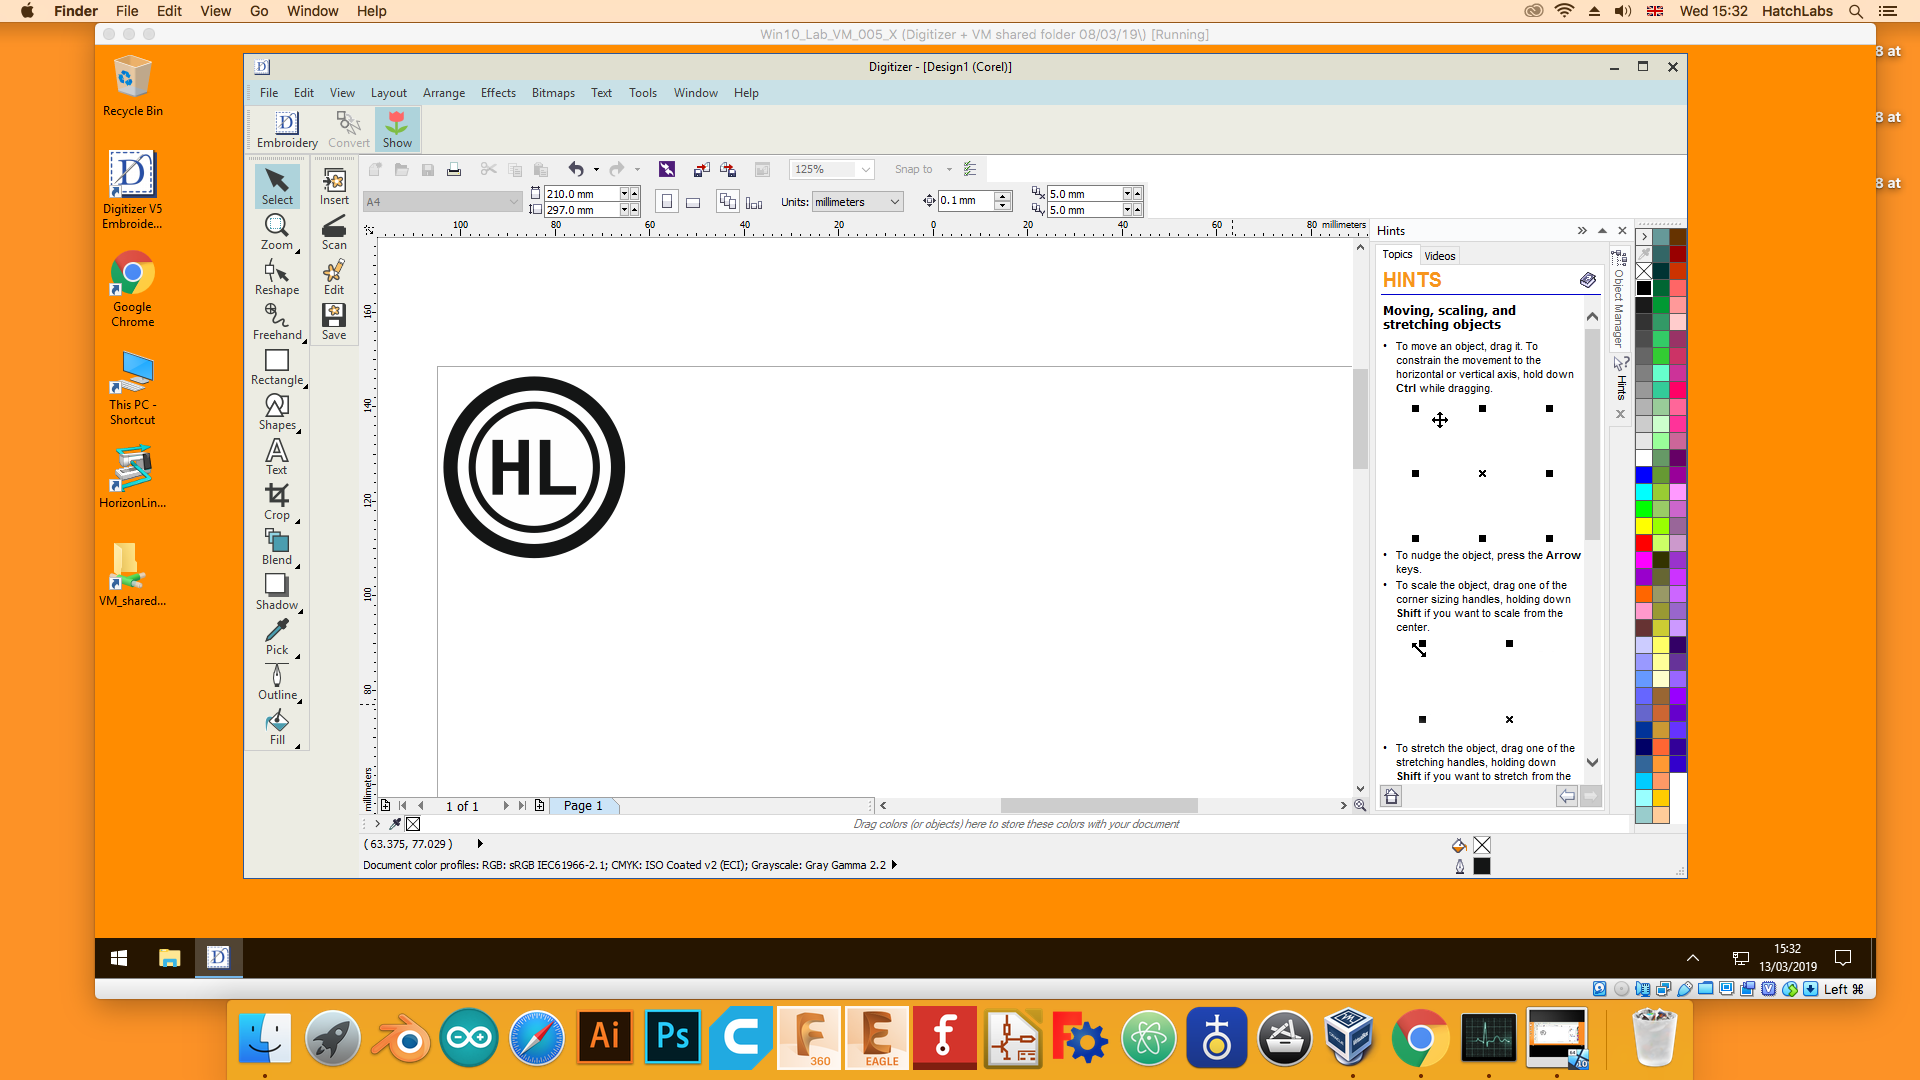
There are many different ways to design with digitizer including designing within the software. For this tutorial we are going to use an illustrtor file that you will need to design beforehand and digitize it. You need to save the file as a legacy file using the Illustrator 3 version.
-
Drag your vector file into “VM shared folder”
-
Open “Virtual Box” & press “Start”
-
Click “Devices --> USB --> JANOME 862[0001]”
-
Open “Digitzer V5 Embroidery Software”
-
From the dropdown list choose “Hoop FA10 (100x40)”
TIP The zoom can be hard to navigate so if you get lost go to the top panel of options and choose “Zoom 1:1” -
Switch to Graphics Mode (Pencil icon on the top right)
-
Select “Insert” and choose your .ai file. Select somewhere on the canvas to position your design.
-
Highlight your design objects and select “Convert”. This should convert your design into embroidery paths. TIP: If the writing looks strange when converted to an embroidery path it is because the writing is too small.
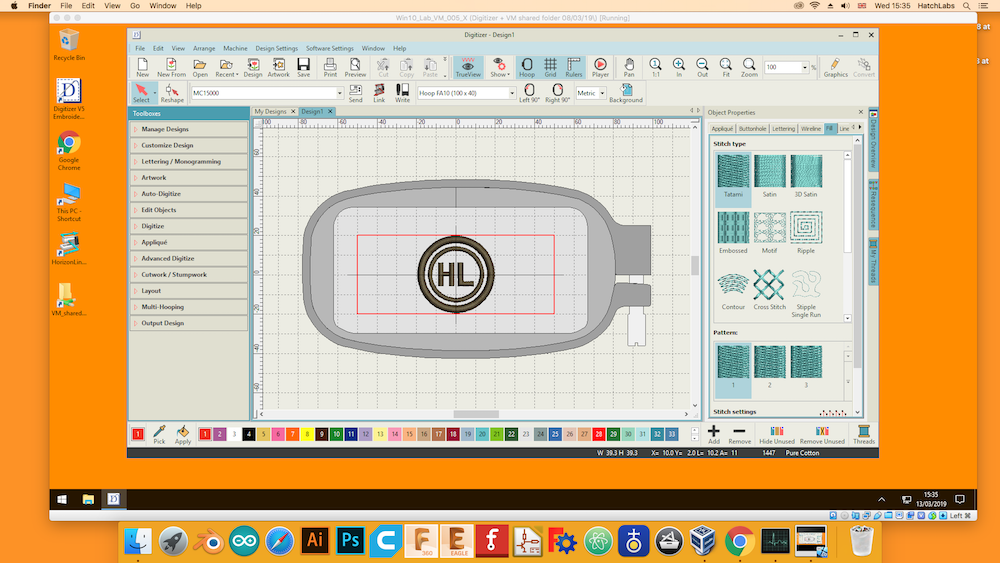
-
Choose an appropriate fill stitching i.e tatami or satin. DO NOT USE ‘3D Satin’ - it will be too thick for the material.
-
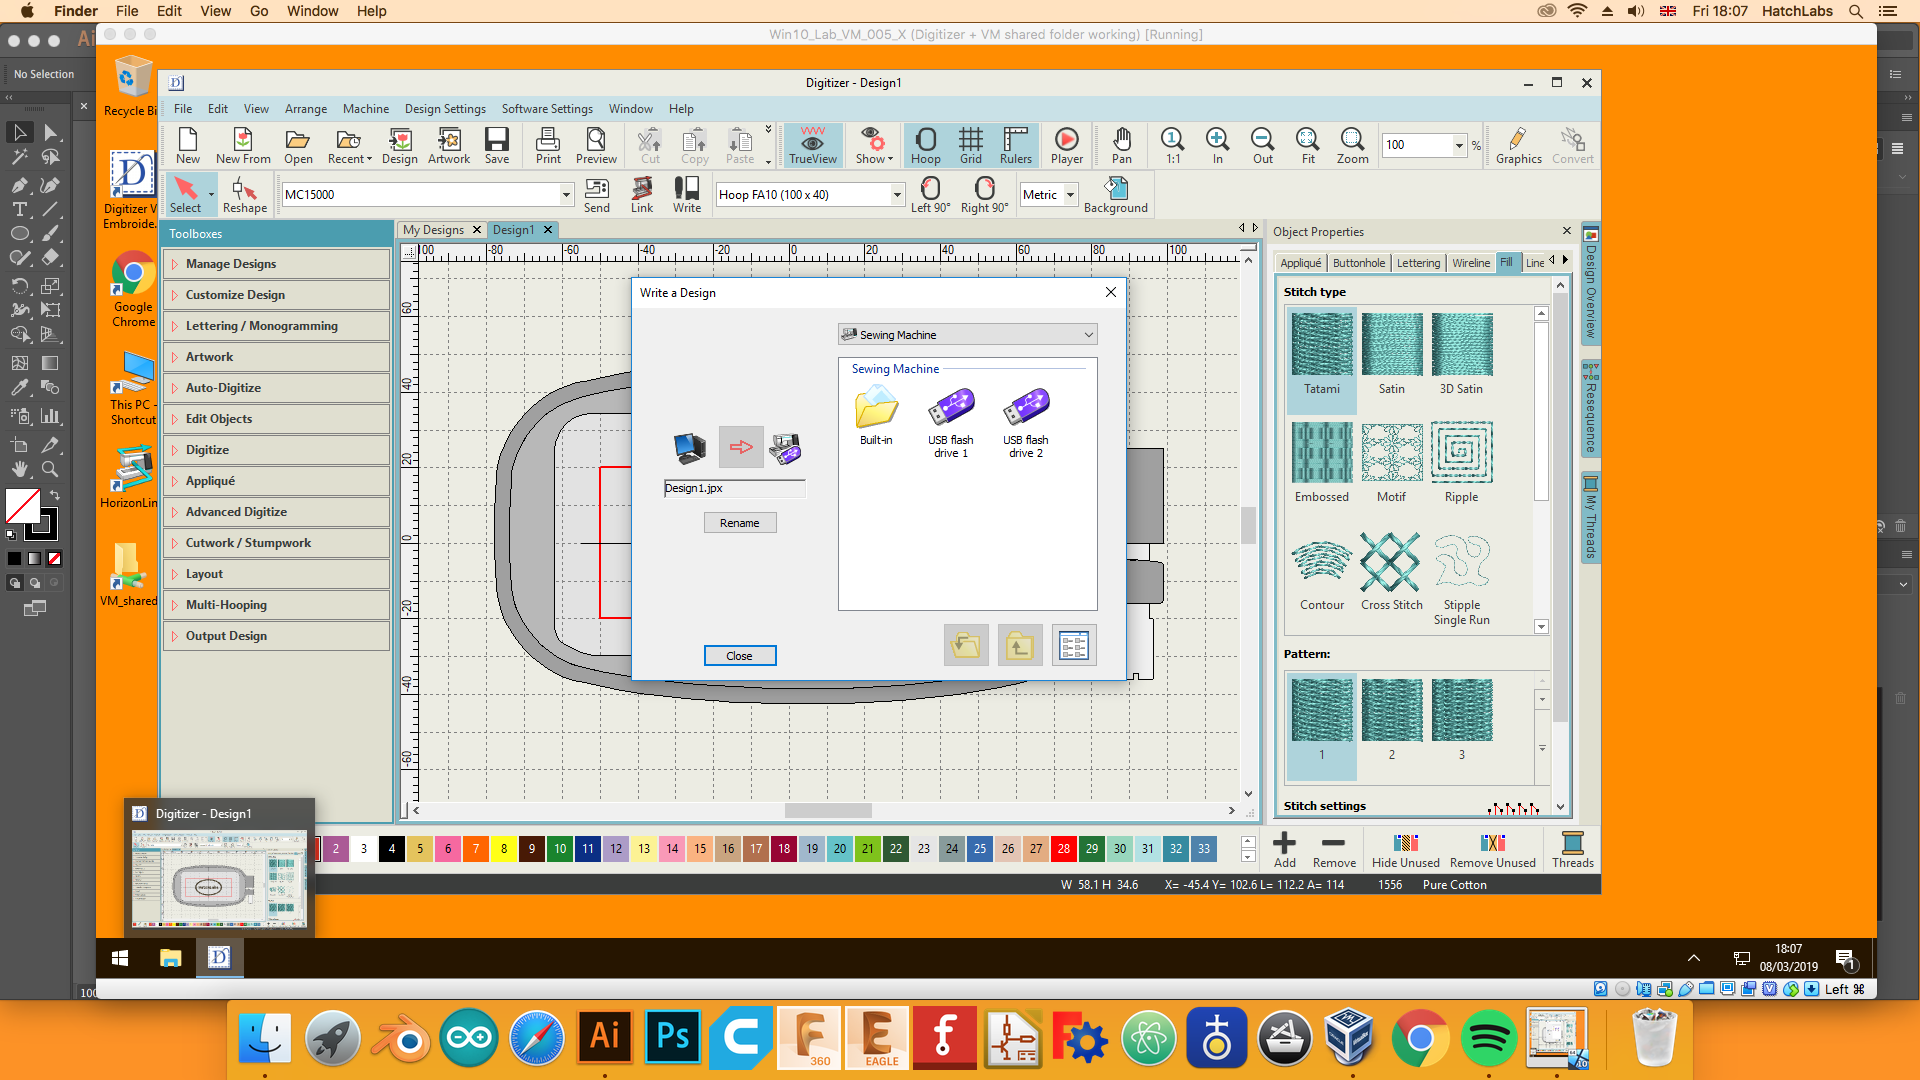
Click “Machine” --> “Send a Design”. Rename your design before sending it.
-
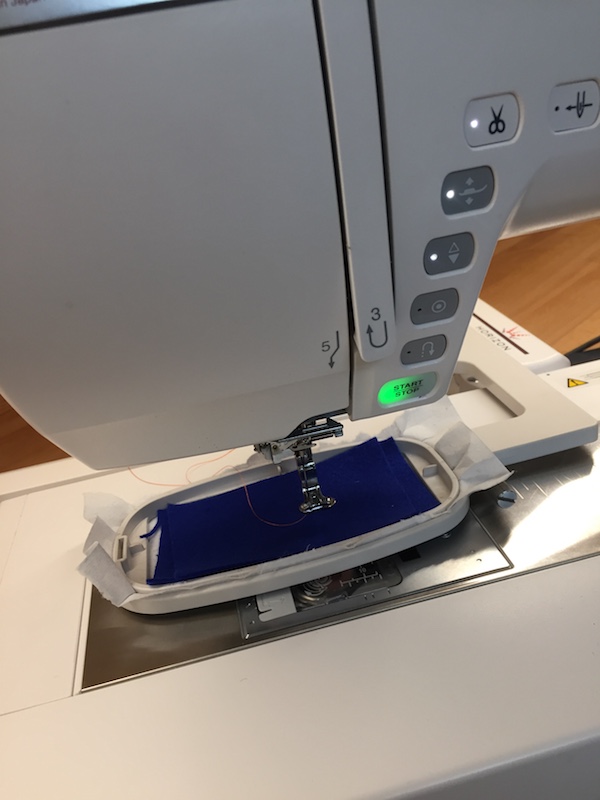
Open the ‘Built-in’ folder to send the file to the machine. Select the red arrow button to upload the file.
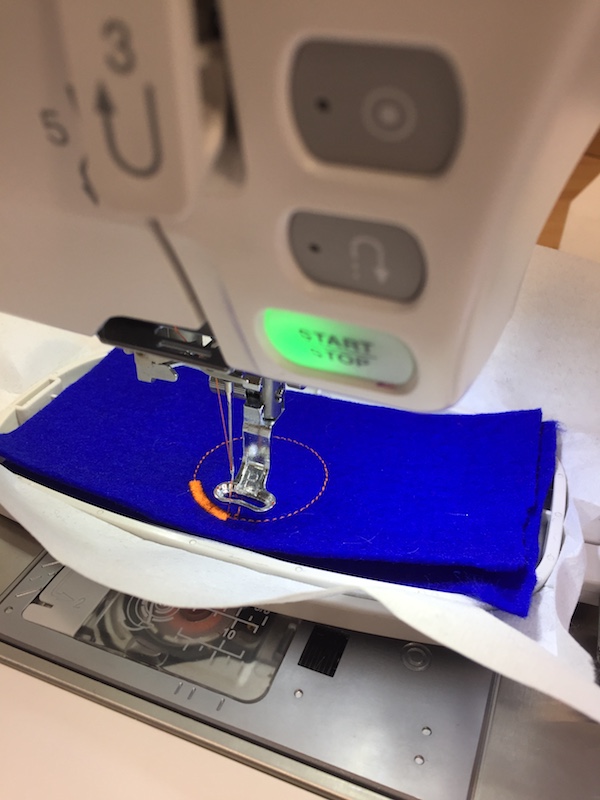
Embroidering the design
-
Click the button #3 on the interface panel to open the file. TIP: Scroll until you find the file you have sent, the files are listed by hoop size.
-
Set the speed to slow using the speed control slider. Page 10 in the manual.
-
Double check that everything is secured - hoop, foot, needle, stabiliser
-
Press the “Start/Stop” button. Page 10 in the manual.
-
If the thread breaks or the machine jams the embroidery machine will stop and display an error. You can pause the machine using the “Start/Stop” button.
-
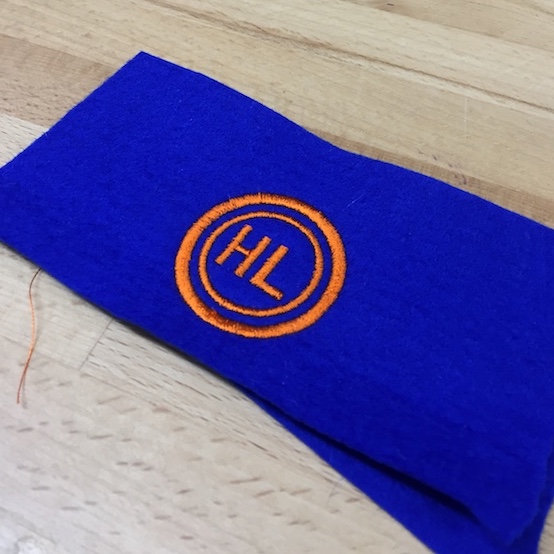
Remove the stabiliser and cut around the outer shape of your patch.