Arduino Kitchen Timer
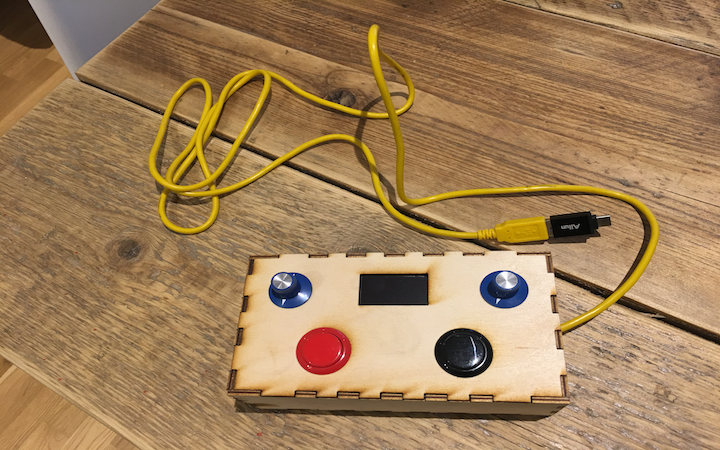
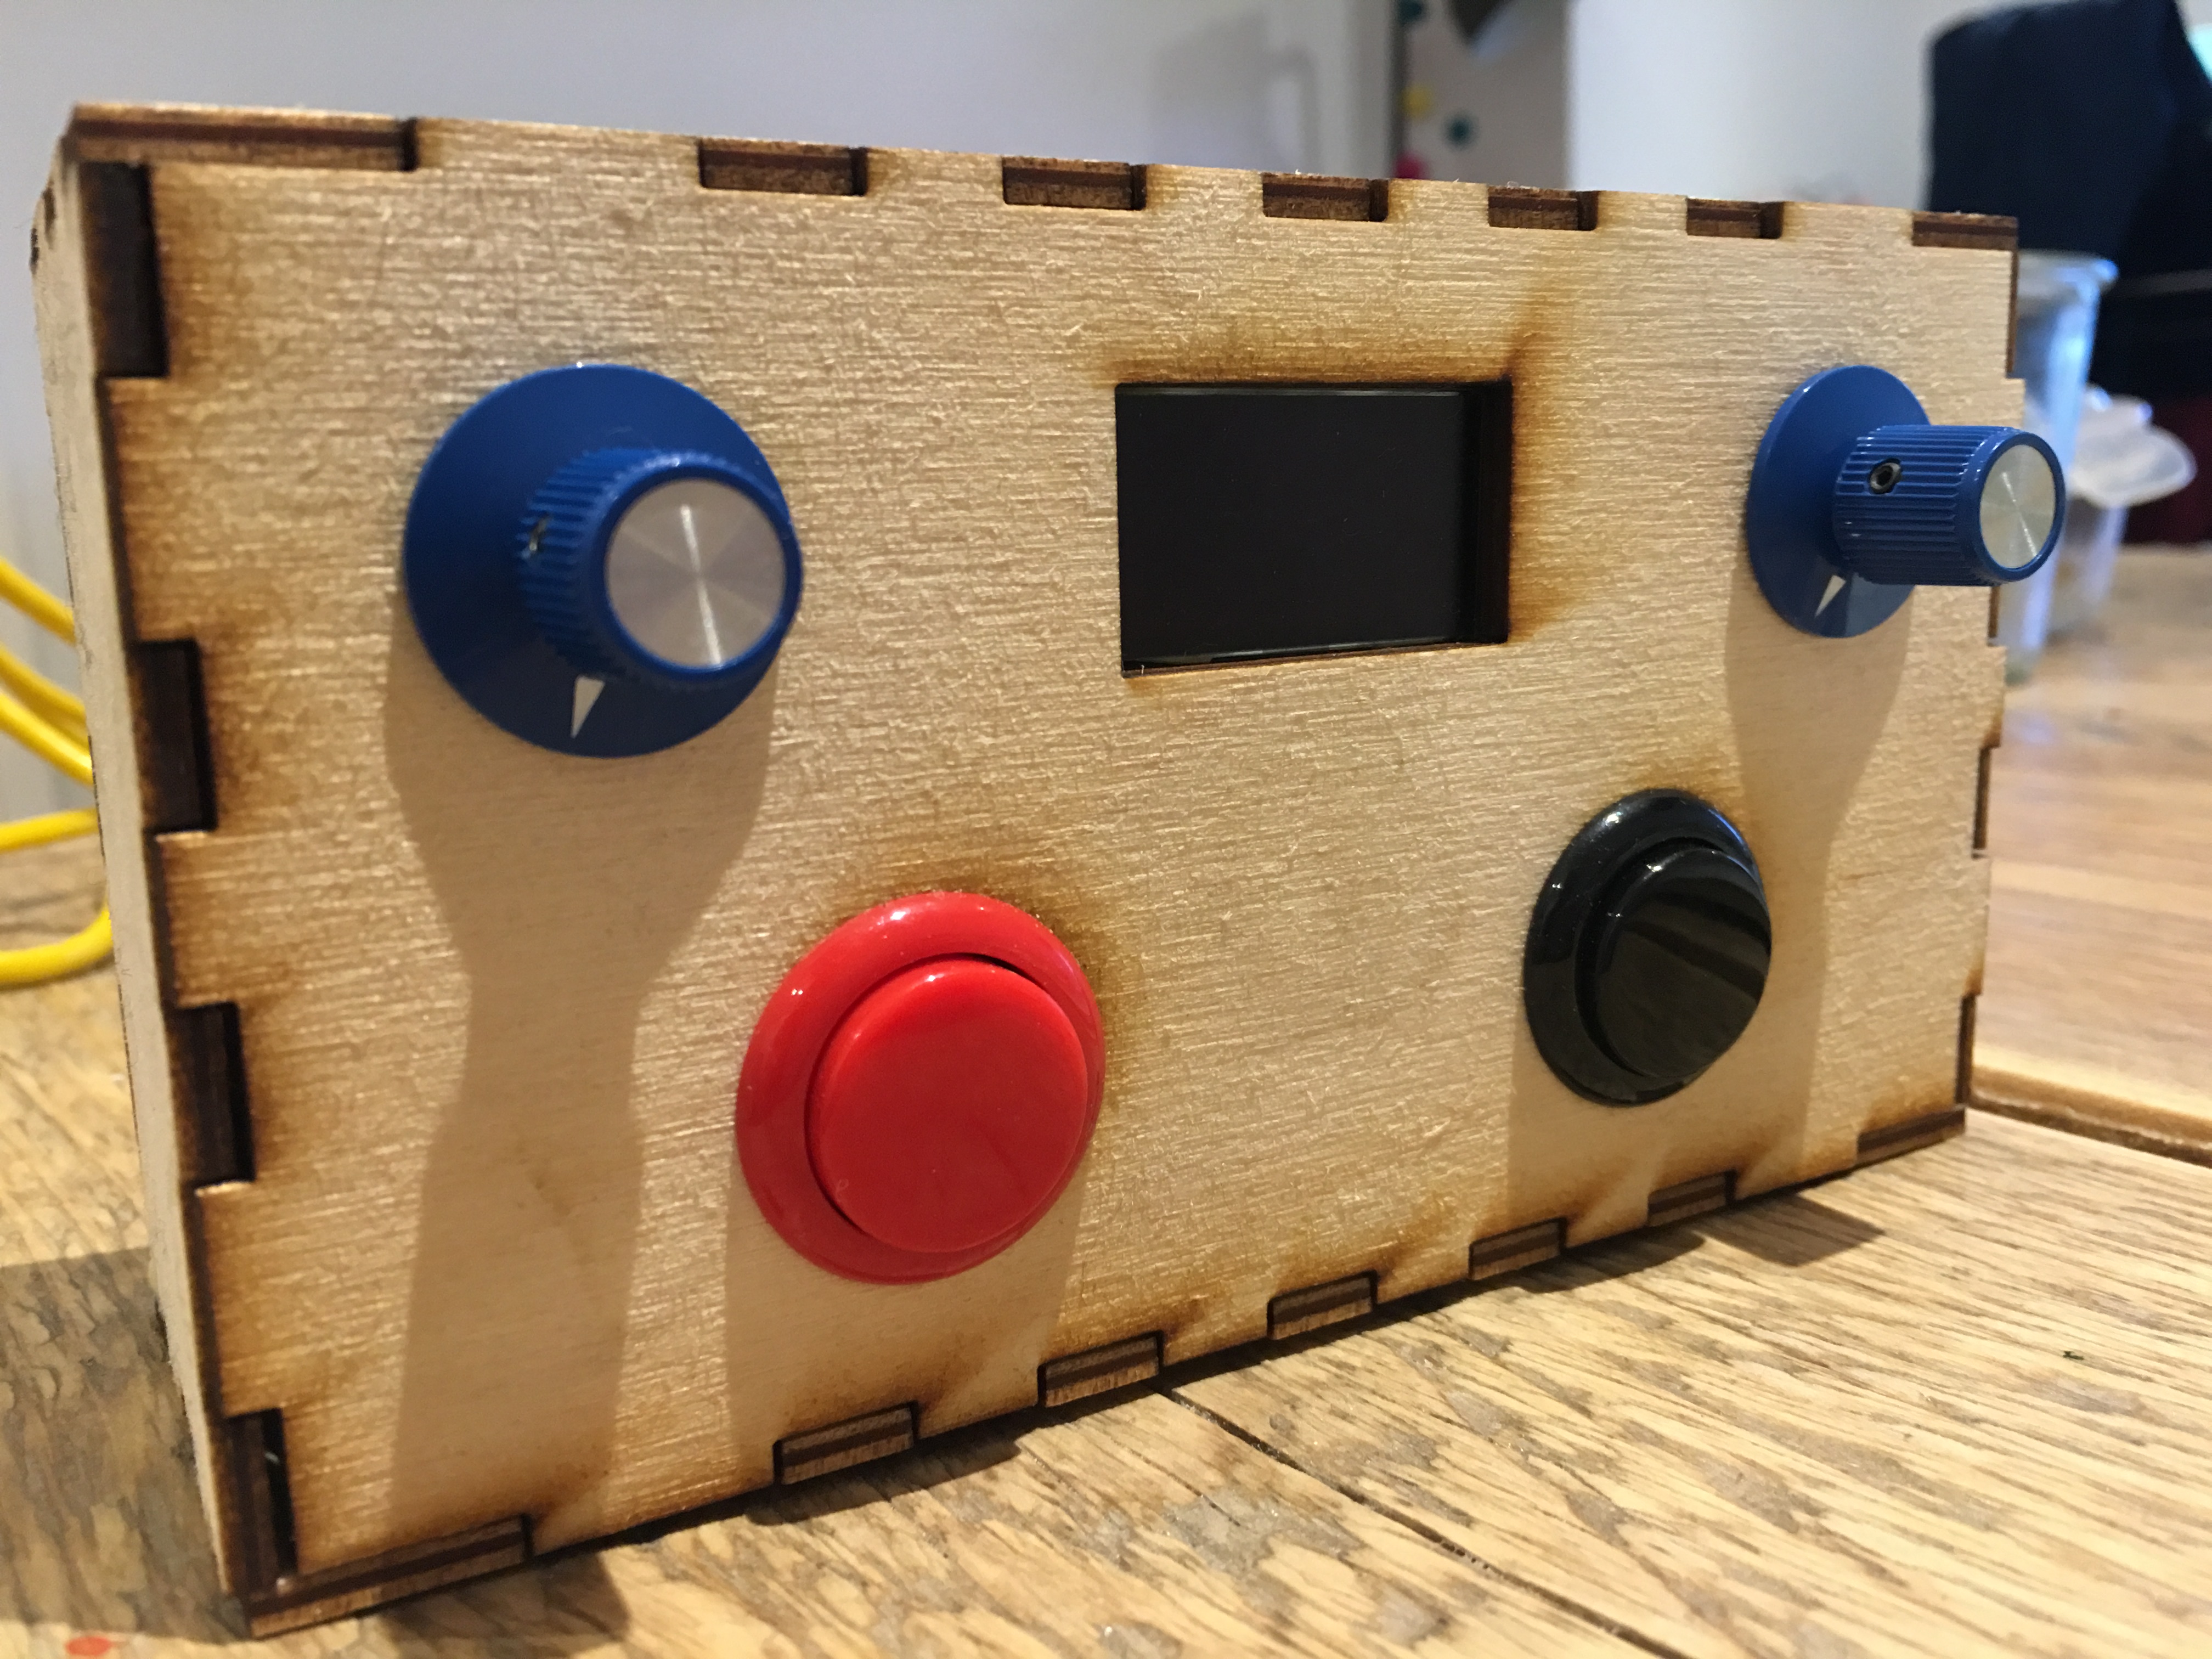
For my physical computing final project I decided to make an Arduino-based kitchen timer so as to stop using my phone in the kitchen while I make bread. I wanted a timer with chunky buttons and large knobs for flour-covered hands, and a tiny but very readable OLED display.
produced by: Elias Berkhout
Ideas & Development
After beginning to bake my own bread at home this year I found that I was always using my phone as a timer to remind me when my dough needed attention. I hate using my phone for these sorts of things, as well as the stress it creates when an alarm or timer goes off loudly on it and takes you by surprise, so I set out to create a better option for myself to use in the kitchen.
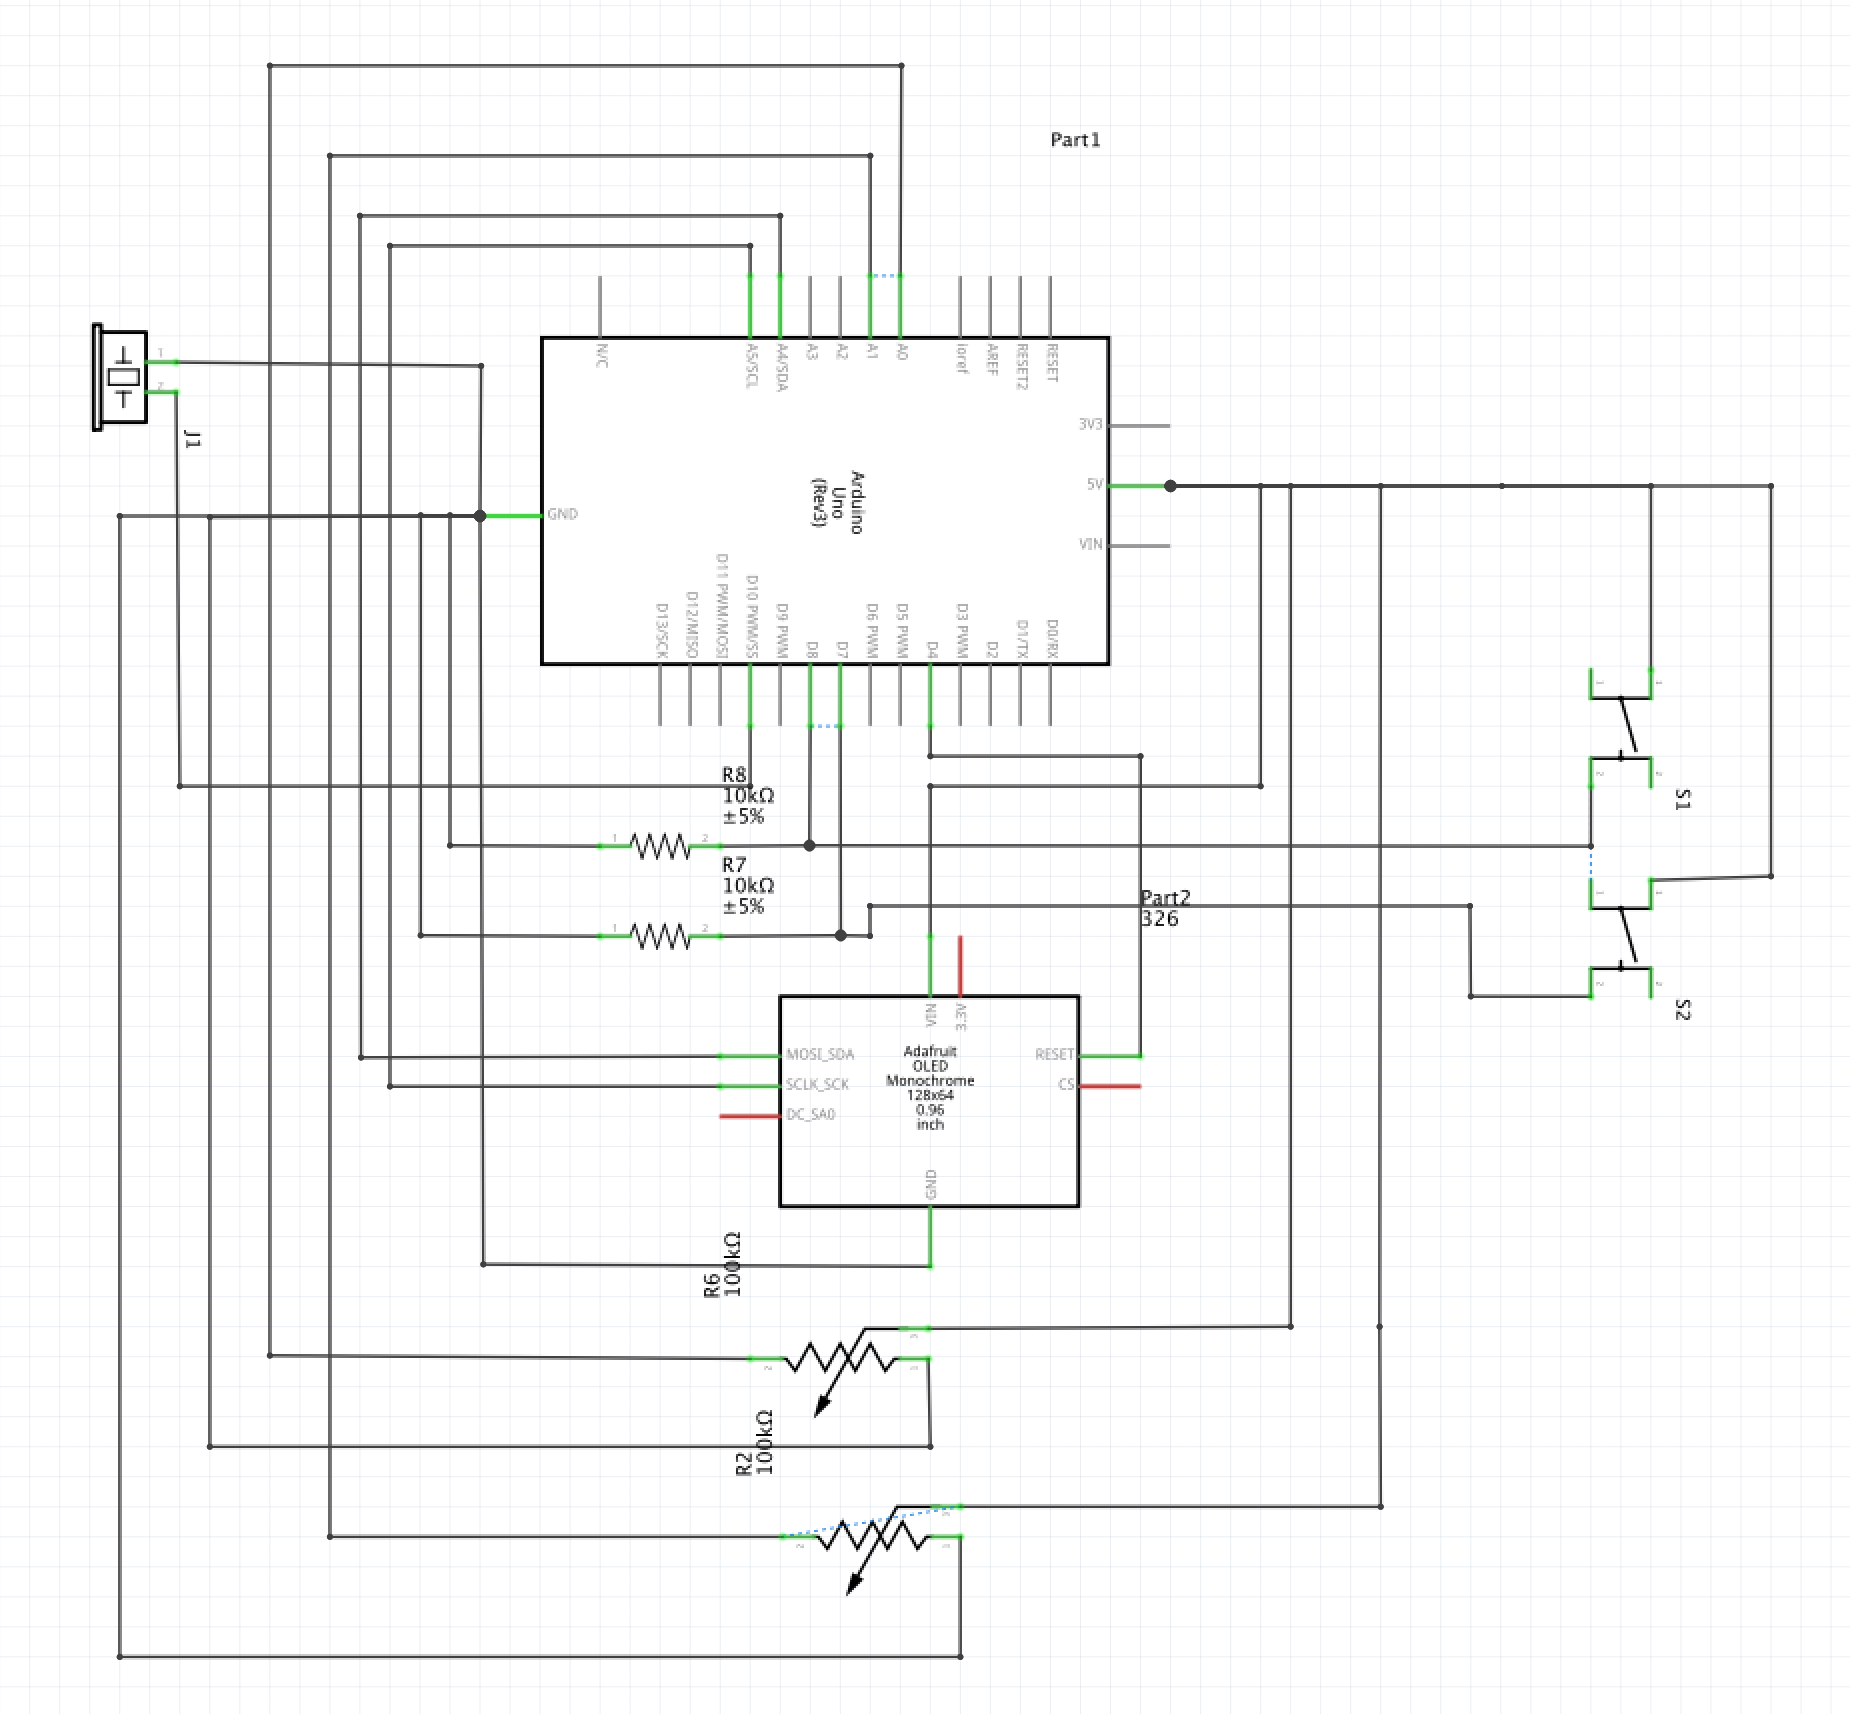
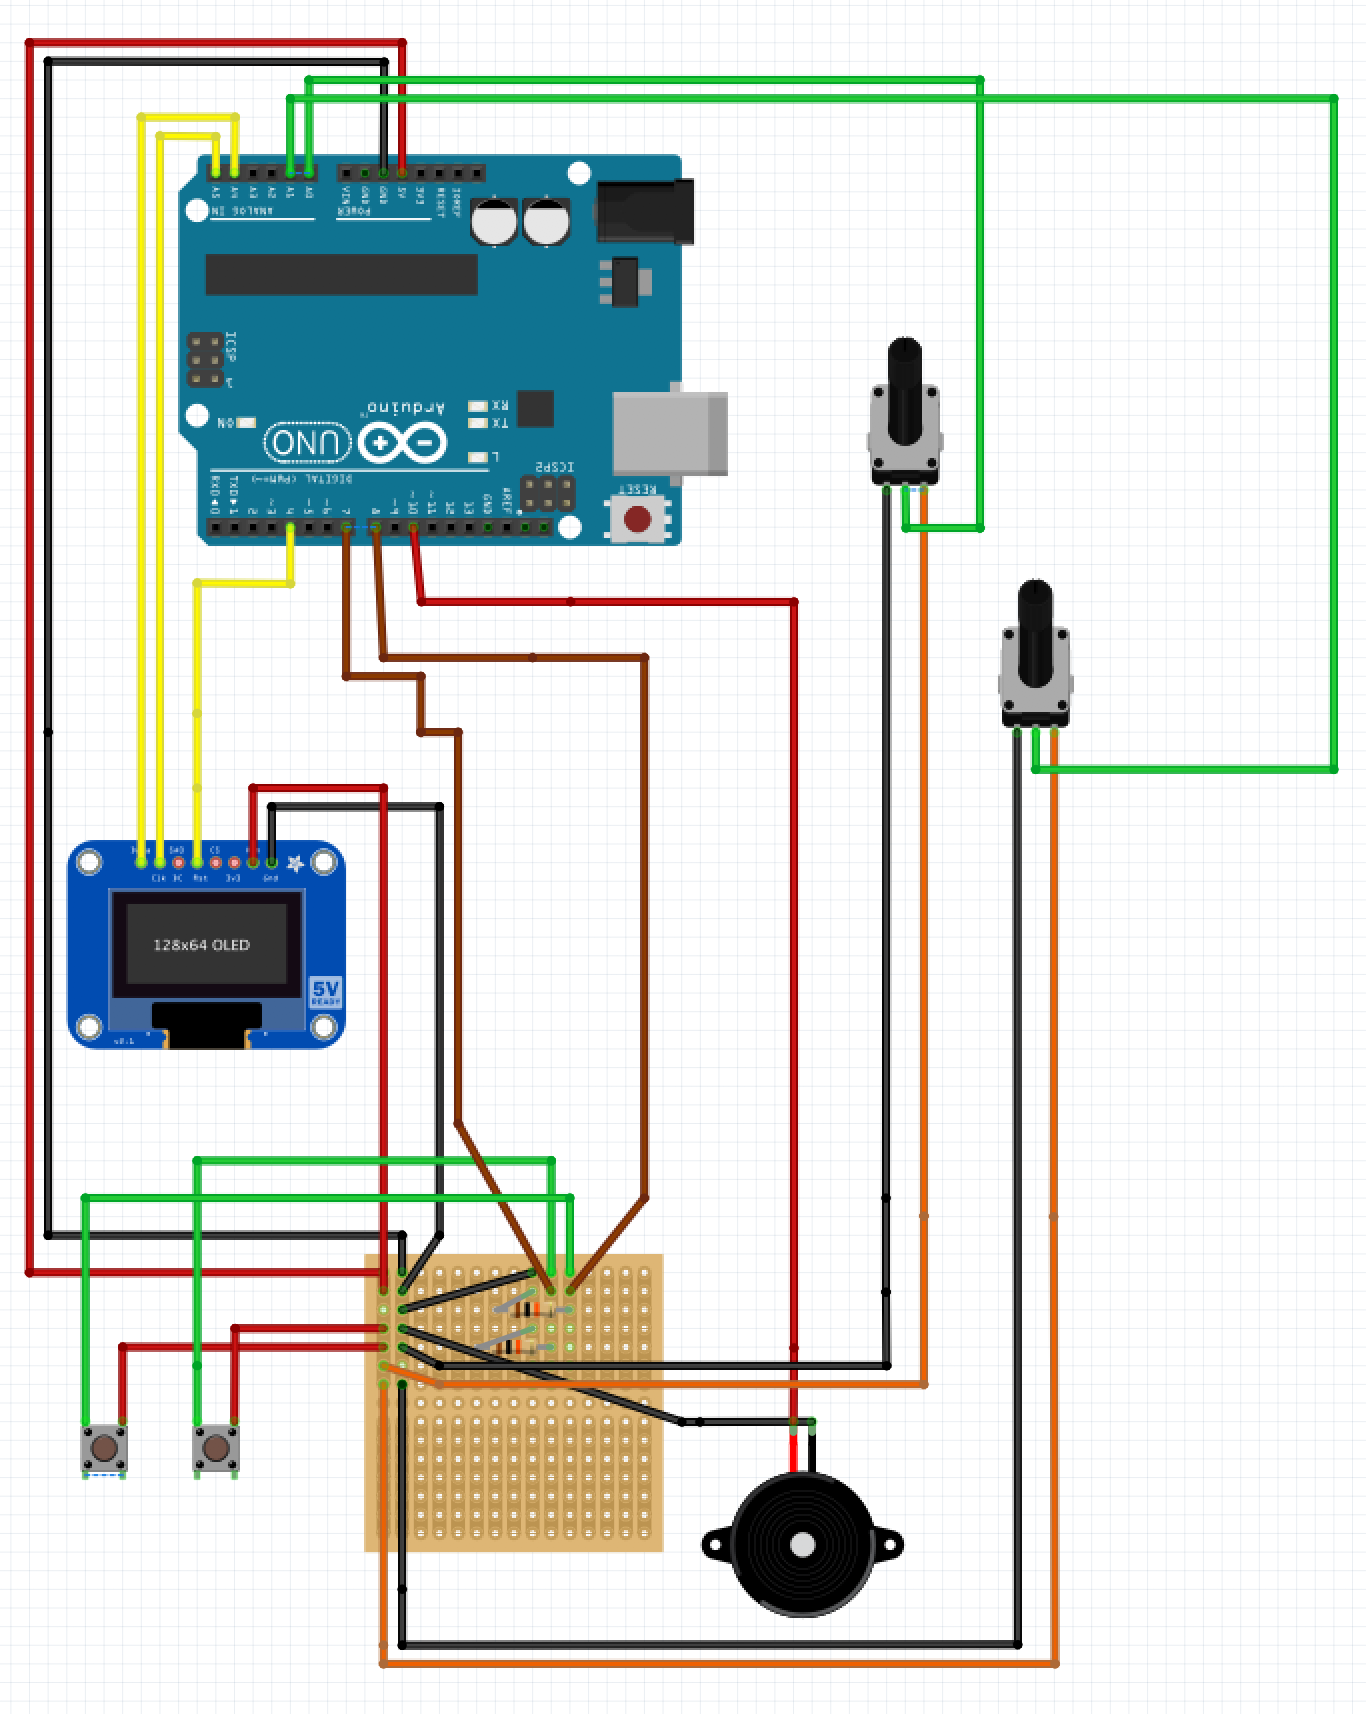
For the design, I knew that at the very least I would need two buttons (one to start the timer and one to reset it) and two knobs (one for hours and one for minutes). Since beginning my journey into modular synthesis a few years ago I have always loved the look of the skirted knobs found on a variety of Don Buchla’s modules, and, luckily, those very knobs were available from a UK-based DIY music shop I have frequented in the past called Thonk, along with heavy-duty synthesiser potentiometers to match. I also decided that I would need a couple of chunky buttons which would be easy to press with flour-covered hands, and, after initial testing, a better screen than the awful LCD which comes with the Arduino. I ended up settling on an Adafruit 128x64 OLED screen which, despite its size, has incredible clarity and sharpness, and is also capable of displaying simple animation and sketches, similar to some of the work we have done this term in openFrameworks and Processing. Finally, I also used the piezo included in the Arduino pack to play an array of notes when the timer finishes.
For further development in the future, I would like to get the timer operating on a battery, however, I was put off by how inefficient 9V batteries are with many Arduino projects and would like to use batteries with a bit more longevity. I would also like to put a temperature sensor inside and have the current temperature displayed on the screen because this has a great impact on how long sourdough needs to be left to develop. More artistically, I’d like to have a variety of arrays of notes which can be randomly selected when the timer is finished, and also have other more obviously generative animation to play both when the timer is starting up/resetting and when it is finished.
When the timer is switched on, the set up and reset functions run. This involves initialising variables and showing a small randomly generated sunrise-esque animation before going to the “home” screen, where the left and right knobs can be used to input the hours and minutes required. An if statement reads the state of the start button and, if pressed, commences a nested for loop which counts the hours, minutes and seconds down to zero using a 1000 millisecond delay function. The development of how I thought this could be effectively displayed on the screen can be seen in the development video above. To return to the home screen, the user simply holds down the red button, which returns the timer to the home screen after playing the aforementioned start up animation. If the timer reaches zero, a for loop inside a while loop plays the melody set out in the melody array before the display shows a generative animation involving many circles of varying size and says “Finished!” until the reset button is pressed or the device is switched off.
References
My project contained elements of code from:
Saiyam’s intractable Arduino Kitchen Timer ([http://www.instructables.com/id/Arduino-Controlled-Kitchen-Timer/])
Angelo Fiorillo’s Arduino Kitchen Timer ([https://create.arduino.cc/projecthub/i-and-myself/arduino-kitchen-timer-db8ba6])