Arduino MIDI Controller
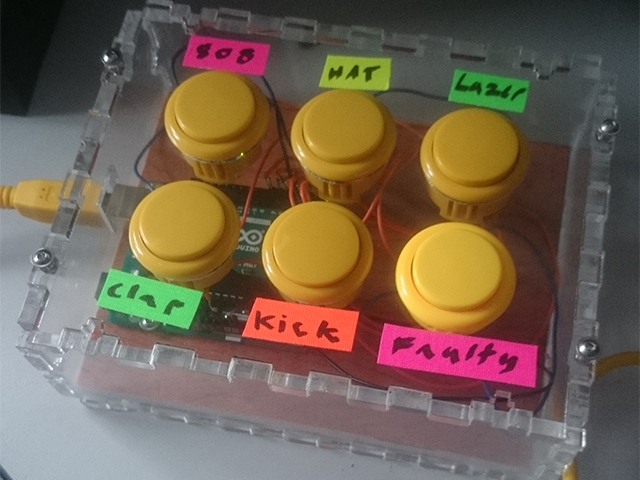
Rigid MIDI controller with arcade buttons and clear acrylic case for troubleshooting. This custom device can control DAW’s such as Ableton using incoming data from the Arduino.
produced by: Chris Speed
Concept
With my physical computing project, I wanted to solve a common problem that effects audio/visual performers. Many computer musicians and VJ’s utilise laptops. However due to the distance between performer and spectator it can become questionable as to what they are looking at on their screens (checking social media for example?)
A MIDI controller is “hardware or software that generates and transmits Musical Instrument Digital Interface (MIDI) data” to “trigger sounds and control parameters of an electronic music performance.” [1]
This tool adds extra interactivity between the artist and their machine. It feels more like you are playing an intuitive musical instrument rather than being limited by the traditional keypad and mouse input. I already own two controllers but wanted to dig deeper and understand the frameworks behind these devices. So I chose to build my own using the Arduino Uno.
Inspiration
Since much of my work repurposes gaming technology, it made sense to further explore this approach within the course. I was inspired to build my own controller from the tutorials of Yeuda Ben-Atar, who incorporates retro gaming electronics into his designs [2]. From Week 7 I knew that I wanted to make something based on arcade machines as I find making sound/visuals almost like a videogame. I then found the perfect Instructables tutorial [3] that would utilise the Hatchlab’s facilities and force me to become more familiar with the tools. Inspired by the MIDI Fighter [4], I wanted to set limitations by only working with buttons rather than sliders and potentiometers.
Technical
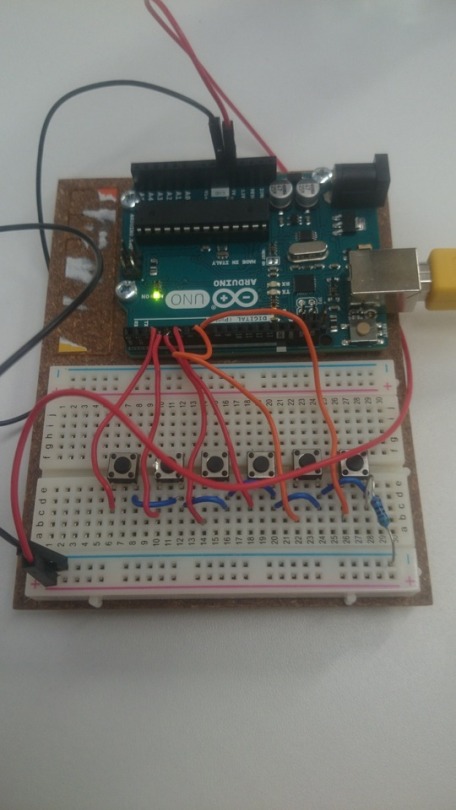
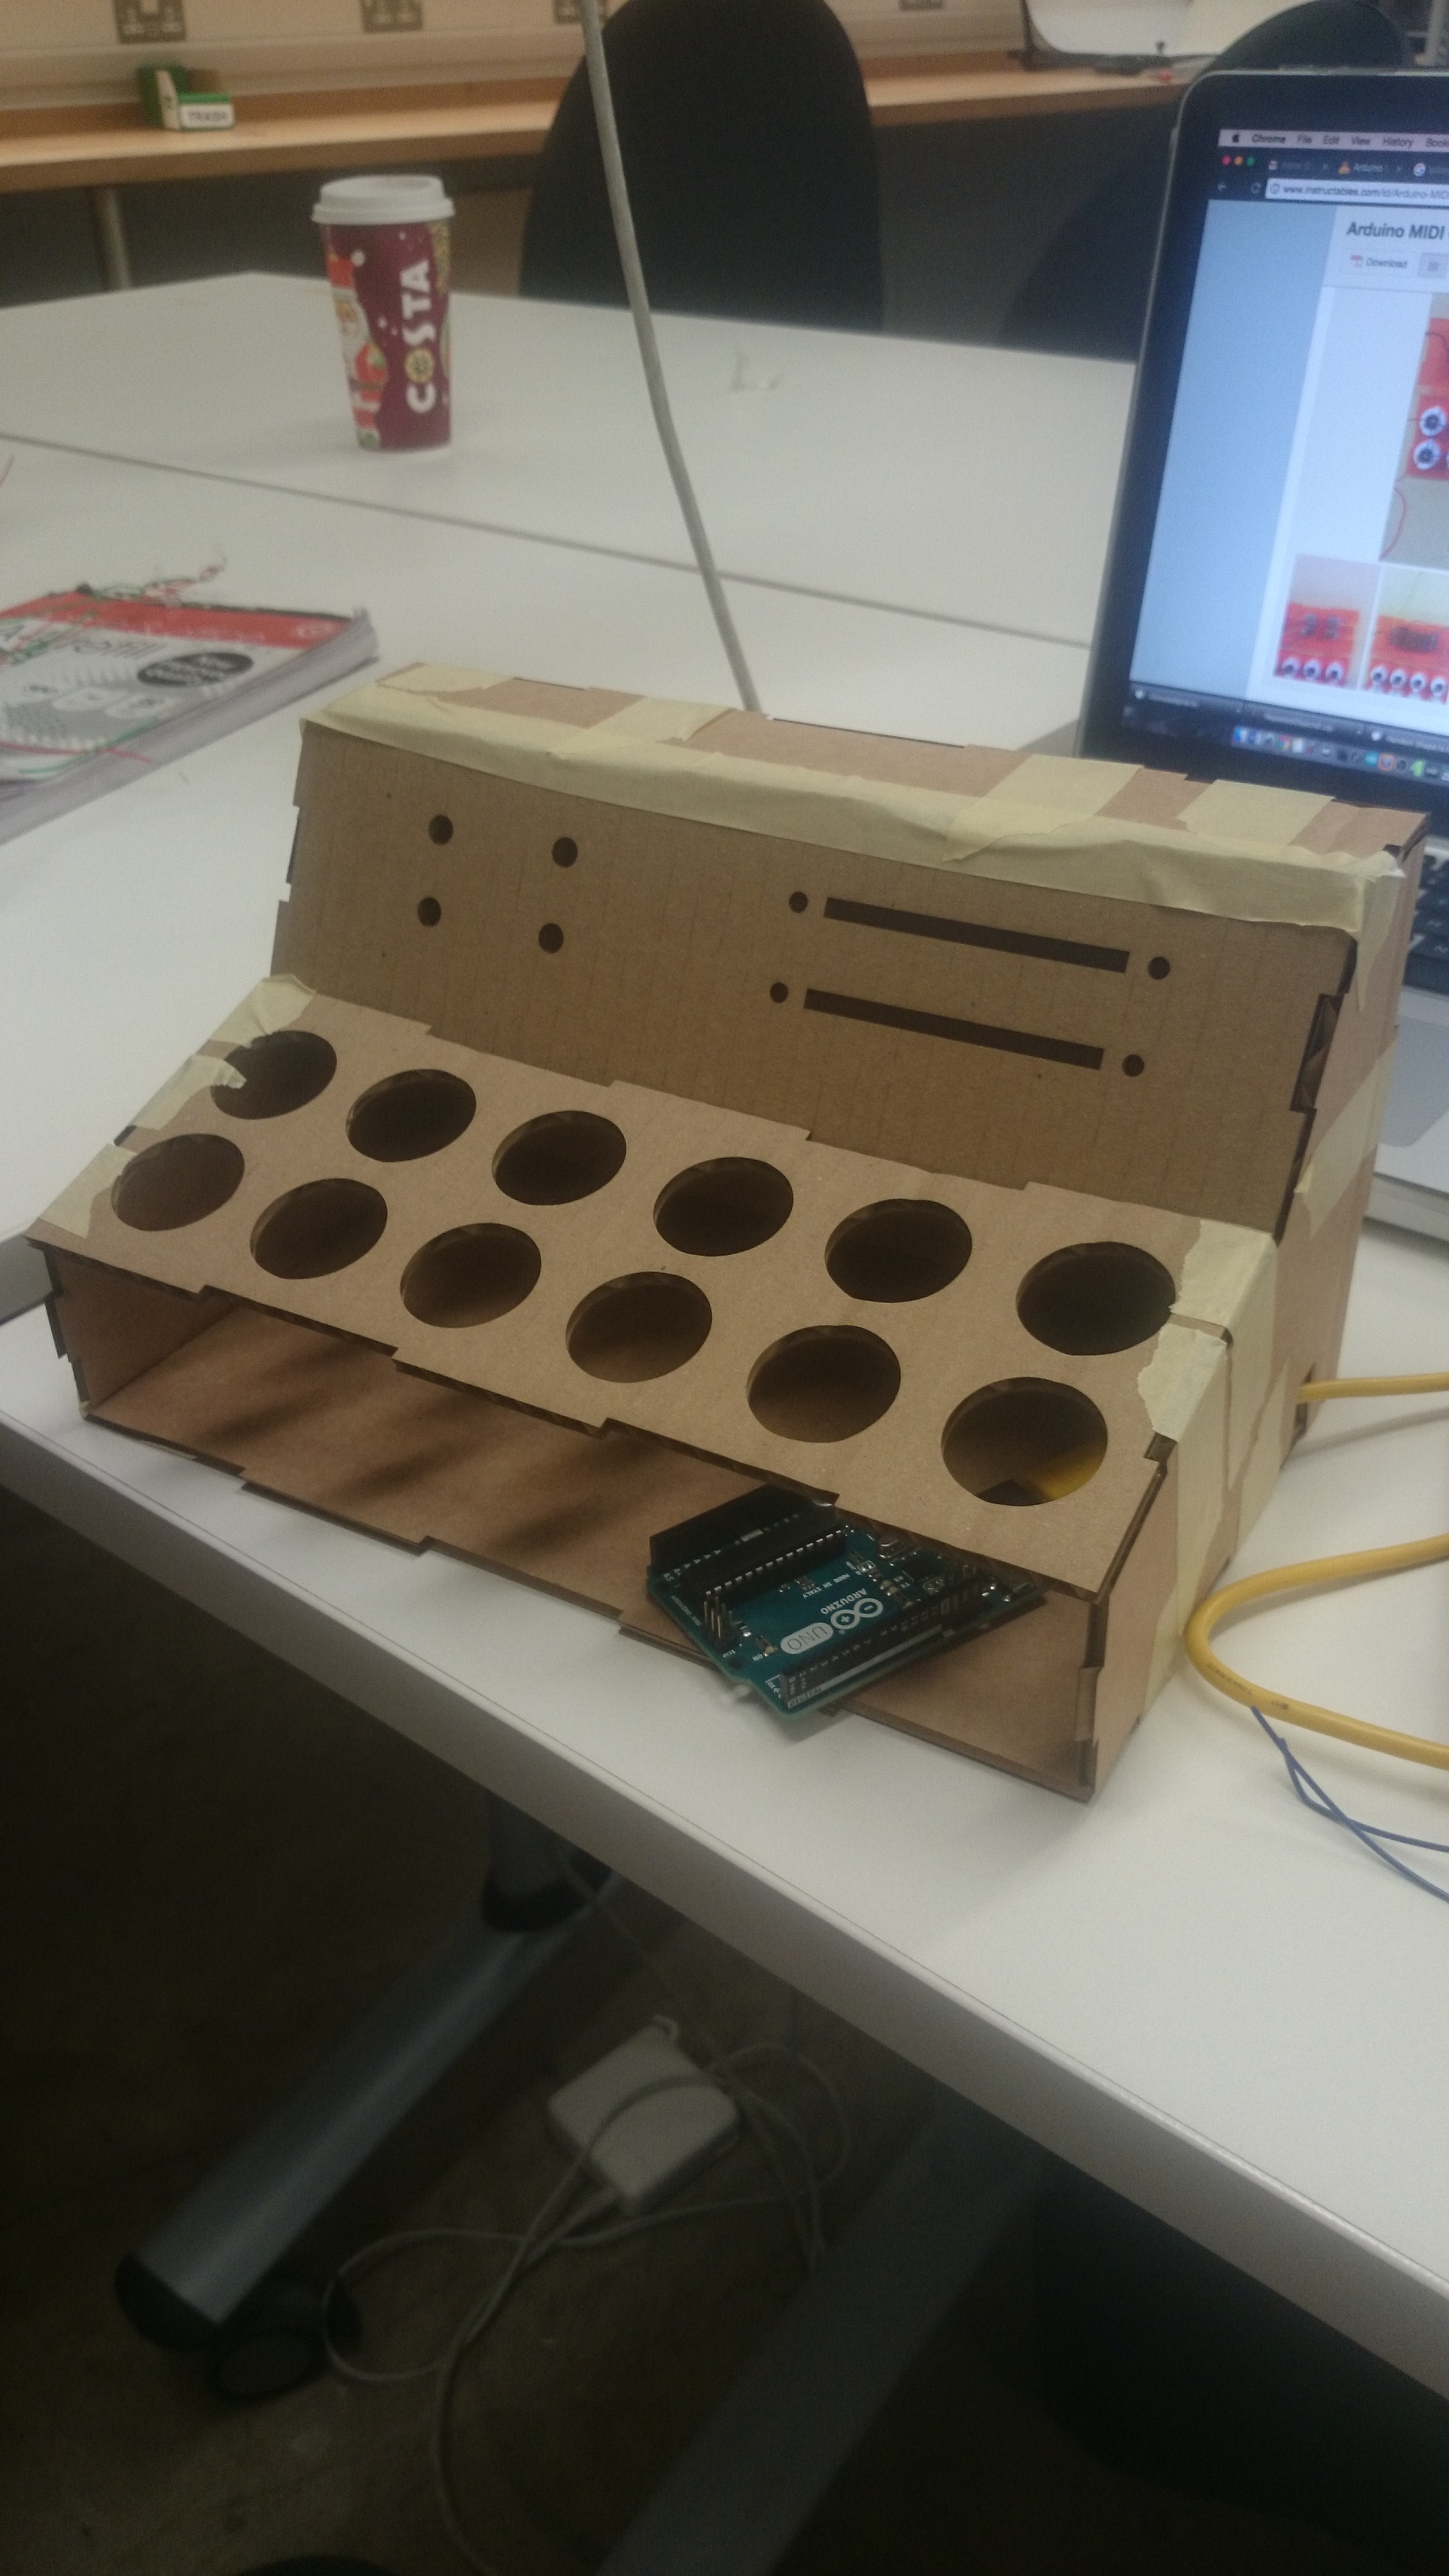
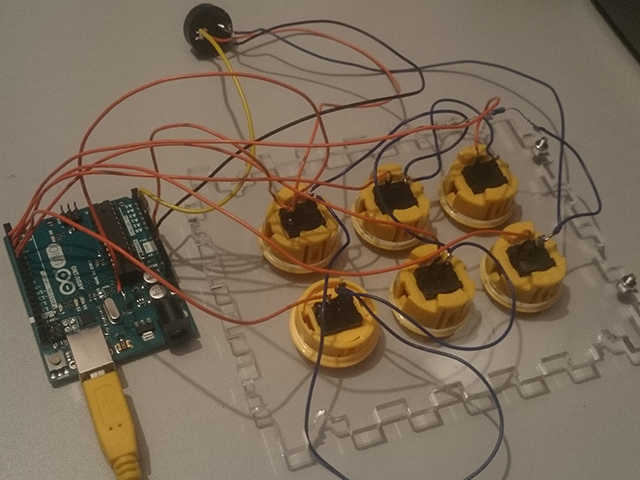
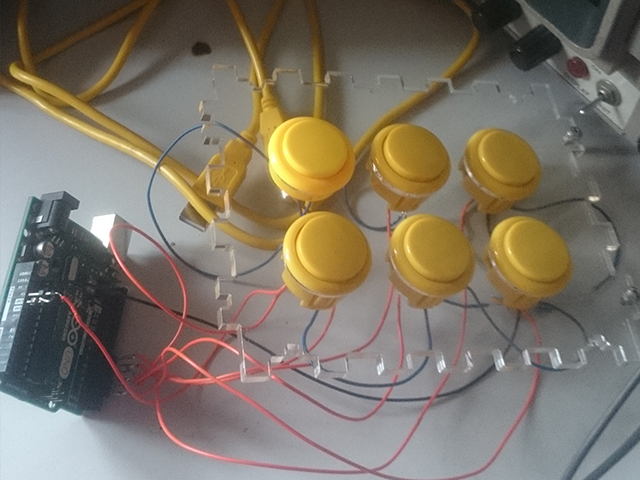
After assembling my breadboard prototype [5], I began collecting the materials to fabricate my minimal viable product. To start with, I practised laser cutting a cardboard enclosure from the Instructables author’s Illustrator file. However, the result was unsatisfactory so I edited the document to better suit my requirements. This next attempt was an improvement however the lines were not completely straight so I had to use Makercase [6] to create another enclosure. I imported this new SVG into Illustrator then added button and USB holes. This attempt was successful so I finally used the acrylic off cuts. Unfortunately, the T slots for the screws were the wrong way around which meant I had to use glue to seal it instead.
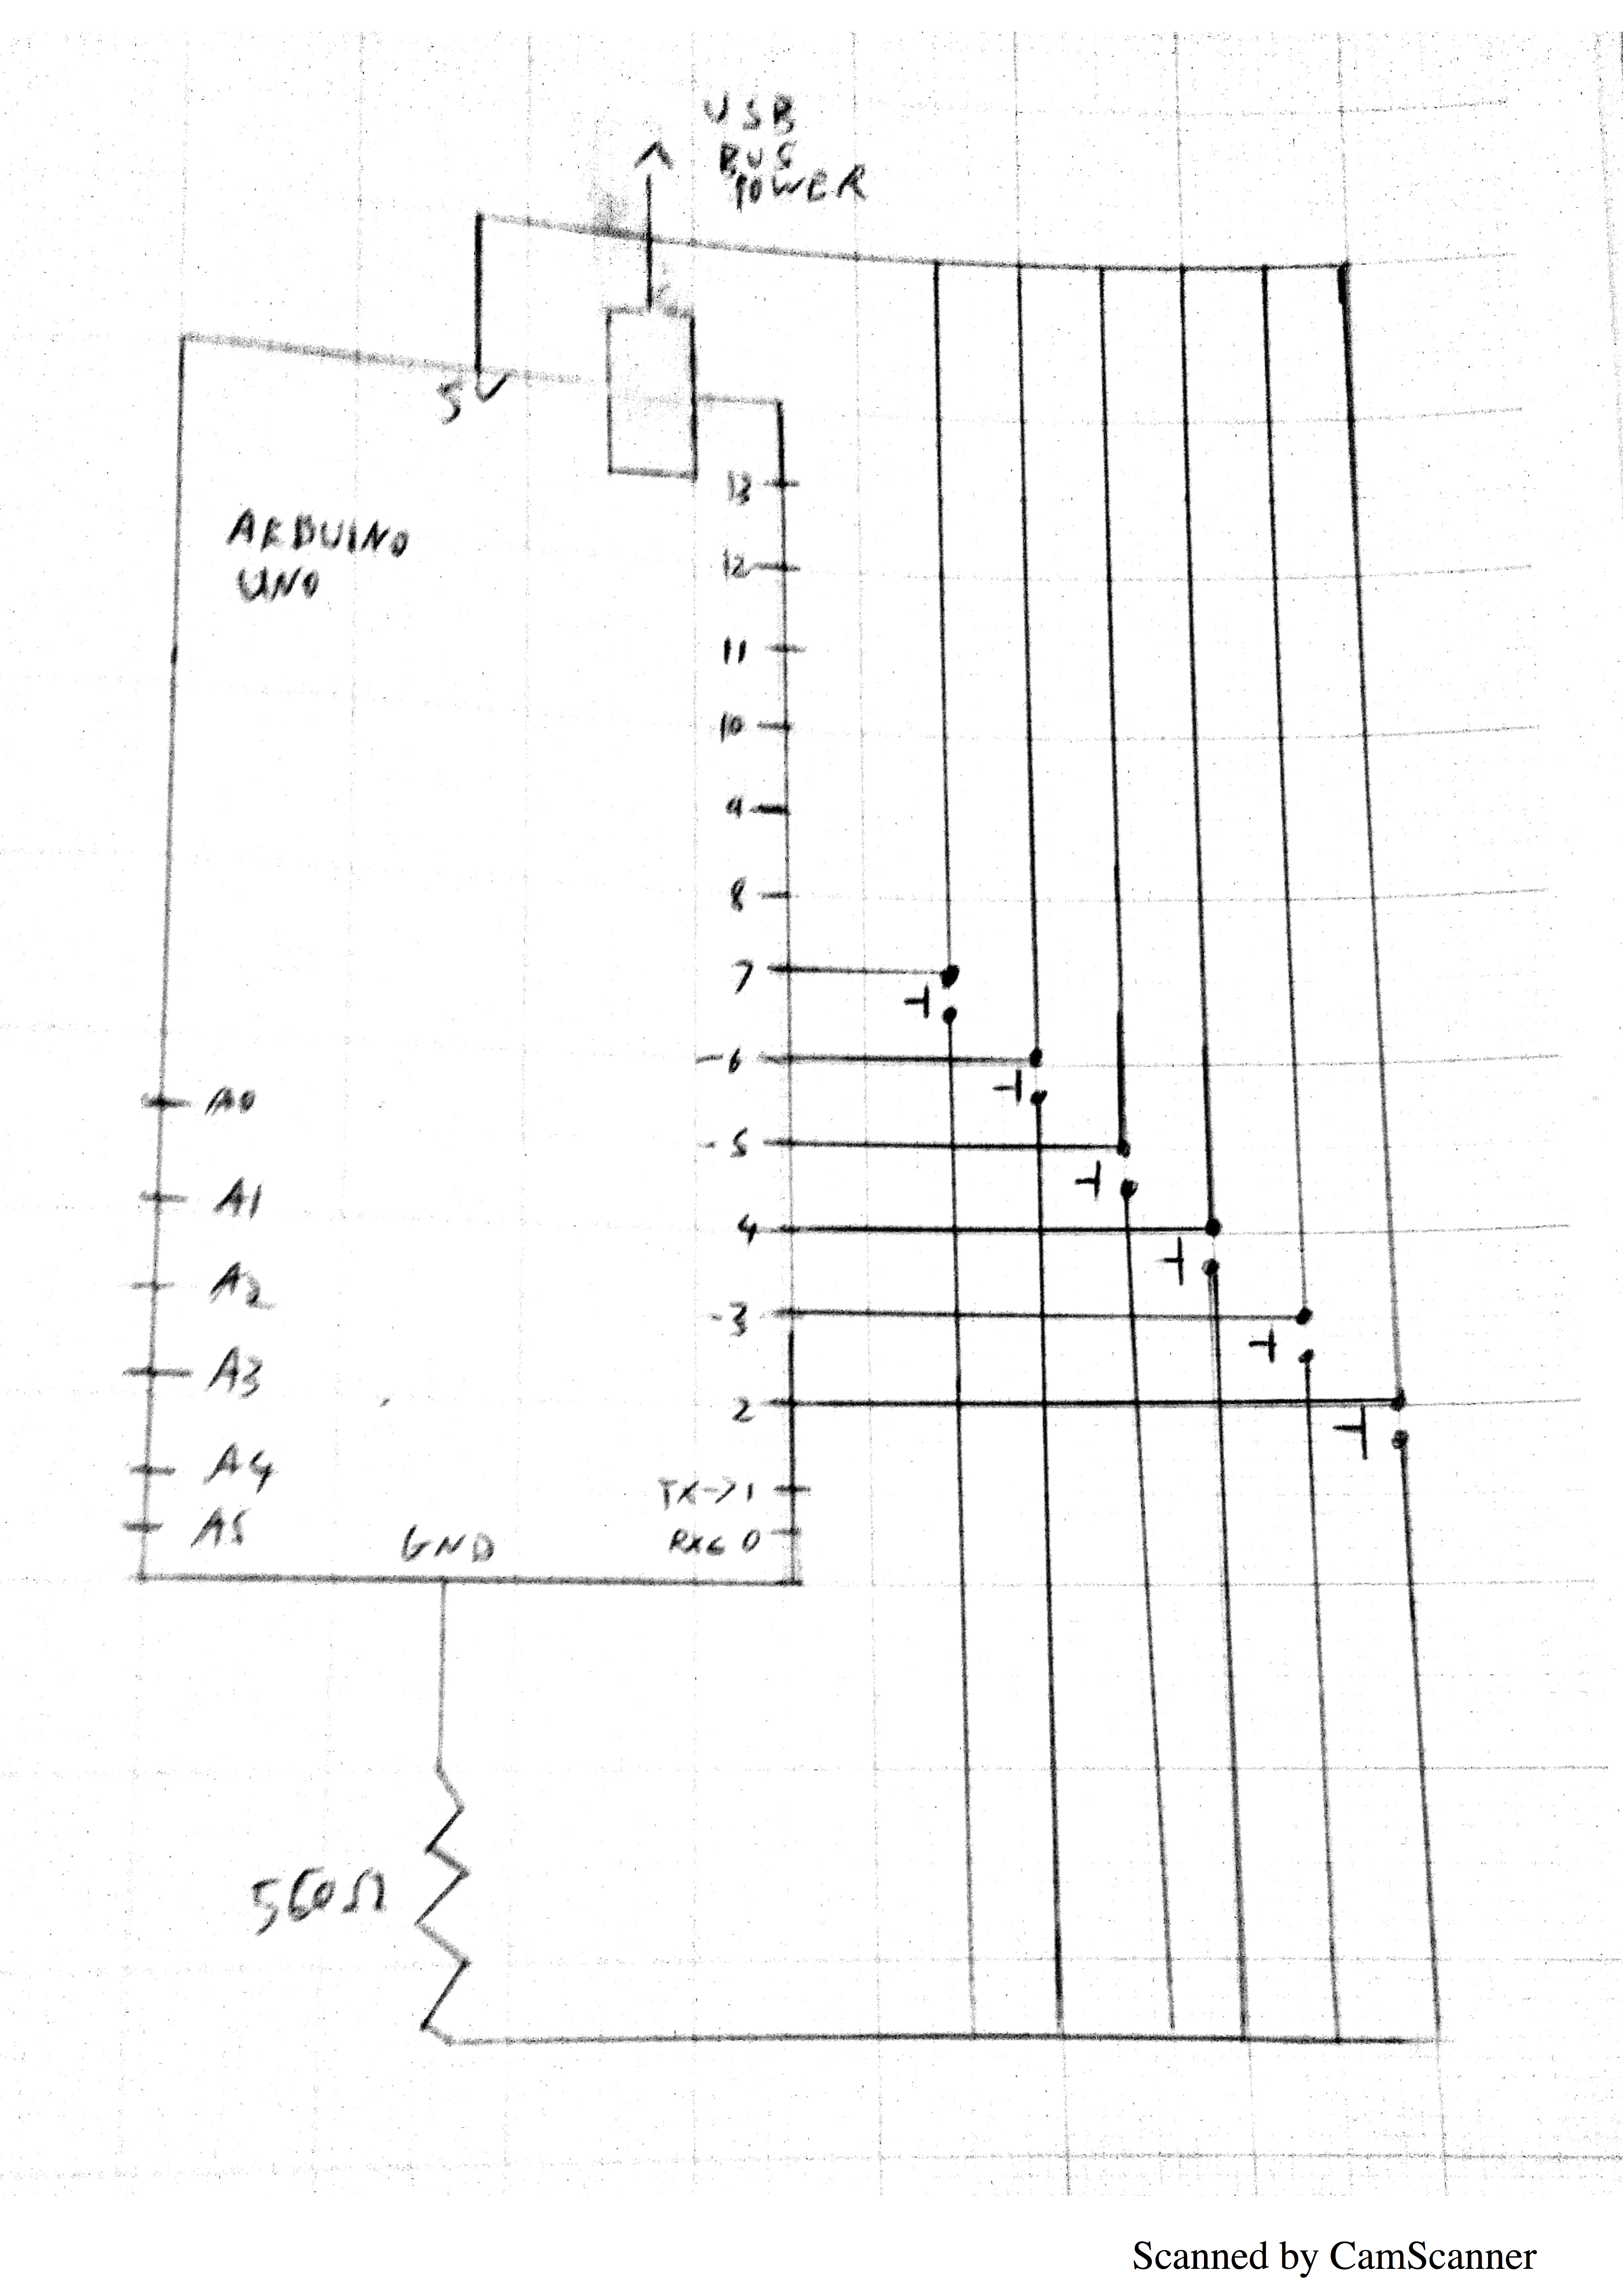
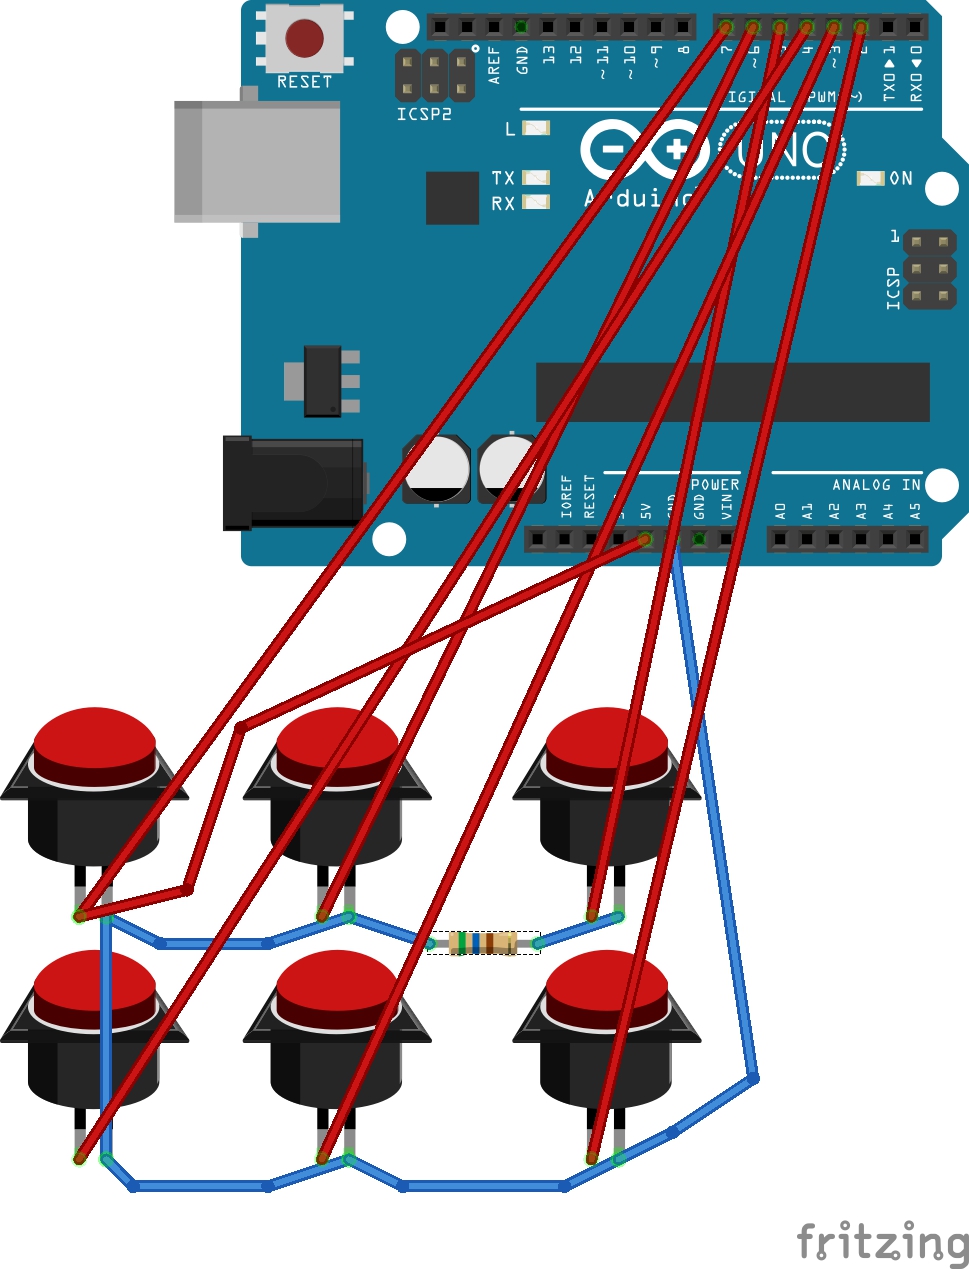
From here I pushed the Sanwa buttons into the lid and began soldering. As you can see in the schematic the buttons are all connected, with each leg going to 5 volt and digital pins 2-7 on the Arduino then the others connected to ground through a 560 ohms resistor. The USB port powers the circuit.
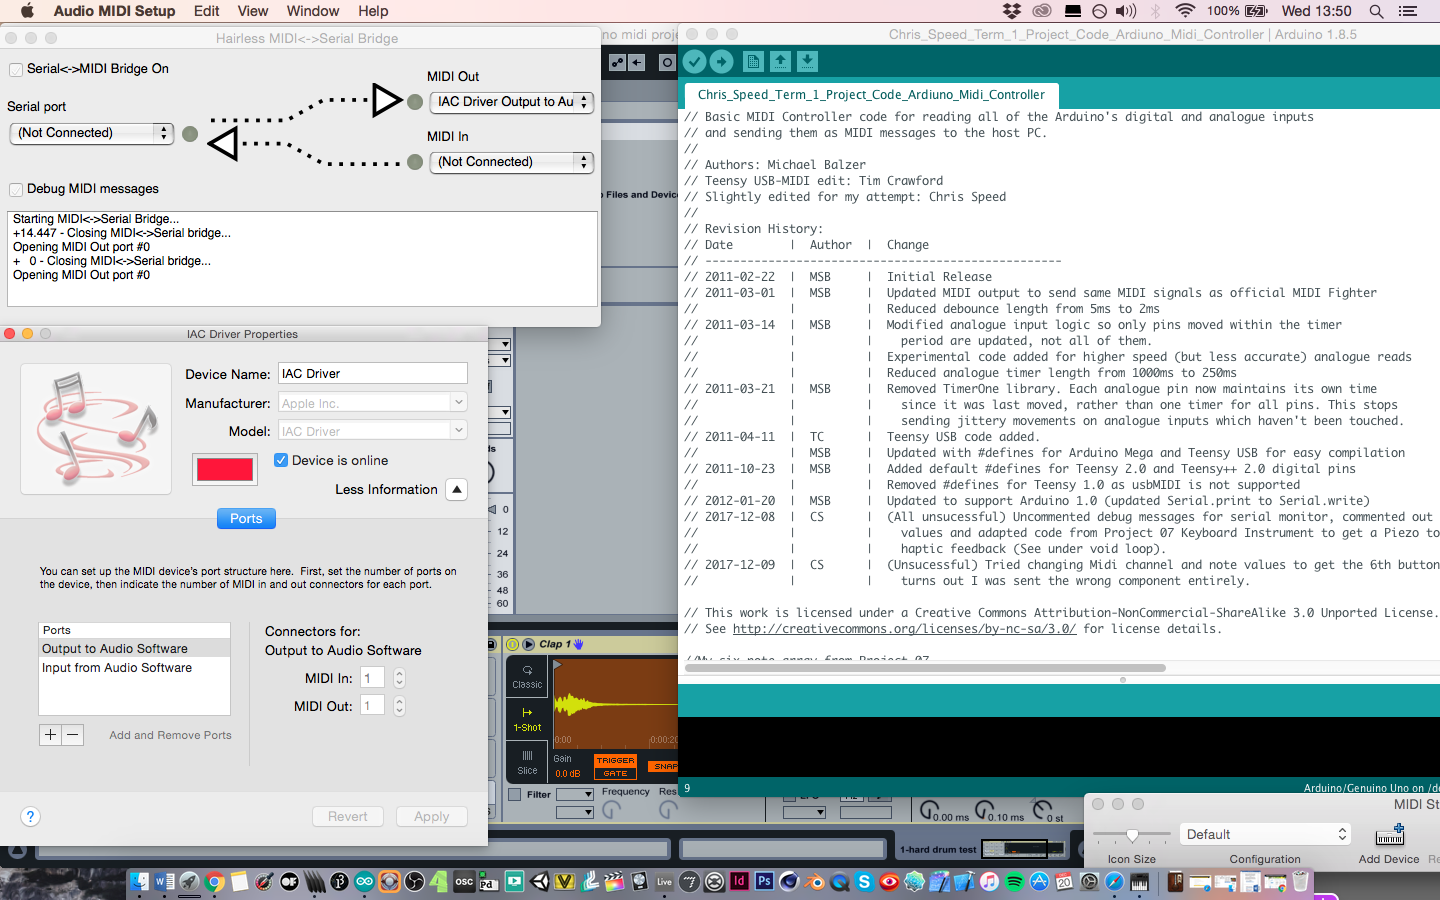
In terms of code there was not much I needed to program as the author had already written the majority of it. One button was not working, so I edited the MIDI note values to fix this however on close inspection it seems I was sent the wrong component entirely. The program itself works by reading all of the Ardiuno’s digital and analogue inputs then sending them as MIDI messages to the computer. To map messages from Arduino’s serial I had to use the IAC driver to create two virtual MIDI ports, an input and an output. I then converted these serial port messages into MIDI using a free piece of software called Hairless MIDI<->Serial Bridge [7]. Finally, I mapped the MIDI Out data to a drum rack in Ableton so that each button triggers a one shot sample.
Development
If I were to expand upon my MVP, I would add something for more haptic feedback. I attempted to add a vibrating piezo into the circuit, similar to Project 07 Keyboard Instrument, however I had no time to create the necessary resistor ladder. Extra buttons and LEDs could also be a worthwhile expansion to the controller. In conclusion I am quite happy with how the finished product turned out and will use it for many VJ performances to come.
References
1. Wikipedia 2017, accessed December 2017,
https://en.wikipedia.org/wiki/MIDI_controller
2. Lynda 2013, accessed January 2016,
https://www.lynda.com/Ableton-Live-tutorials/Utilizing-alternative-DIY-controllers/107066/124114-4.html
3. Instructables 2015, accessed October 2017, (This author wrote the majority of the Arduino source code)
https://www.instructables.com/id/Arduino-MIDI-Controller/
4. DJ Tech Tools 2009, accessed December 2017,
http://djtechtools.com/2009/11/19/diy-midifighter-kit_midi-fighter/
5. Chris Speed Psychical Computing Tumblr 2017, accessed October 2017,
https://cspeedgoldma.tumblr.com/post/167779572023/project-idea-term-1-breadboard-prototype
6. MakerCase 2014, accessed December 2017,
http://www.makercase.com/
7. Hairless MIDI<->Serial Bridge 2012, accessed November 2017,
http://projectgus.github.io/hairless-midiserial/#downloads