


Chitter
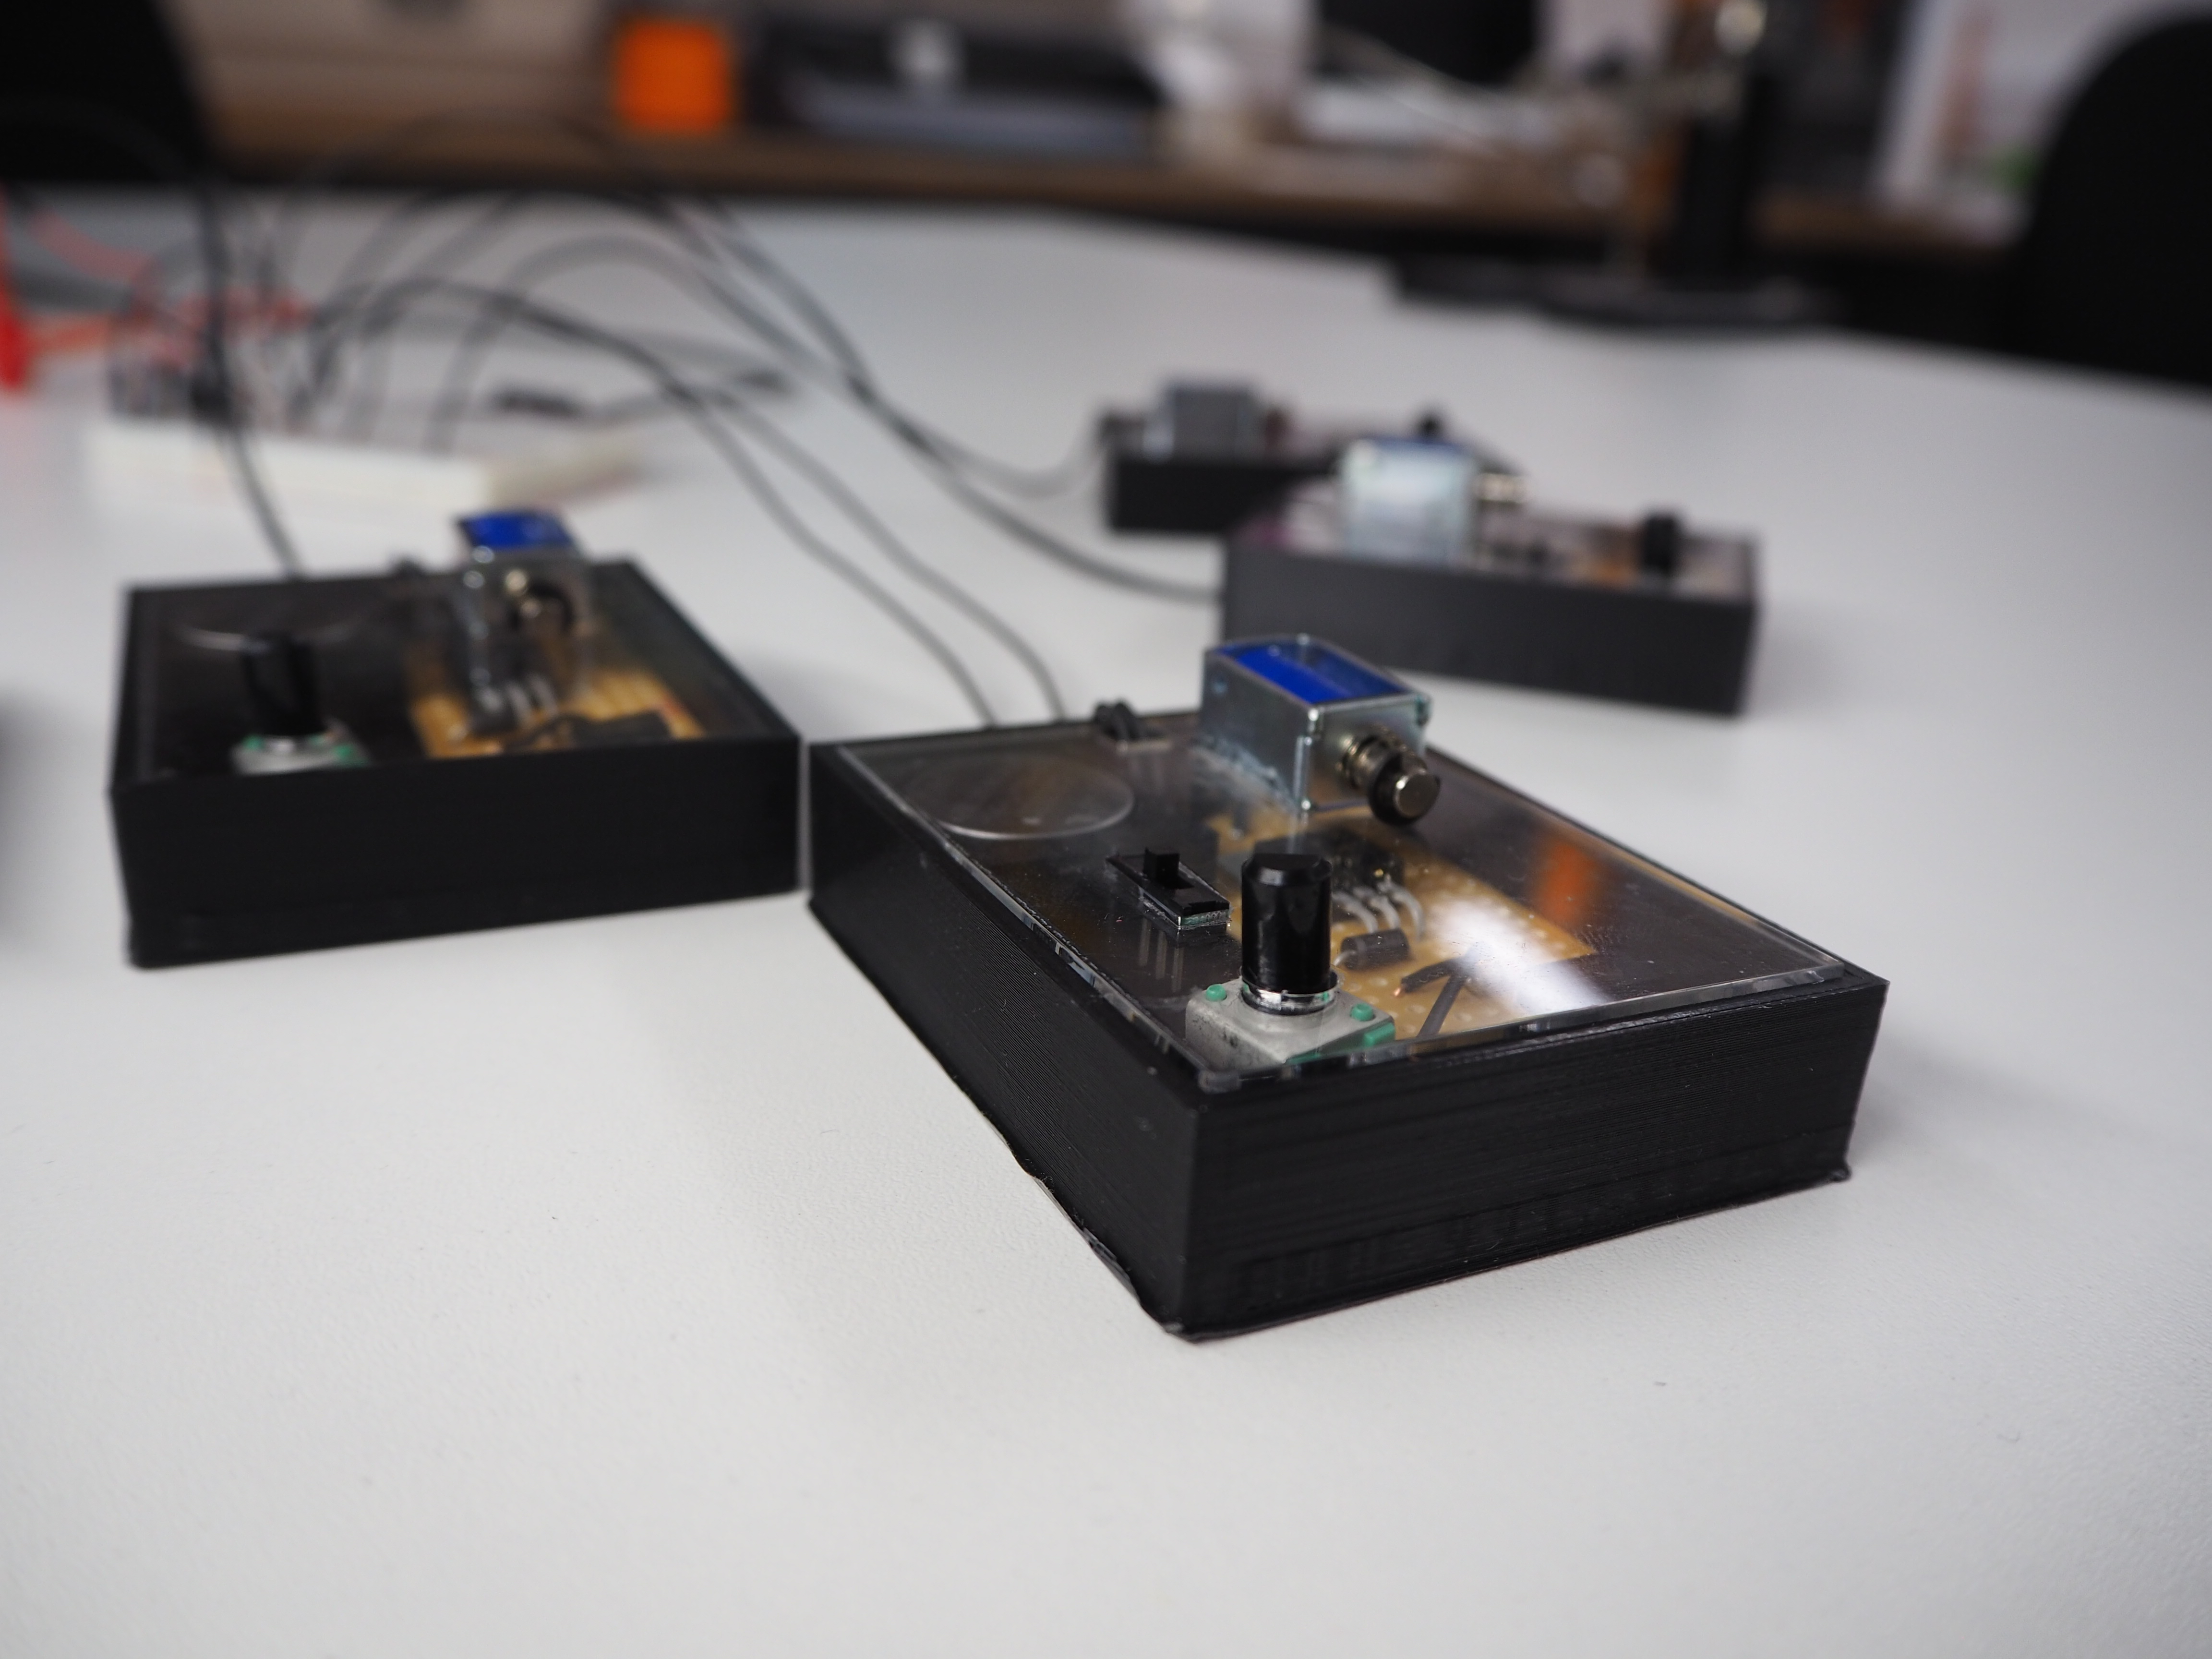
Chitter is a scalable, site-adaptable sound installation. It consists of any number of small modules housing a solenoid which fires in evolving, tempo-adjustable rhythmic patterns generated by a microcontroller. These modules are distributed around a space, giving a dense percussive sound texture taken in as whole, giving way to identifiable components as the space is explored and the devices discovered, their patterns going in and out sync with their neighbours as if in conversation.
produced by: Sam Ludford
Concept
Chitter is an evolution of a previous project, the autoreong [1], which used solenoids to hit a metal bowl in percussive patterns. A common piece of feedback I received was that the solenoids sounded great on their own, and that they lost some personality when the metal bowl was placed on top of them, muting their sound and hiding their movement. It was interesting to me that an electronic component could convey a personality, and I wanted to explore this further. With Chitter the aim was to put the solenoids centre stage, allowing them to be both the primary sound generators and the visual focus.
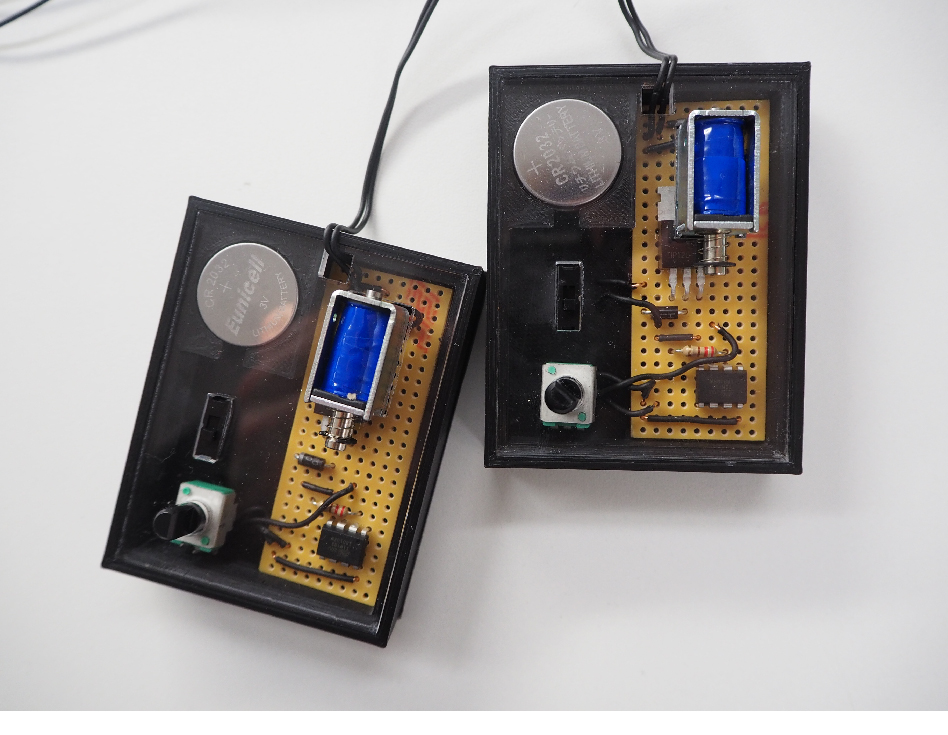
Chitter consists of small, independent modules for several reasons. The first is that, inspired by contemporary sound art, particularly the Microtonal Wall by Tristan Perich [2], the work of Zimoun [3], and FM3's Buddha Machine [4], I've become interested in the sonic effects yielded by combining a large number of simple, autonomous sound generators. The second is that I wanted this first iteration to be a prototype for a project that will actually end up being realised. Designing something modular and scalable puts me in a stronger position to acquire funding for a full scale version at a later date. The third reason is that I wanted it to be adaptable to the space it is installed in. By making each module physically independent of each other (and battery powered) they can be arranged in any way that suits the space, making each installation a unique experience.
I've always been attracted to disused industrial spaces, and this is the environment I envisage Chitter being installed. These spaces would have once been thick with the sound of machinery making consumer goods for human use. The idea guiding both the visual and sonic development of Chitter was to invert this way of encountering machinery by filling these spaces with the sounds of consumer electronics in dialogue with each other.
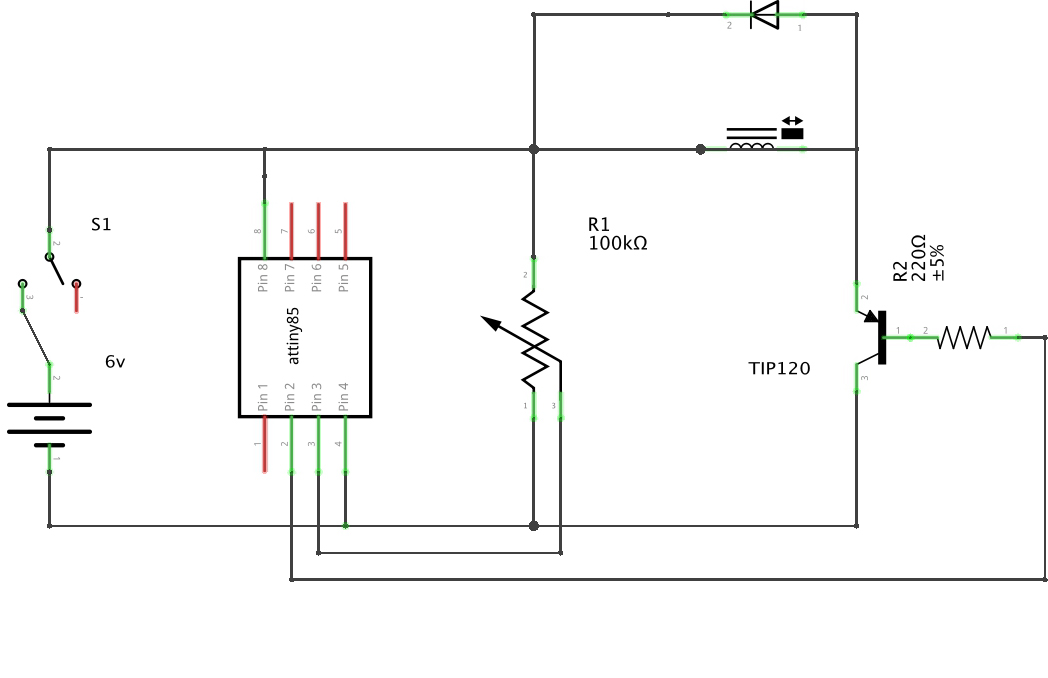
Circuit
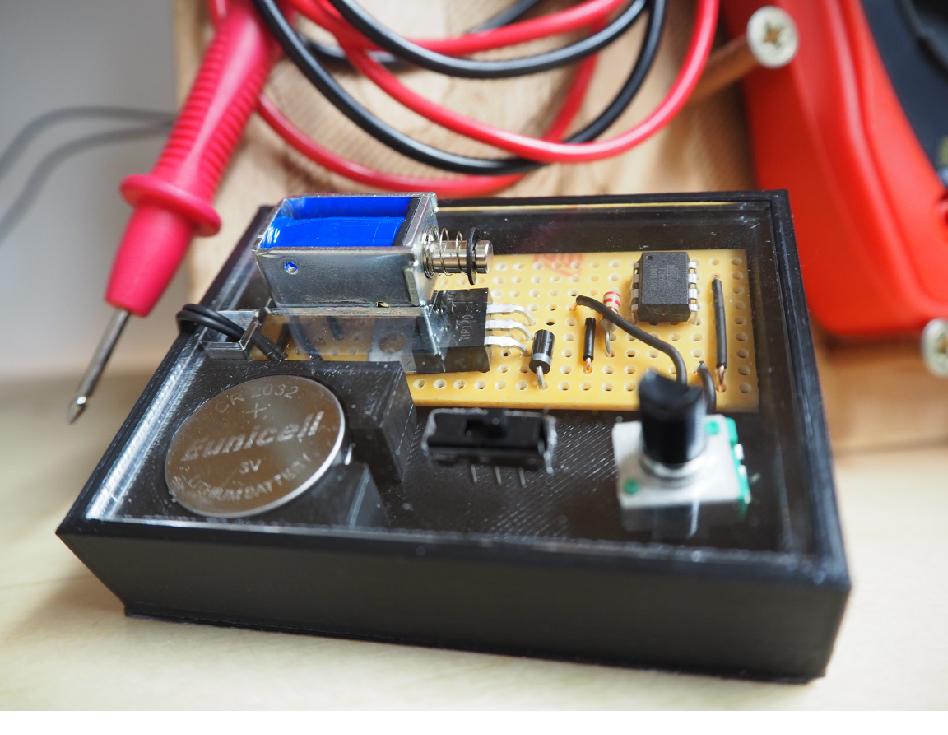
The logic driving each module was, in essence, simple, but there were three main complications arising from the constraints of the project: they would have to be extremely cheap to produce since there would in principle be many of them, they would have to be as small as possible, and they would have to be battery powered. (I also equipped each one with an on/off switch, and a potentiometer to control tempo so that they could be put out of phase with each other).
The standard Arduino Unos are too big and expensive, so I researched smaller microcontrollers. At this stage I did not know exactly what the functionality of a module would be, and found myself faced with a chicken and egg problem: I couldn't know what they would sound like en masse until I had lots of them, but I wouldn't know how to build one of them until I had some idea of what they would sound like en masse. A particular concern was whether they would communicate with each other at all (in the sense of being networked). This would involve a significant jump in complexity, which I wanted to avoid it if it wouldn't add anything of great value.
I got round this problem by writing a simple app to simulate multiple modules running together in an environment.
The app was written in openFrameworks, with ofxMaxim used for the sound [5].
This exercise confirmed my suspicion that extremely simple independent patterns could create rich textures when combined in numbers. I abandoned the idea of having the modules linked by a network and this led me to the ATTiny85, which more than satisfied my requirements of cheapness and smallness.
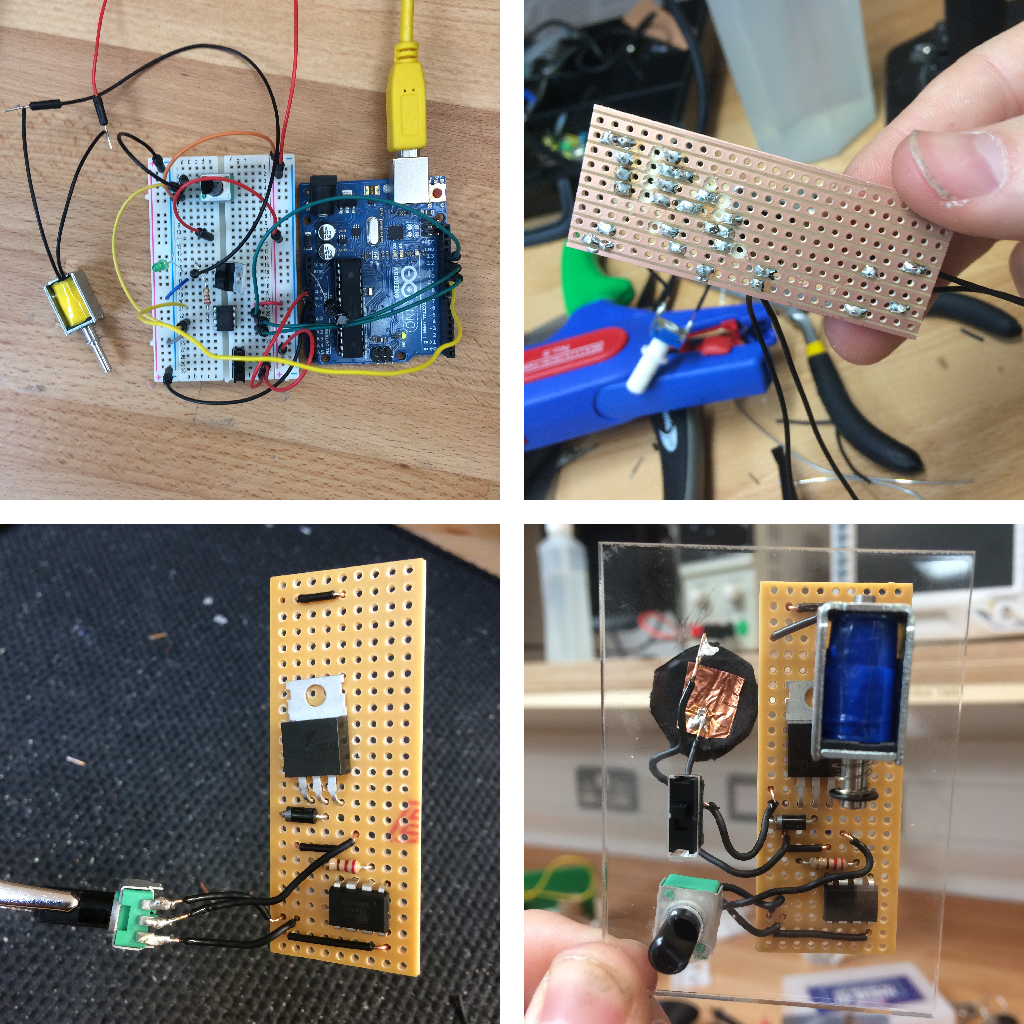
Writing the code was for the most part a case of building on (and in some cases simplifying) the Arduino code I wrote for the autoreong [6]. The new addition was the rhythm generation, for which I used randomly chosen Euclidean rhythms. I had previously implemented Euclidean rhythms in Processing, but the absence of variable-length arrays in the Arduino environment provided some challenges (I've documented the port in a blog post [7] and in the source code below).
The other difficulty was powering the module, and at the time of documentation this has not been resolved. I found that the 5V solenoid in combination with the ATTiny85 operates optimally at 5-6V, so initially I used two 3V lithium coin cells in series. These are very small and fitted well with the design aesthetic (discussed below). However, I did not realise until the final moment that the current they supply is not nearly enough to power the solenoid for any significant length of time, and they drain in around a minute. For demonstration and documentation purposes I hooked them up to external power. Solving this problem will have to be a task for the next iteration. Some preliminary research has shown that there's two hopeful solutions: (i) find a different 6V batteries which carry much more current, for example the ones used for camera flashes, and (ii) experiment with some higher voltage batteries and add some circuit logic to step the voltage down. It is possible that neither of these strategies will provide a solution cheap and long-lasting enough for the project, in which case I'll have to revert to external power.
Source code: https://github.com/samludford/chitter-module
Design
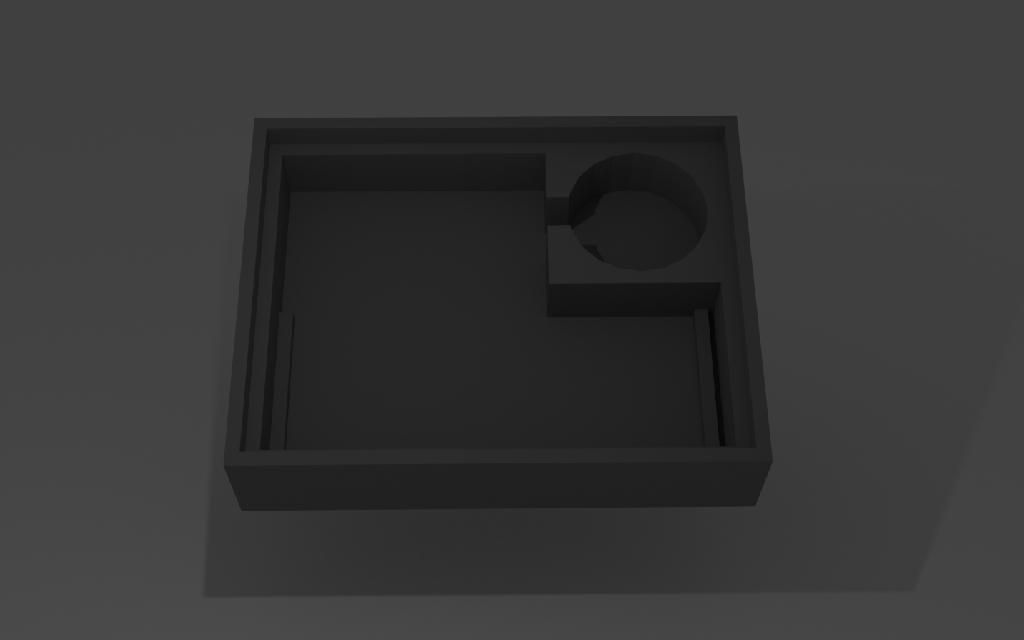
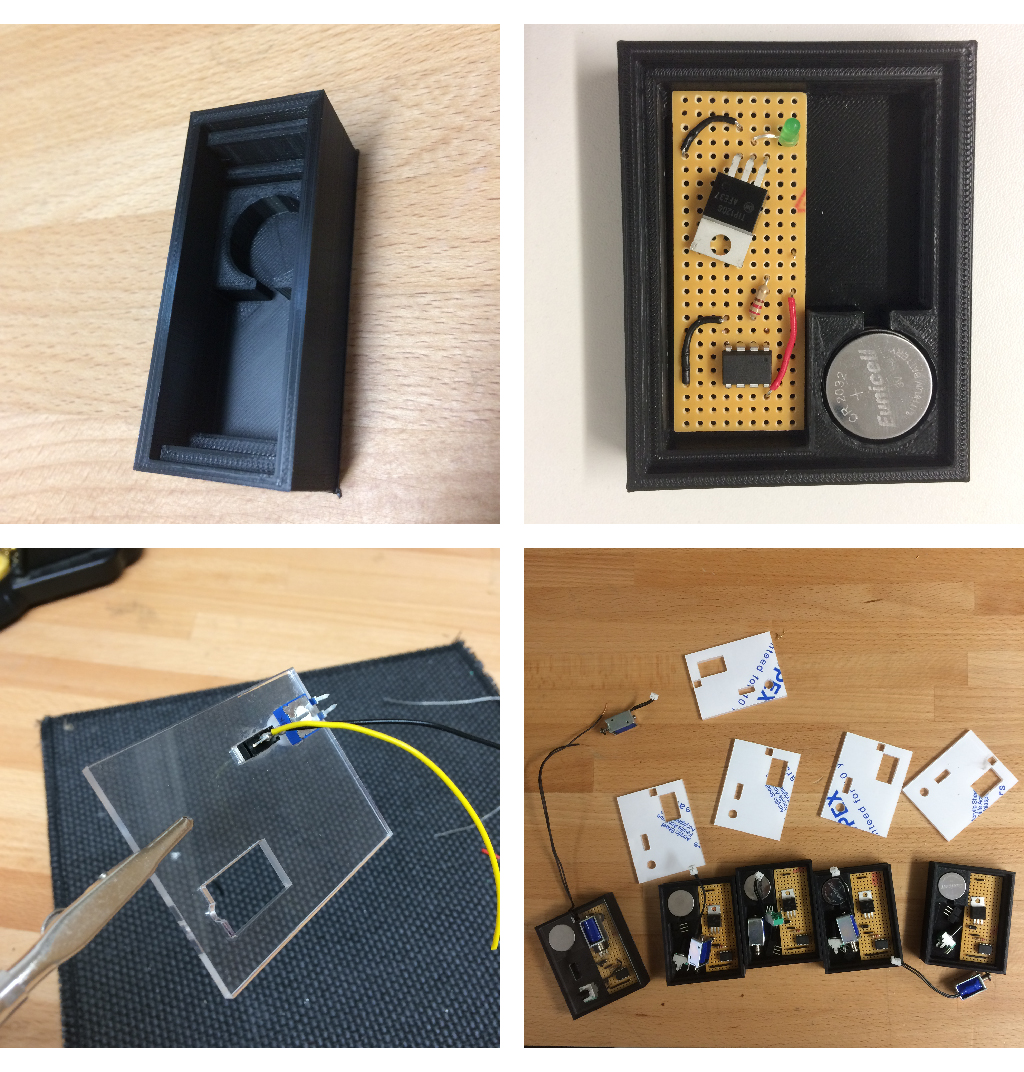
The concept behind Chitter dictated three guiding principles for the design of the modules: (i) the solenoid should be visible and its sound emphasised, (ii) it should evoke the look and feel of consumer electronics, and (iii) it should also evoke the look and feel of a transmission device (to add to the sense that they are in dialogue with each other).
The cost constraint pretty much provided the consumer feel all by itself: it should use cheap components, battery power, low quality plastic casing, etc. I also took some inspiration from old morse code machines. As well as helping them look like a communications device, this gelled well with the need to keep the solenoids on the outside, where a morse code machine's clicker would be. I decided to give the black 3D printed casing a transparent acrylic front panel, to further emphasise the visibility of the machine.
I briefly considered putting the solenoids inside a speaker horn to amplify the sound, but dicovered that the case acted as a more than adequate resonating chamber as it was. I tried a few variations on a theme before settling on a final design (see the images below).
It's difficult to put an exact cost on each module for various reasons (buying last minute parts at high prices, free access to 3D printers, a still-unknown battery cost) but it was somewhere between £5 and £10 per module. Assembly time takes about 45 minutes, assuming the case is already printed and the front panel already cut. 3D printing the case is the bottle-neck, with each case taking around 3 hours to print.
References
- Autoreong documentation on the comparts blog: http://doc.gold.ac.uk/compartsblog/index.php/work/autoreong/
- Tristan Perich's Microtonal Wall: https://vimeo.com/45225412
- Zimoun: http://www.zimoun.net/
- Buddha Machine: http://www.fm3buddhamachine.com/v2/
- Chitter simulation app source code: https://github.com/samludford/chitter
- Autoreong code: https://github.com/samludford/autoreong
- Euclidean Rhythms on the ATTiny8: https://samludford.github.io/2018/phys-comp-4-tiny/