myTankRobot
I was struck by the idea of building a small moving robot early in the physical computing lectures as I have always been intrigued by robotics and artificial intelligence. myTankRobot was a first step to explore these areas of science and computing.
produced by: Theo Vlagkas
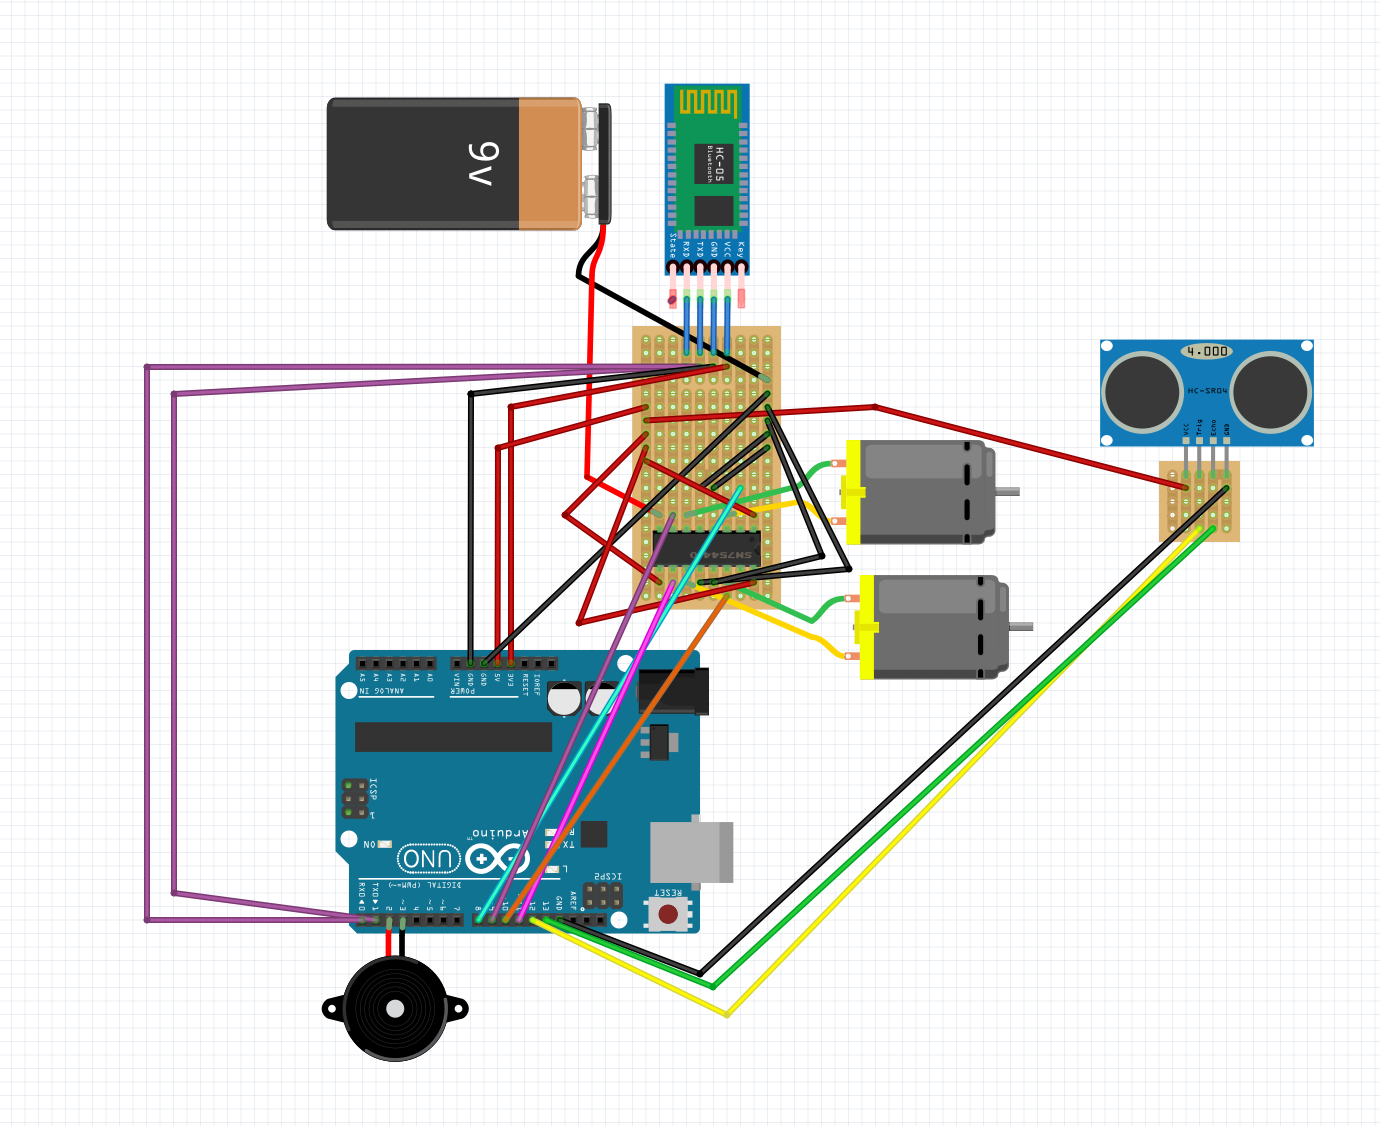
Technical
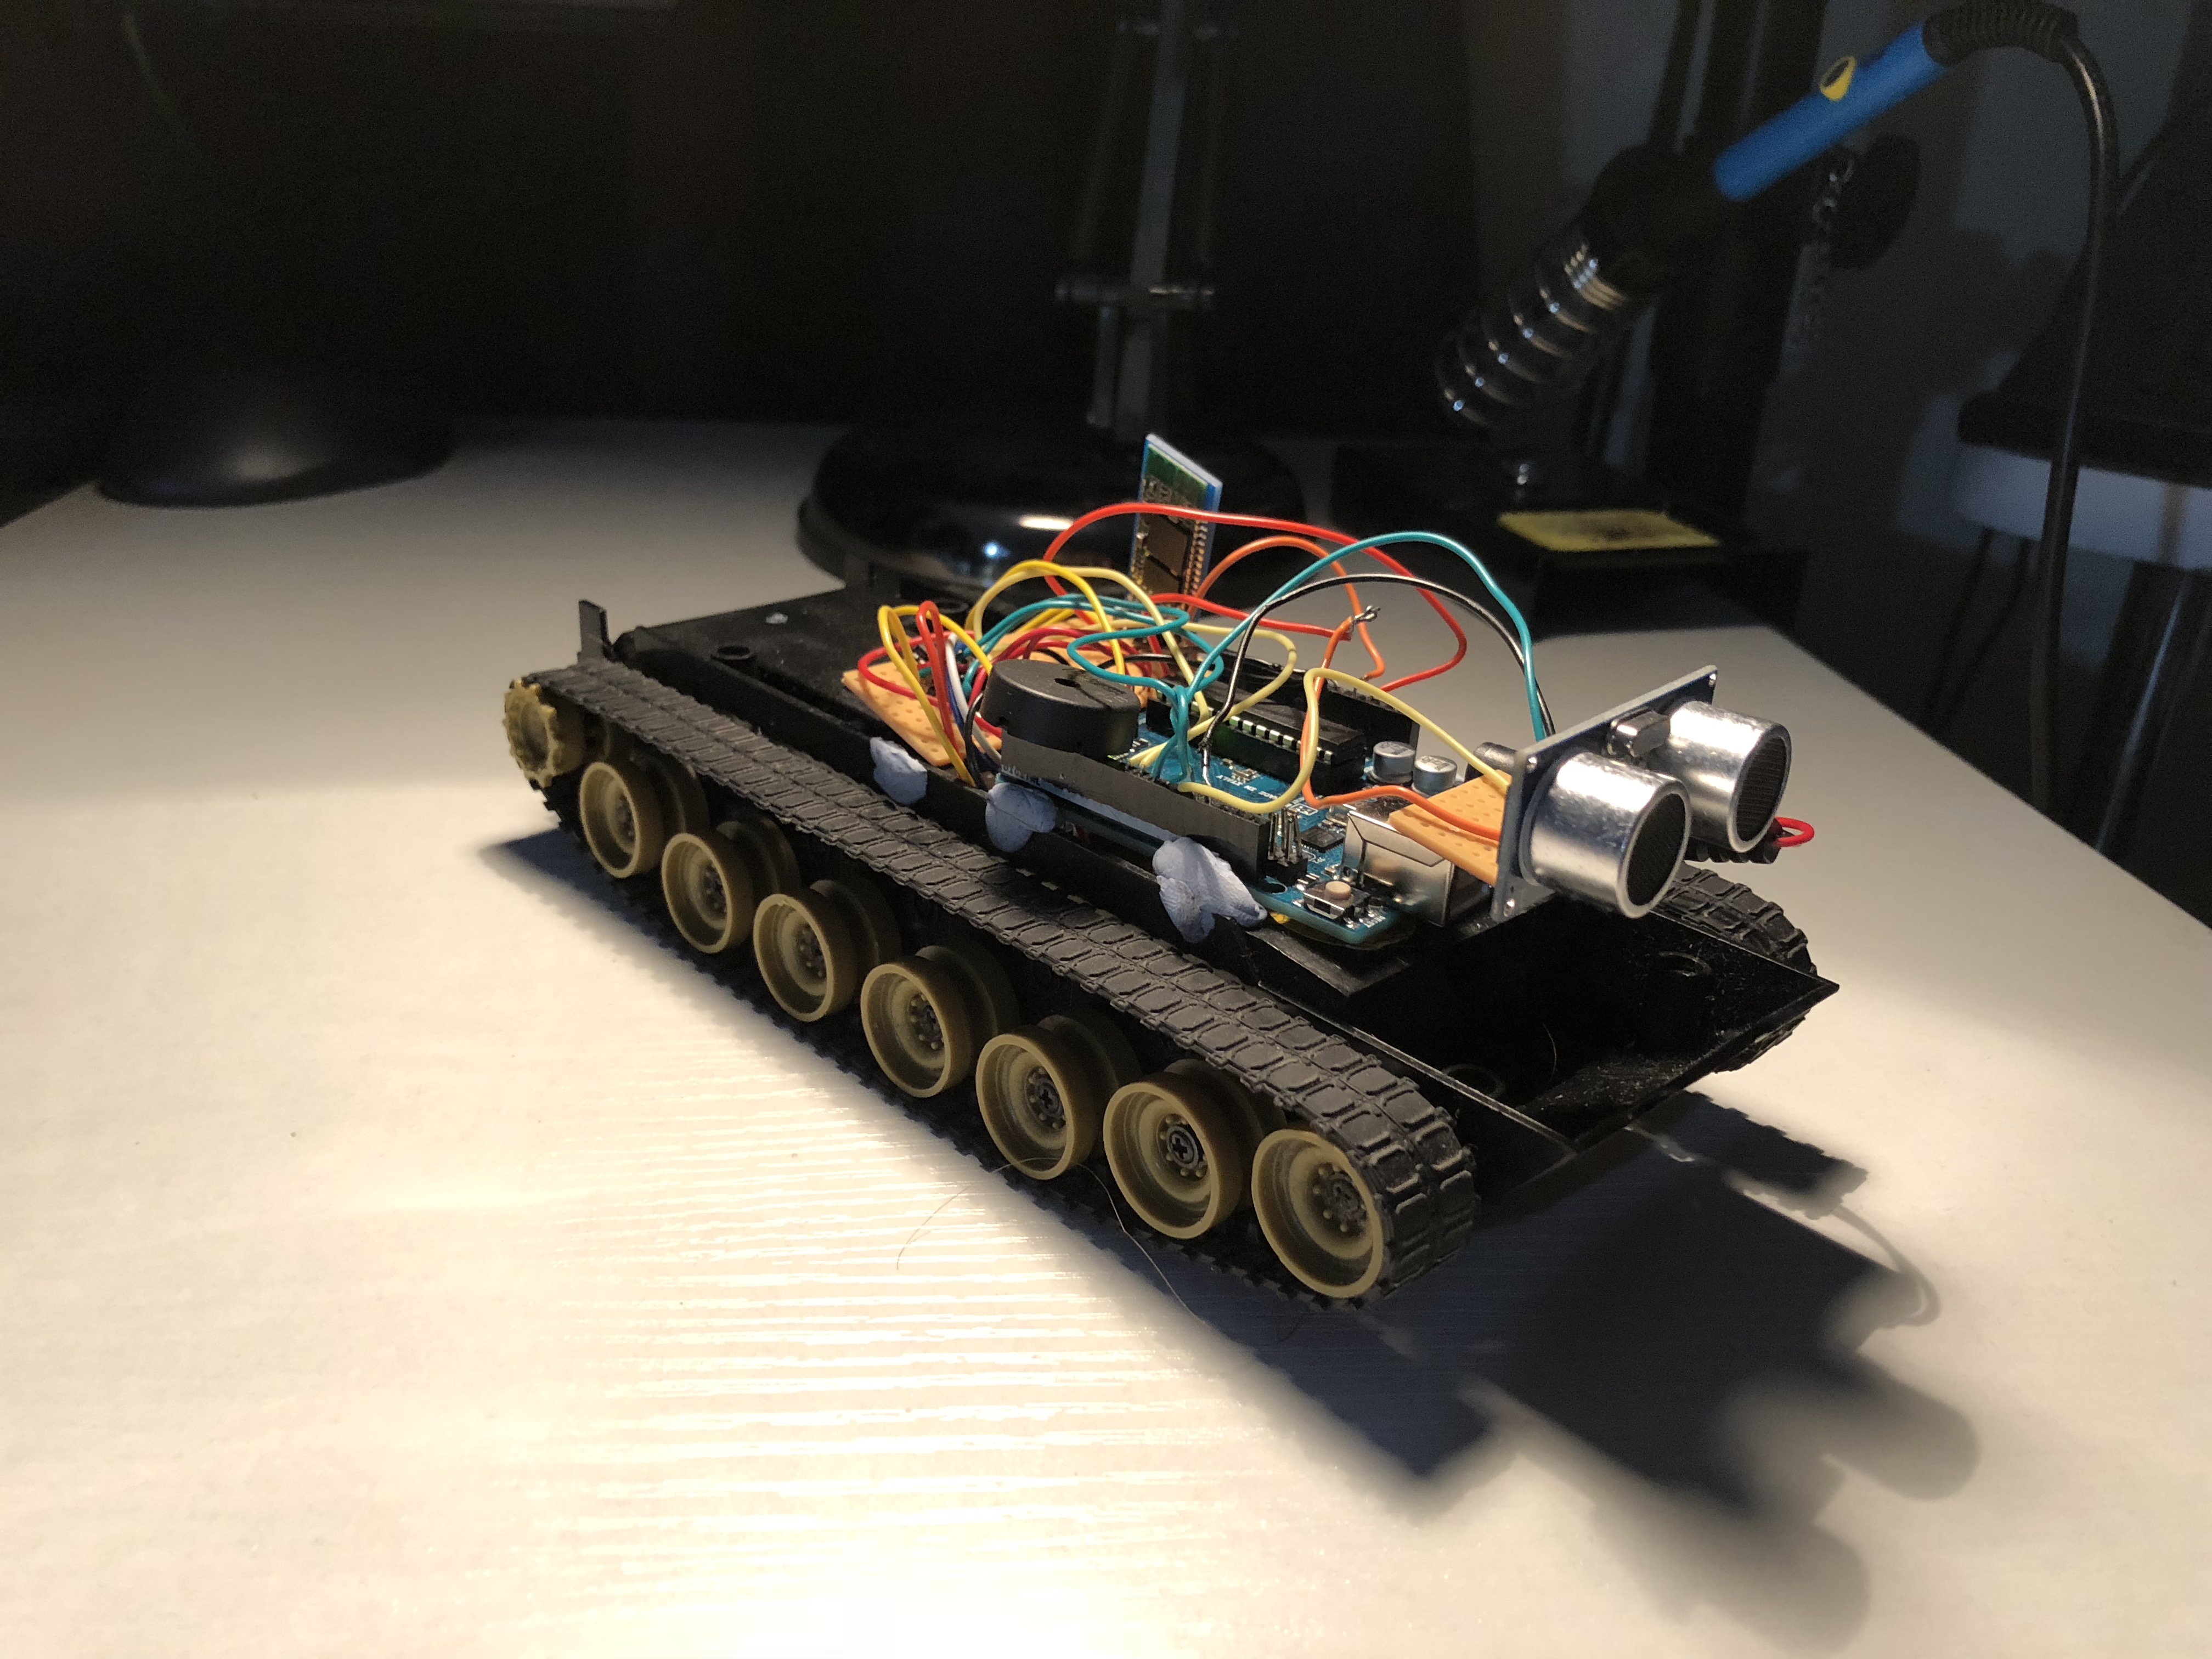
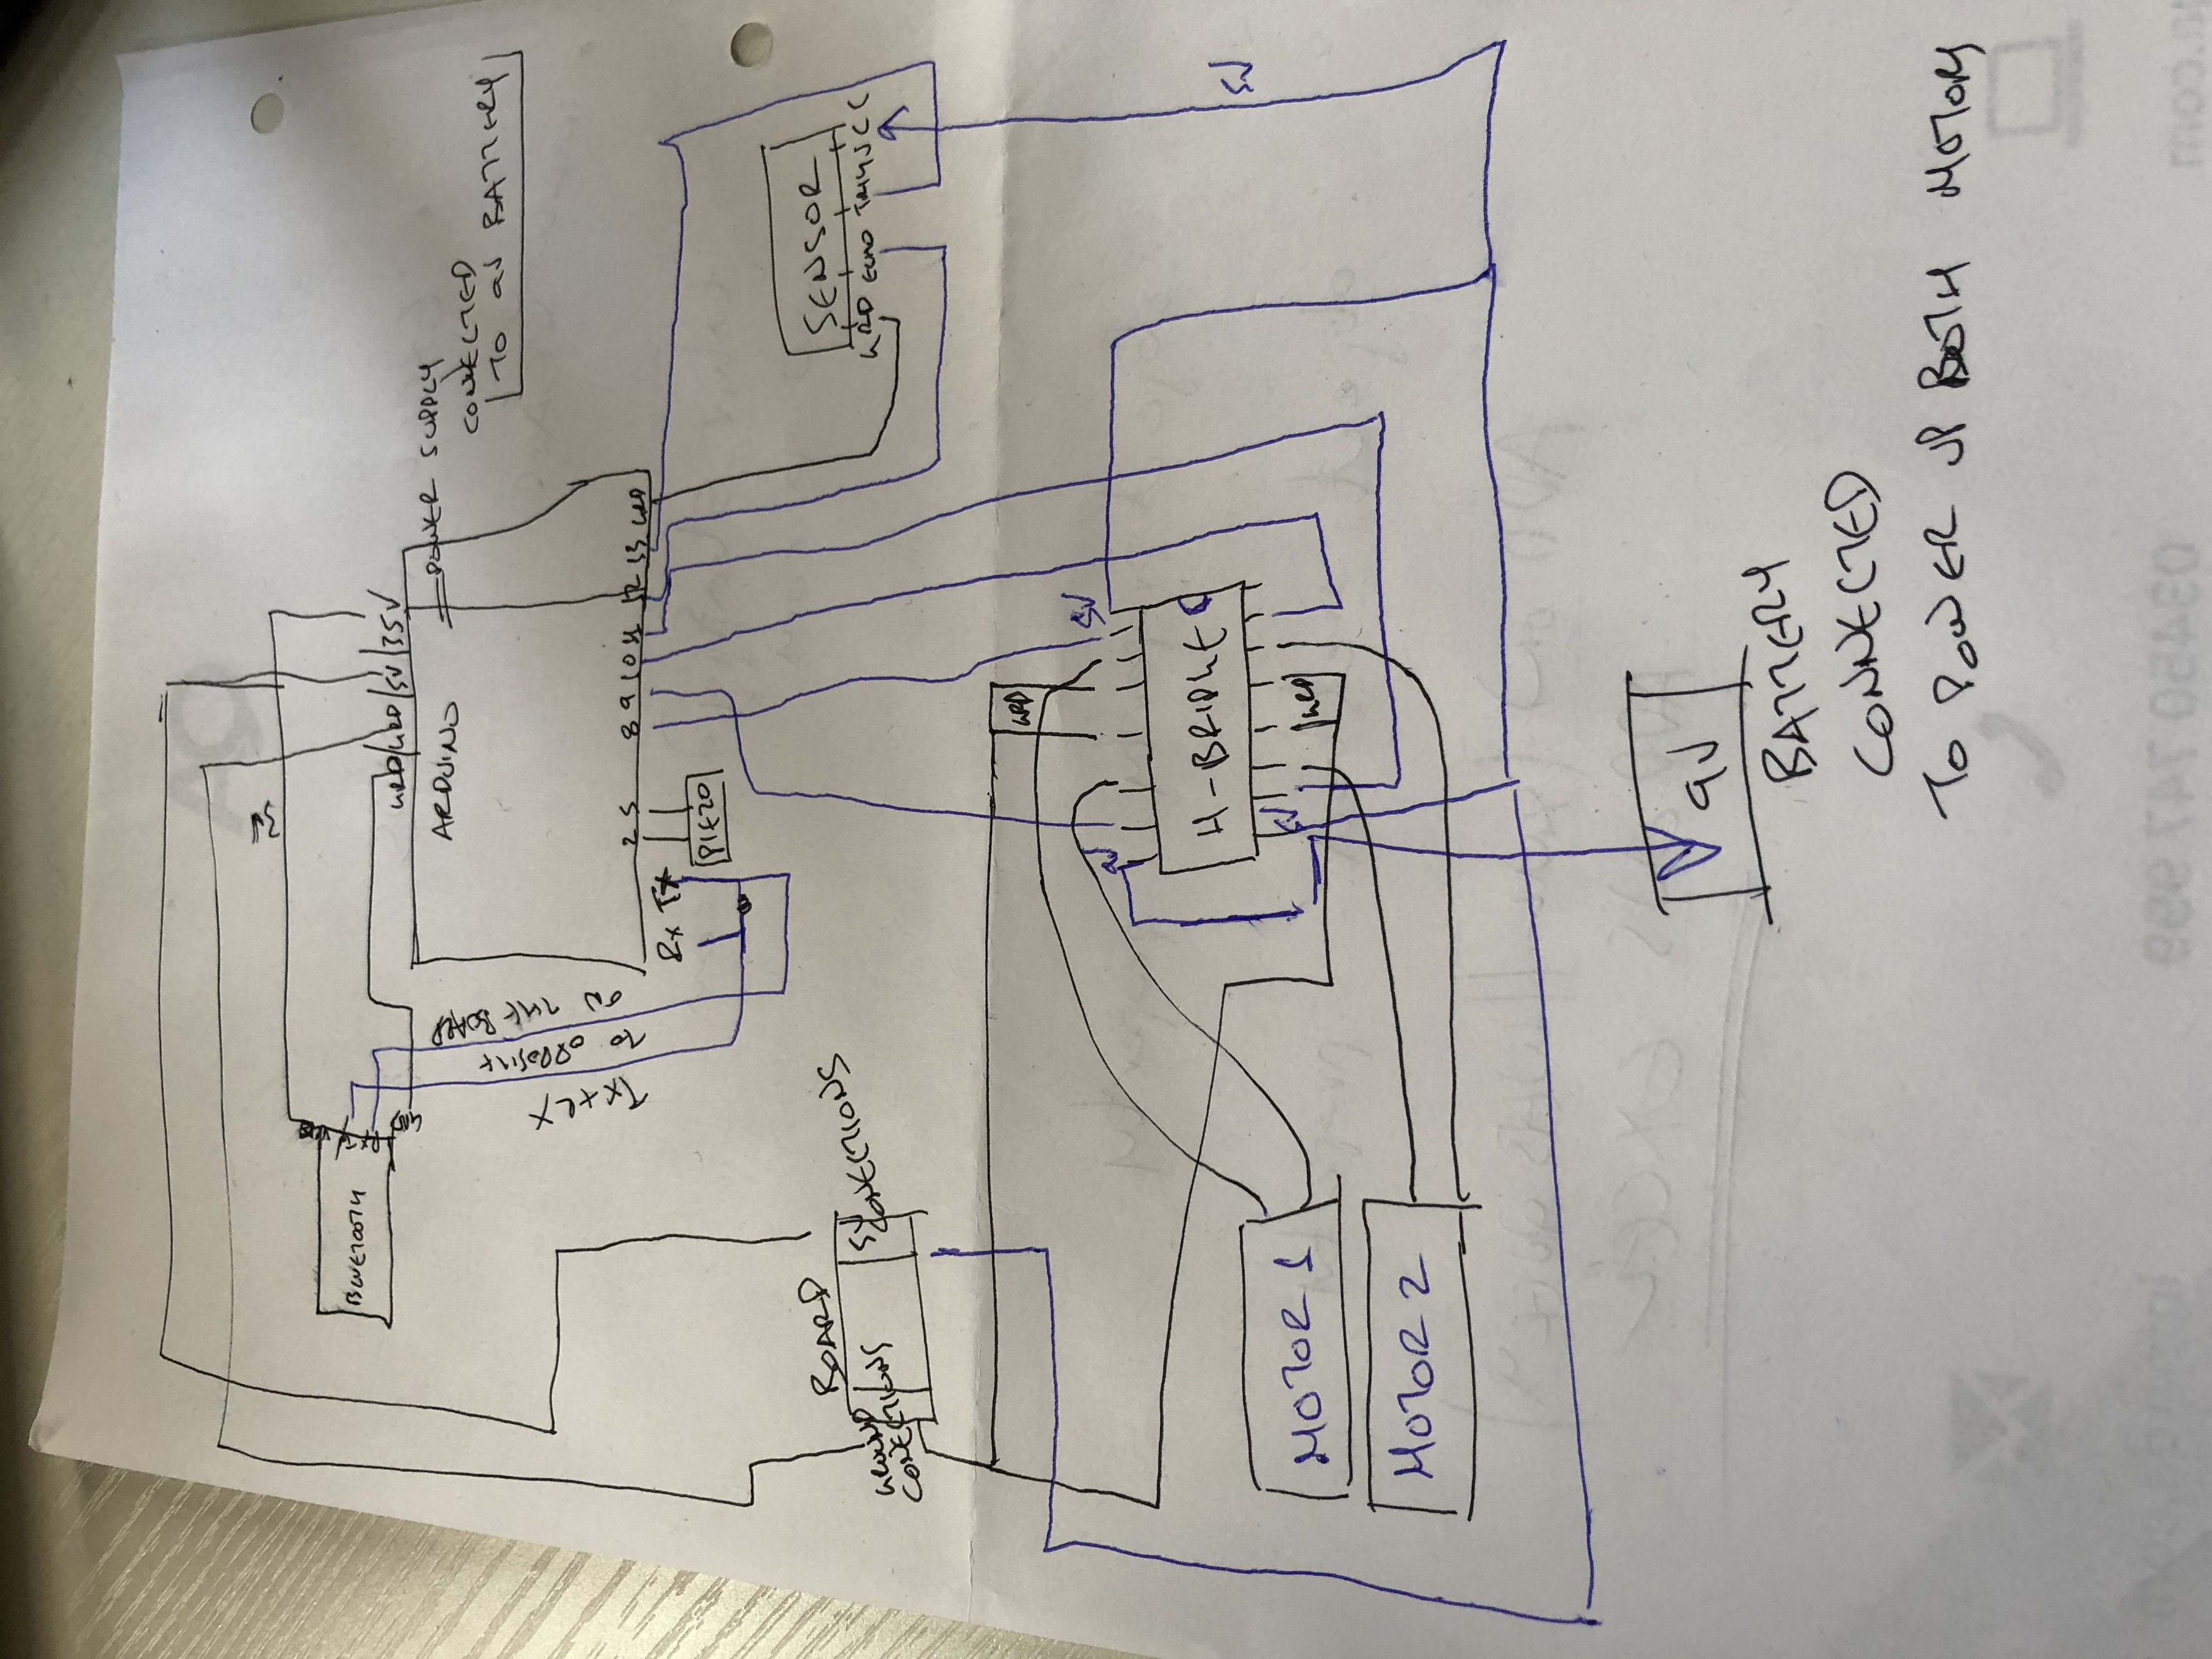
In order to finalise the robot, I separated the project in 4 different parts where I tested the electronics in a breadboard and the Arduino code separately as well. After each of them worked (electronics on breadboard and code in Arduino) I soldered each part separately and brought all the code together so as to finalise the project.
1. Movement
I used a bought tank chassis with 2 DC motors and the Arduino h-bridge to control on/off movement and direction. As it was my first attempt to electronics and Arduino code outside of the book it was a big challenge to solve everything and have everything working. Eventually, I wrote the code to allow me to move the robot on all directions.
2. Bluetooth
I used a Bluetooth slave and the Bluetooth port of Arduino to send messages and control the motors. While Bluetooth is hard to be controlled and needs a lot of effort (also sometimes does not work and does not allow the code to be uploaded if it is connected while the user uploads through the serial port) I managed to make it work and upload my code to control all its functionality. My code for that part is straight forward and different movement happens while the user presses different buttons.
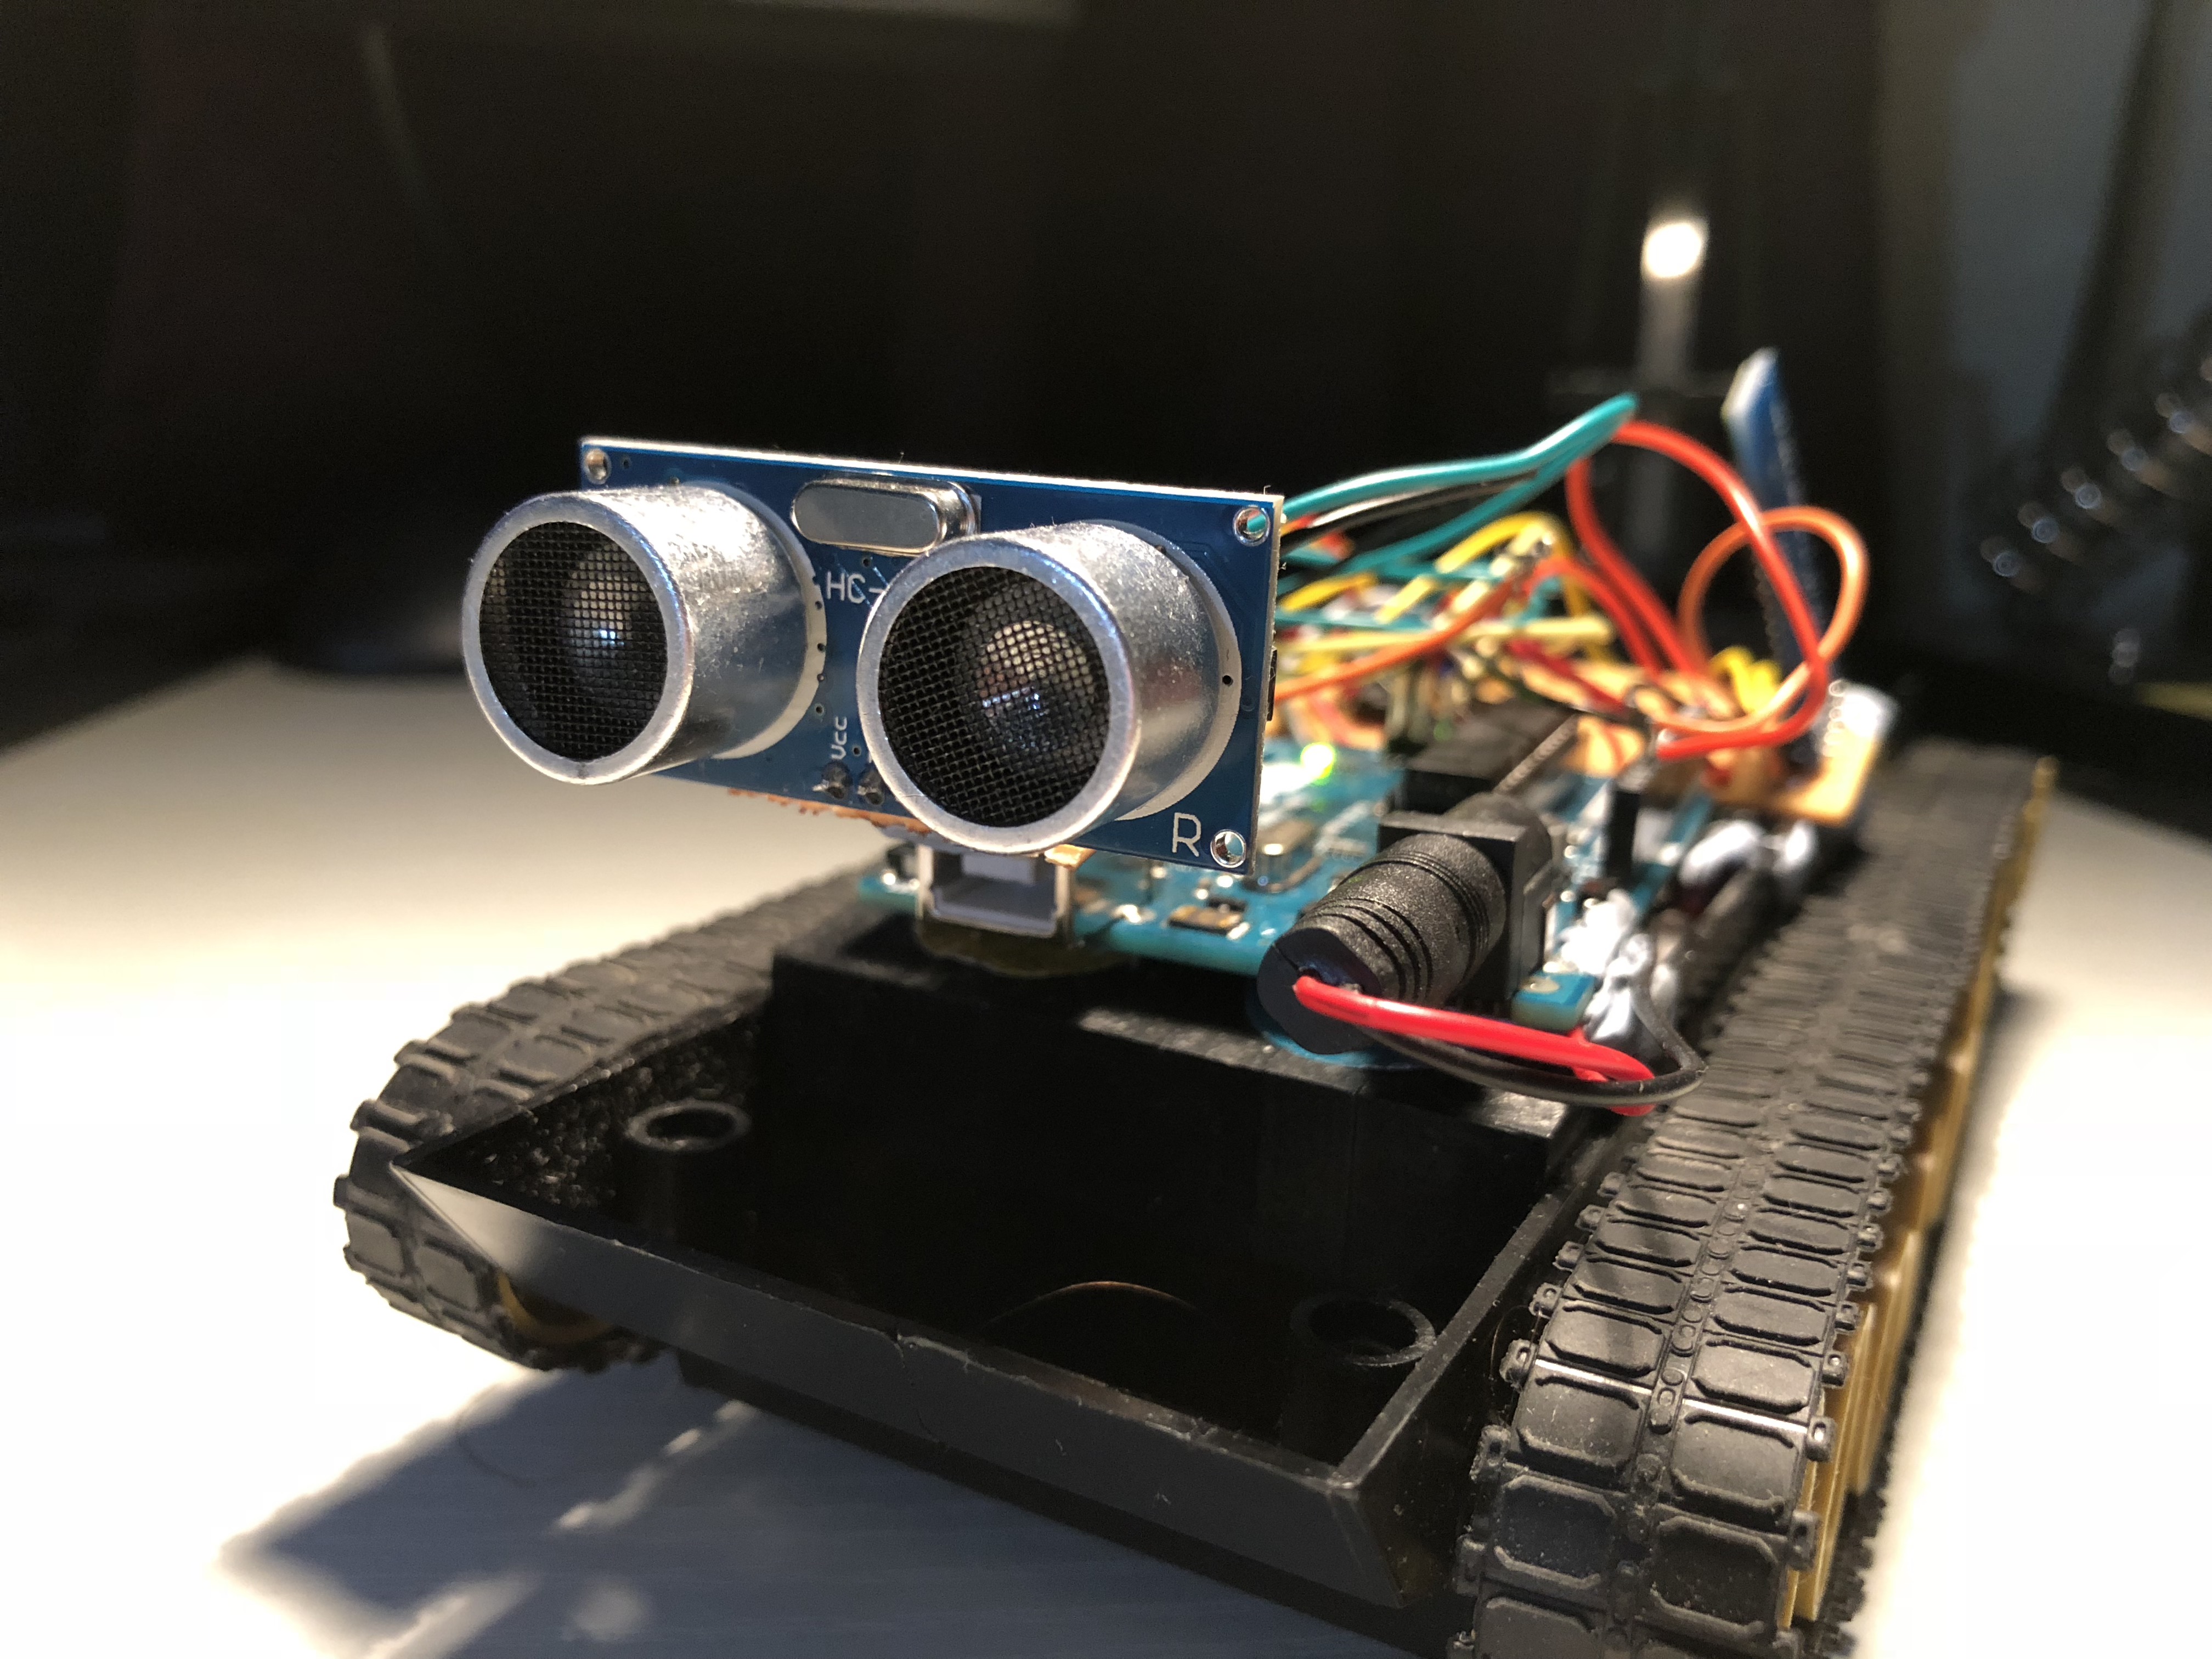
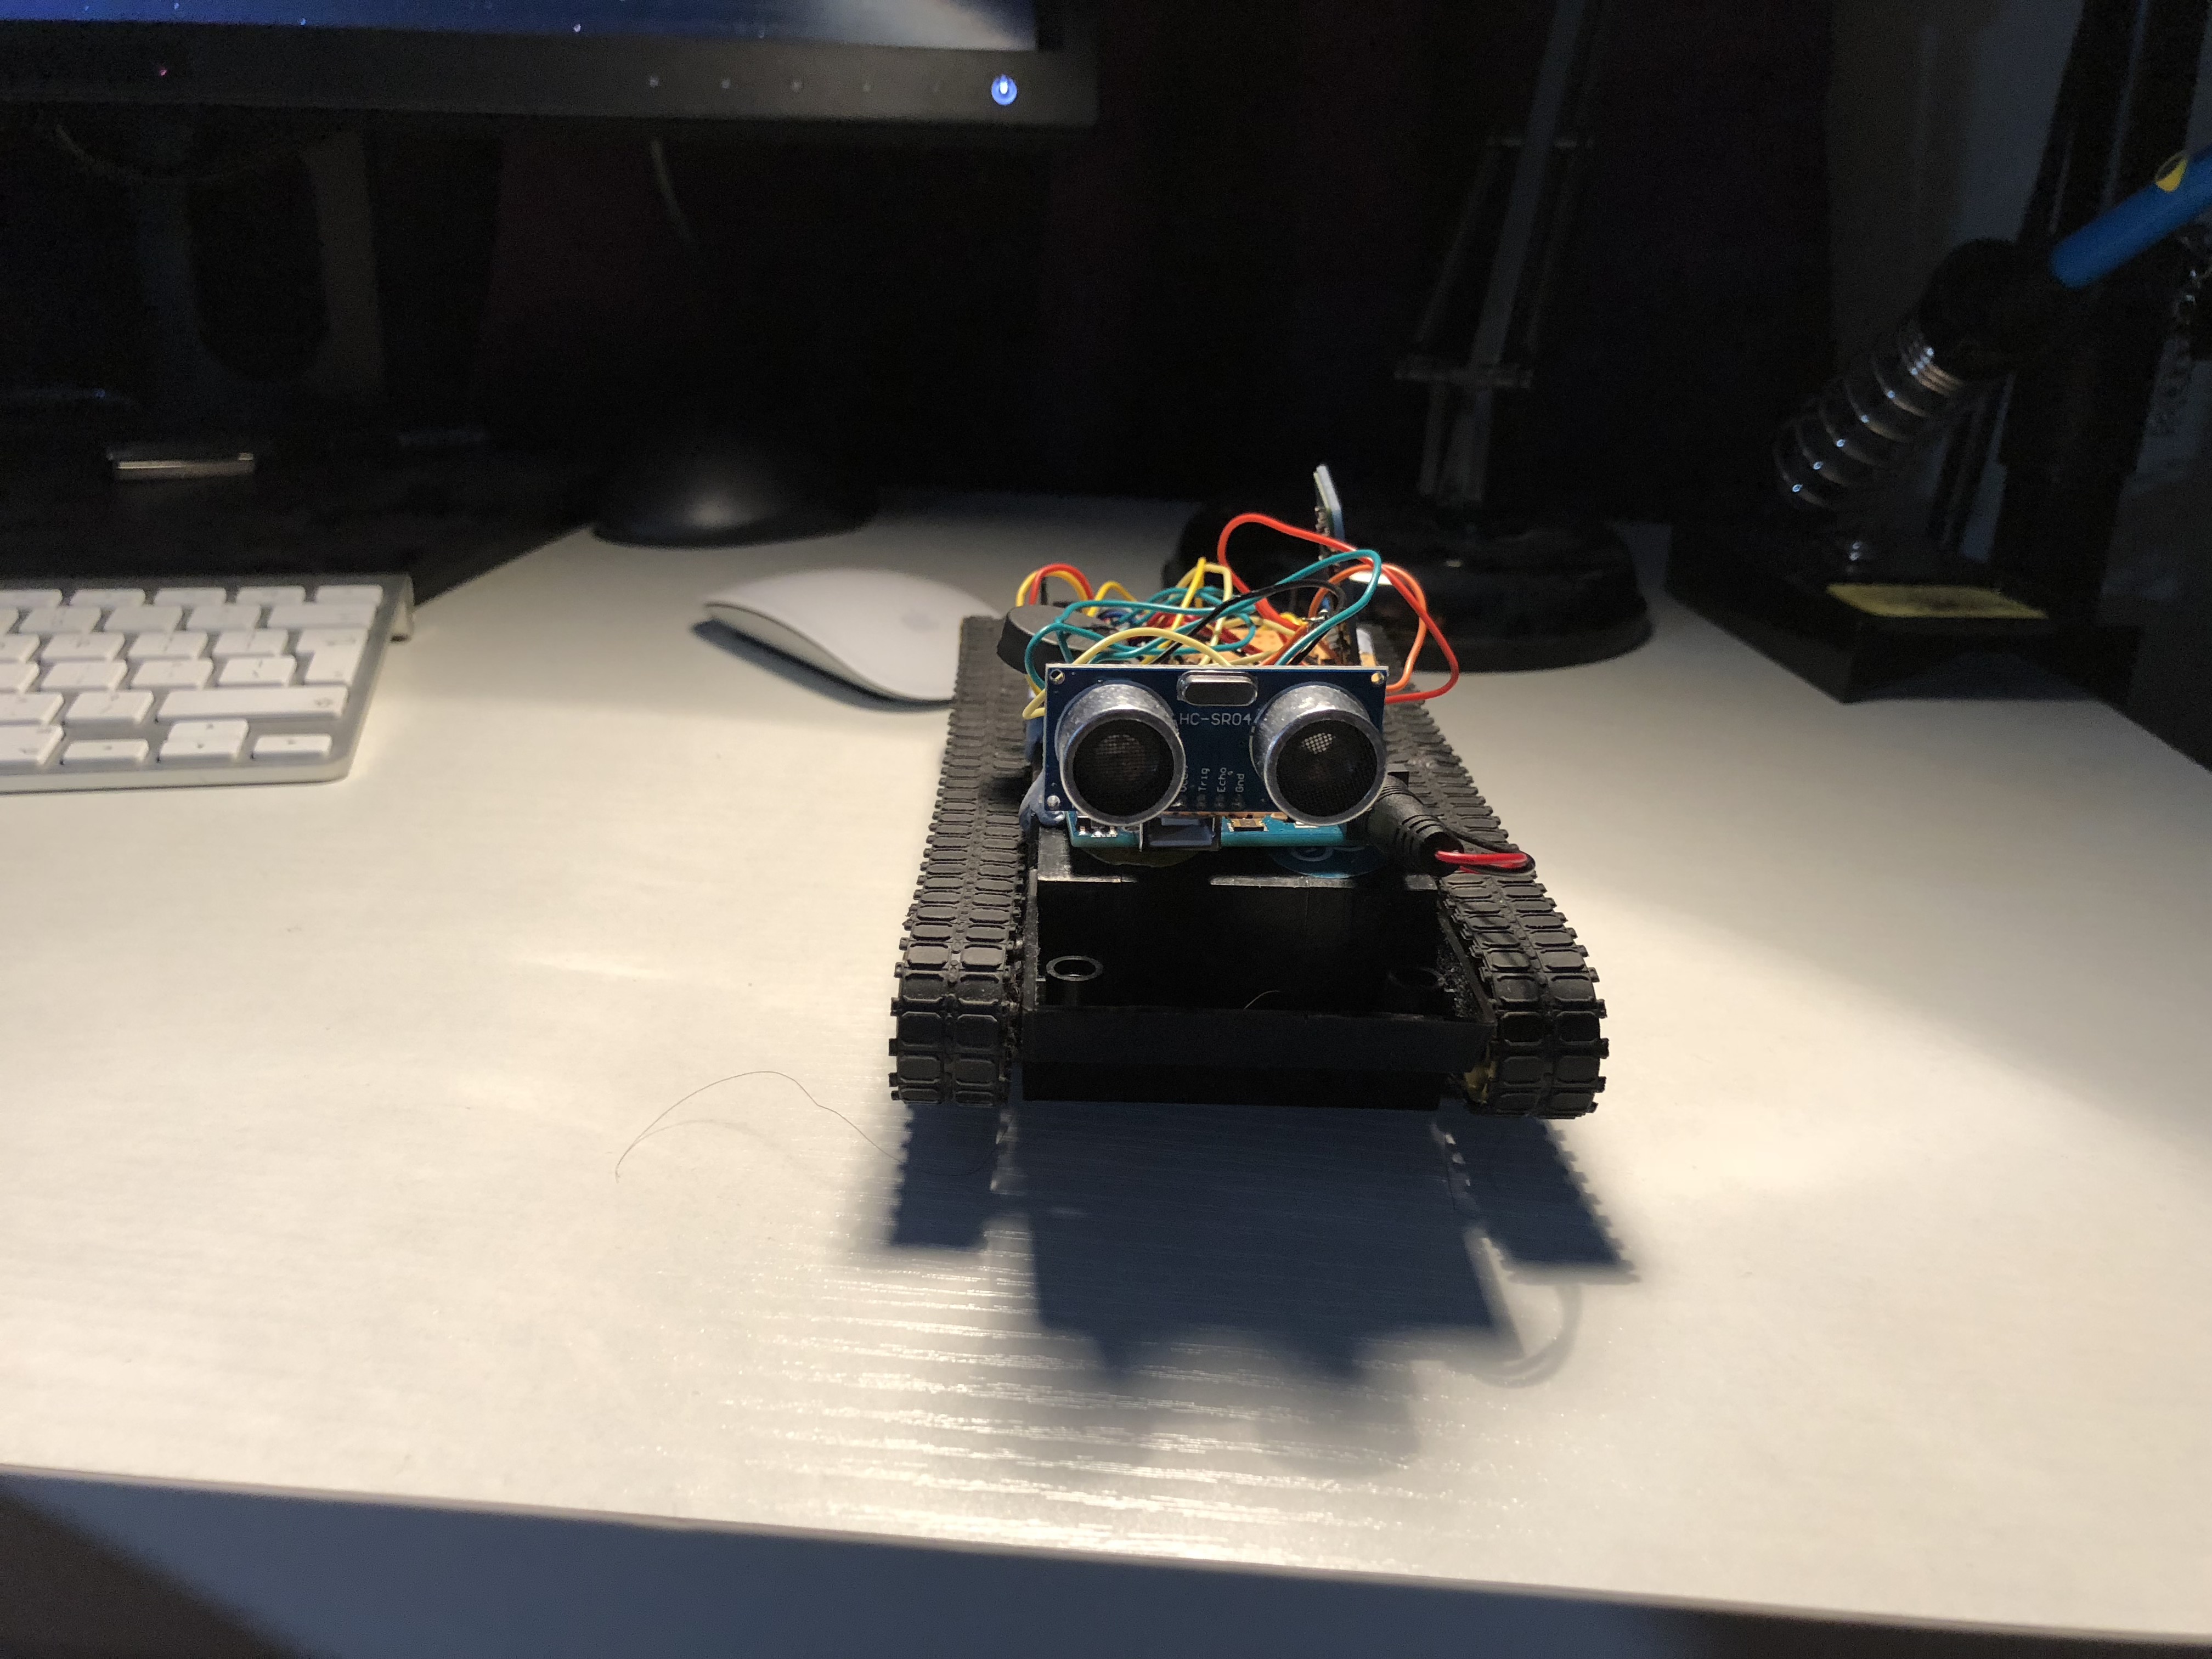
3. Sensor
The sensor works very well when it is not used with Bluetooth and the values are printed very quickly. However, in combination with the Bluetooth the read becomes slower. Nevertheless, it barely affects the robot and the integration flows naturally. The Arduino code allows the sensor to read values and while robot moves the way the user has instructed (sending Bluetooth messages), it turns backwards for 1,5sec when the distance drops less than 300cm (600 on my code as multiply the value of the sensor) and then continue with its movement. Also as it can seen on the video when the code is uploaded if an object approaches the robot it changes direction.
4. Piezo
The piezo emulates an R2D2 robot voice which was the biggest achievement of mine as I wrote a function which rerates the favourite Star Wars robot voice and returns the value on each movement. While the Star Wars Imperial song has been written by someone else (refrenced below) the voice and the code for it was my idea and the compeltion of it as well.
On further development, I would like to map either my Leap Motion or a game controller to control the robot. Also, I would like to use a speaker to send sound from Max/Msp and OSC, use a second sensor for when the robot moves backwards and improve the readability speed of the sensors to maximise performance.
References
Arduino Star Wars Imperial March code can be found here.
http://pasted.co/e525c1b2