


The Modern Conversation
Our lives are mediated through technologies, but how aware are we about the effect of this extra guest in our relationships? This installation of electronic wearables explores machine mediation, surveillance and the embodiment of algorithmic communication.
produced by: Panja Göbel
Introduction
Machine vision and interpretation systems mediate our daily interactions as wearables have now gone ubiquitous, but how are we subtly shaped by these interactions? The status updates, the good streak messages, the daily bot conversations as well as the participation in one way messaging of the social media platforms. Computational systems fascinate and concern me in equal measures and I was keen to explore this territory within a small network including an interconnected wearable, a computer and a camera.
Concept and background research
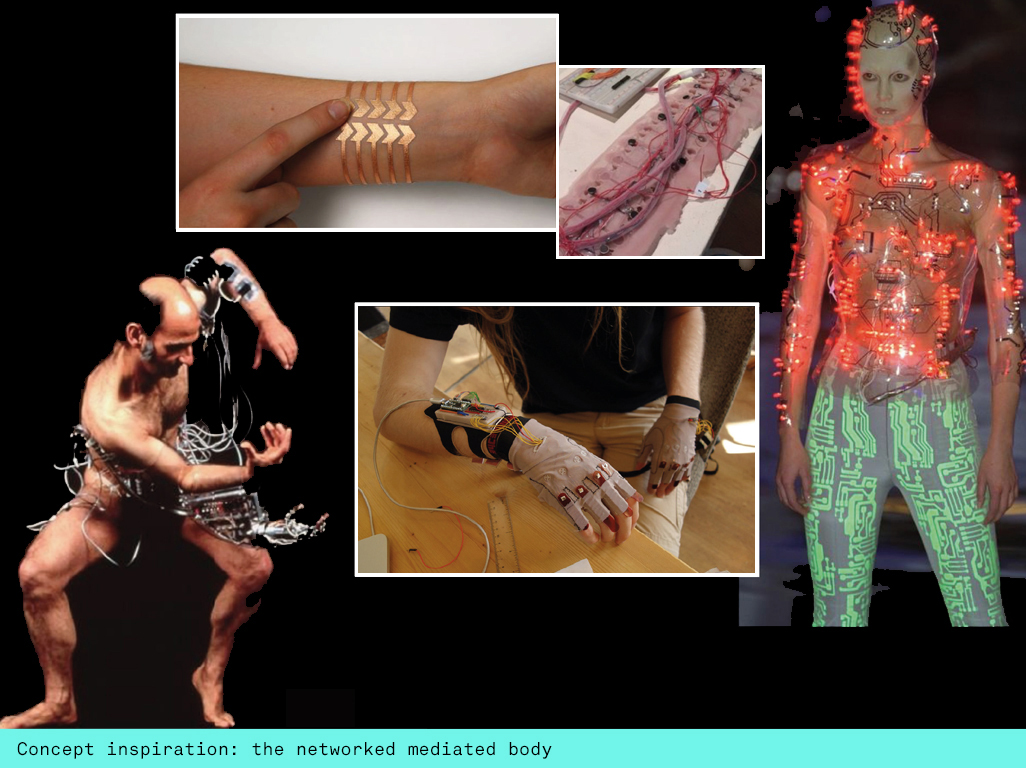
In my previous theory project, Post-Anthropocene Symbiotic Assemblages, I looked at how we might be affected by the interactive communication systems that now increasingly manage our lives. Katherine Hayles examines the ‘cognitive nonconscious’, describing communication and distribution networks between sensors, actuators, processors and storage media: the complex traffic systems, environmental monitoring systems, surveillance and communication satellites, the medical machineries interpreting information, but also increasingly our daily operations with computers, their digital search engines and language learning algorithms. The smartphone and health wearables made this technological interconnectedness mainstream. We are wired to machines via their apps and updates. These ‘complex symbiotic relationships’ with technical systems can bring about neurological changes in the our mind bodies, forming malleable bonds, adapting information as it’s collected, making it personal and storing it for possible later interactions. (Hayles, Unthought, p119)
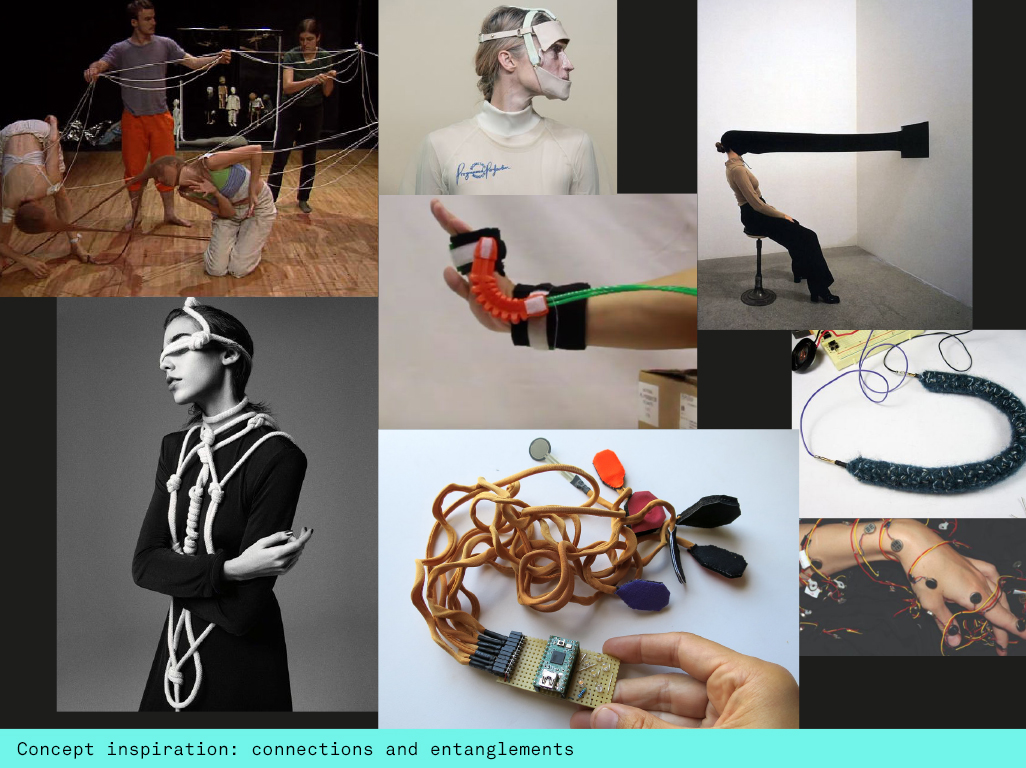
Susan Kozel highlights some of the issues around the technologization of our bodies in her book Closer (MIT, 2008). She points towards our seduction with these systems lured by their potential in terms of the expansion of our senses before highlighting the control and surveillance aspects that come with them particularly when emerging technologies will enter our bodies converging with skin and flesh. I’m interested in the human body as an interaction medium and was drawn to some of her explorations around control and the effects of technologies on the human body.
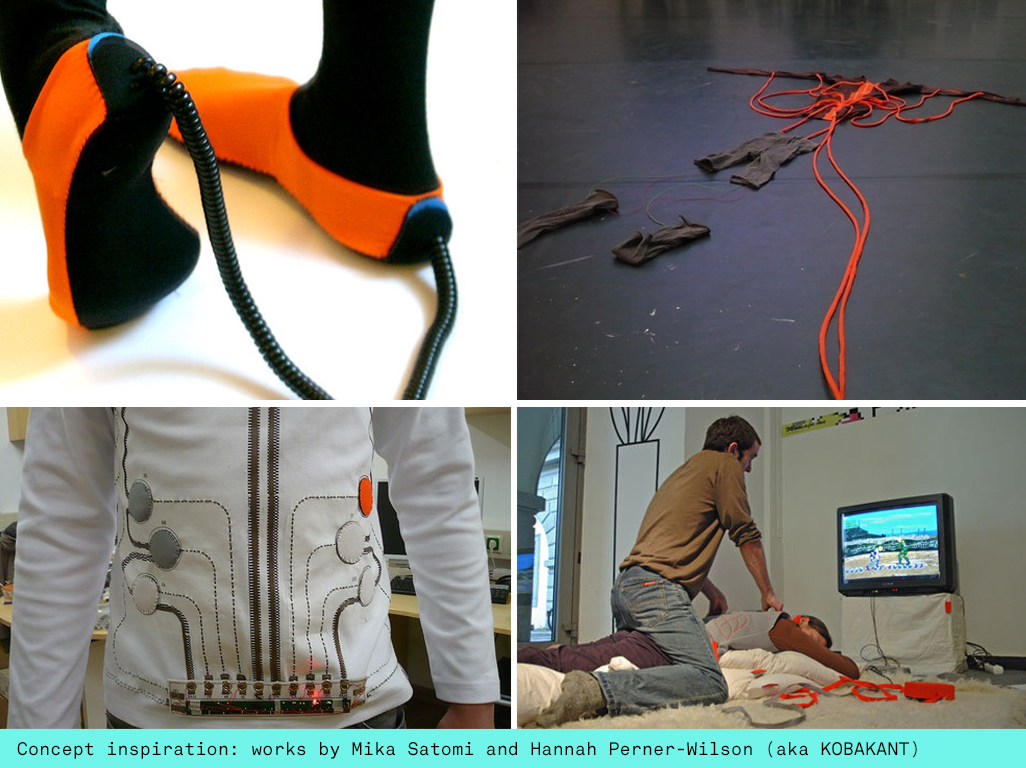
Hannah Perner Wilson and Mika Satomi aka Kobakant have been a big inspiration to me for all my wearables. They have a brilliant resource of approaches, projects and materials on their website. Some of their early works use the human body as game controllers or puppets, incorporating wired connections and capacitive touch. I liked the simplicity of a touch mechanism and the idea of creating very visible connections between my subjects. I wanted the installation to have a medical futuristic feel, with the wearables featuring exposed electronics, wires where there are normally aren't any to show clear connections between the data flow.
System Design
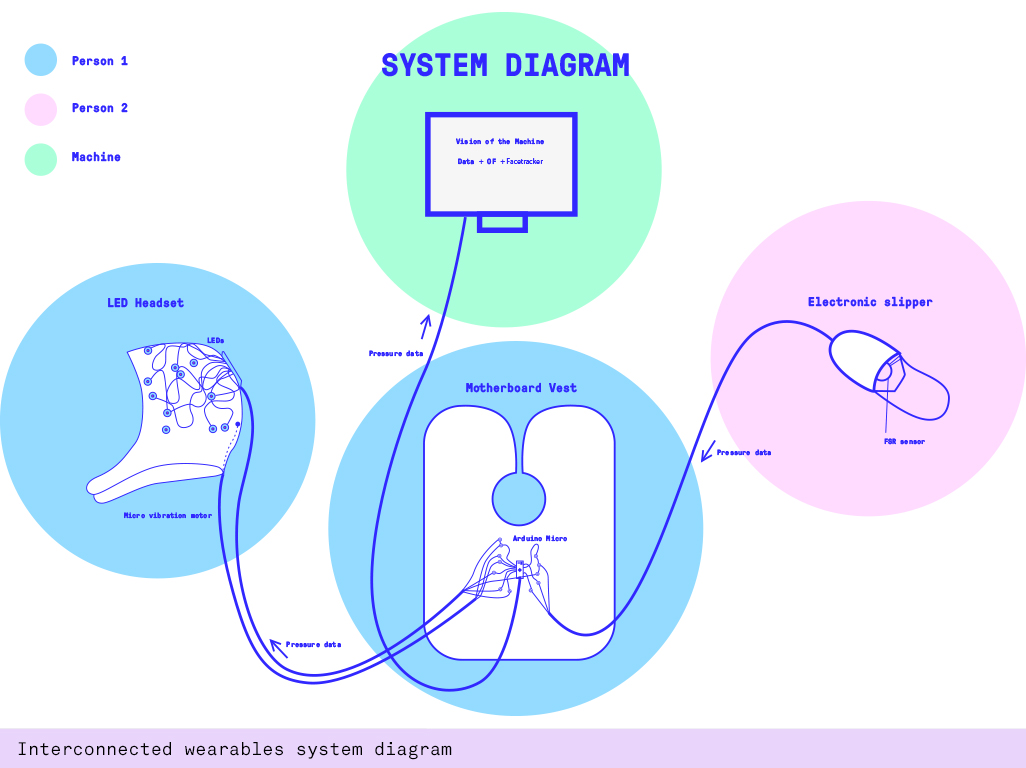
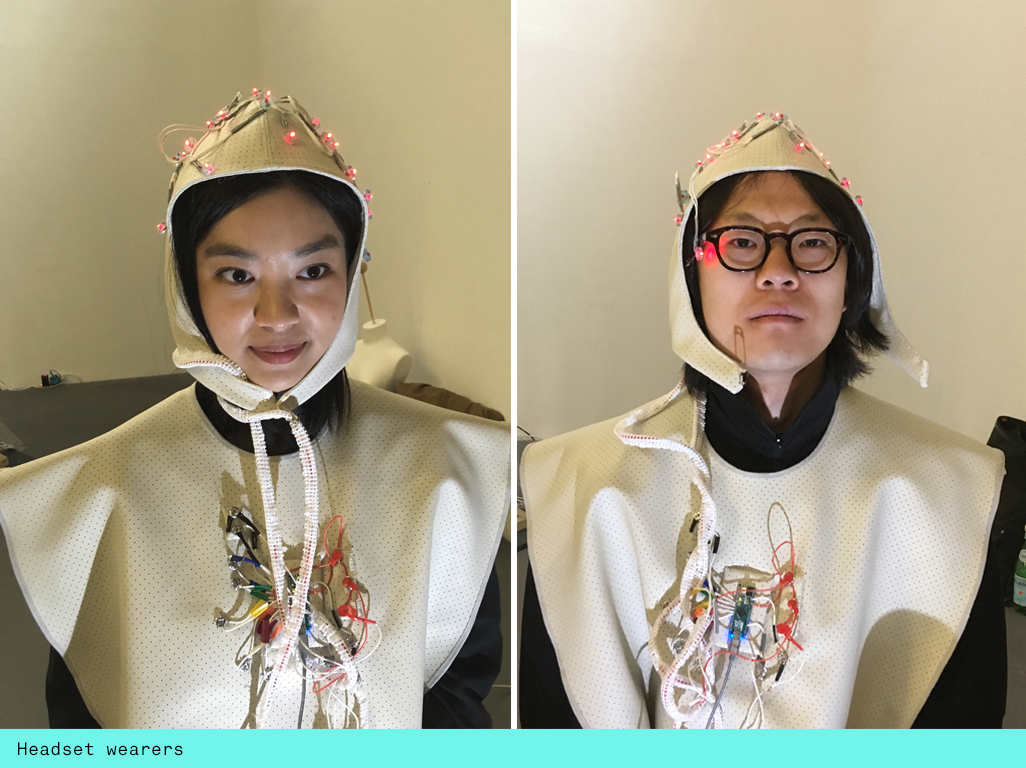
Before moving onto the electronics I began by designing my system to get a better overview of all the different tasks I had to complete. It is very easy to overcomplicate interactions but for this artwork I wanted the audience (and participants) to understand which actions led to which feedback, so I needed to keep it simple. There were 4 components: a speculative headset that mimicked brain technology by lighting up different LEDs, a slipper that contained a sensor, a vest that held all the electronics and an openFrameworks application that would bring in the data in a mixed reality application.
Electronics
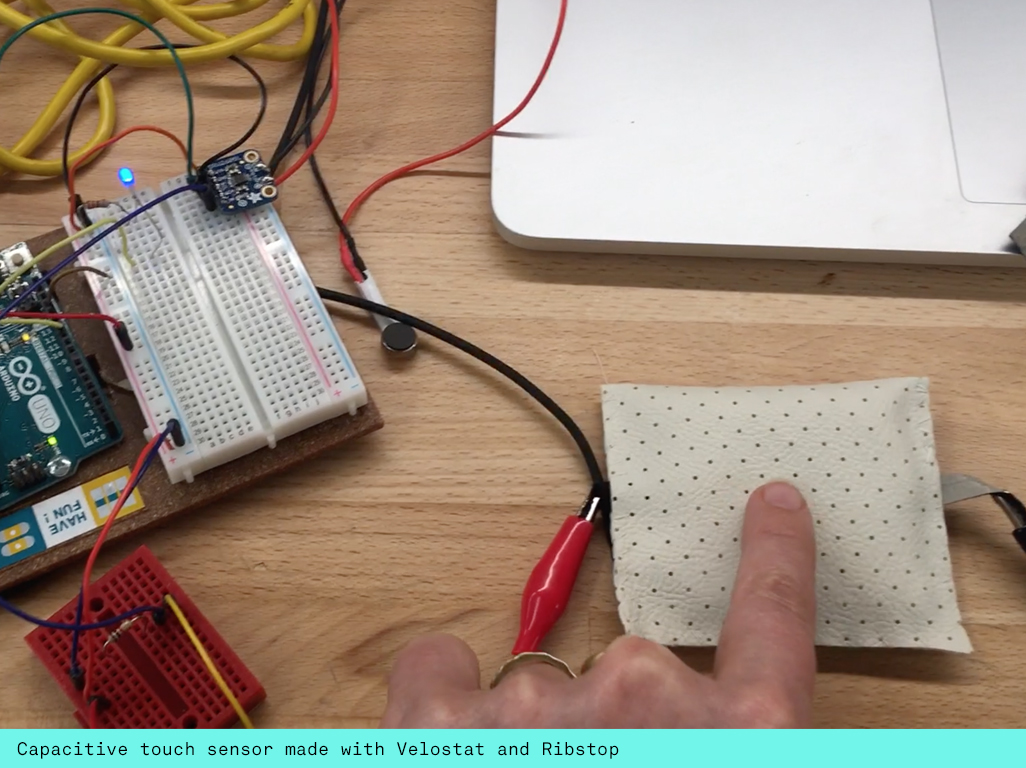
I started by exploring different capacitive sensors, making these myself with Velostat following Hannah Perner Wilson's instructables tutorials. Whilst I loved the high sensitivity of the combination of Velostat and Ribstop, I found the data that I was receiving in the serial monitor not very clear to decipher. I wondered whether their interaction potential would be more suitable to a music application.
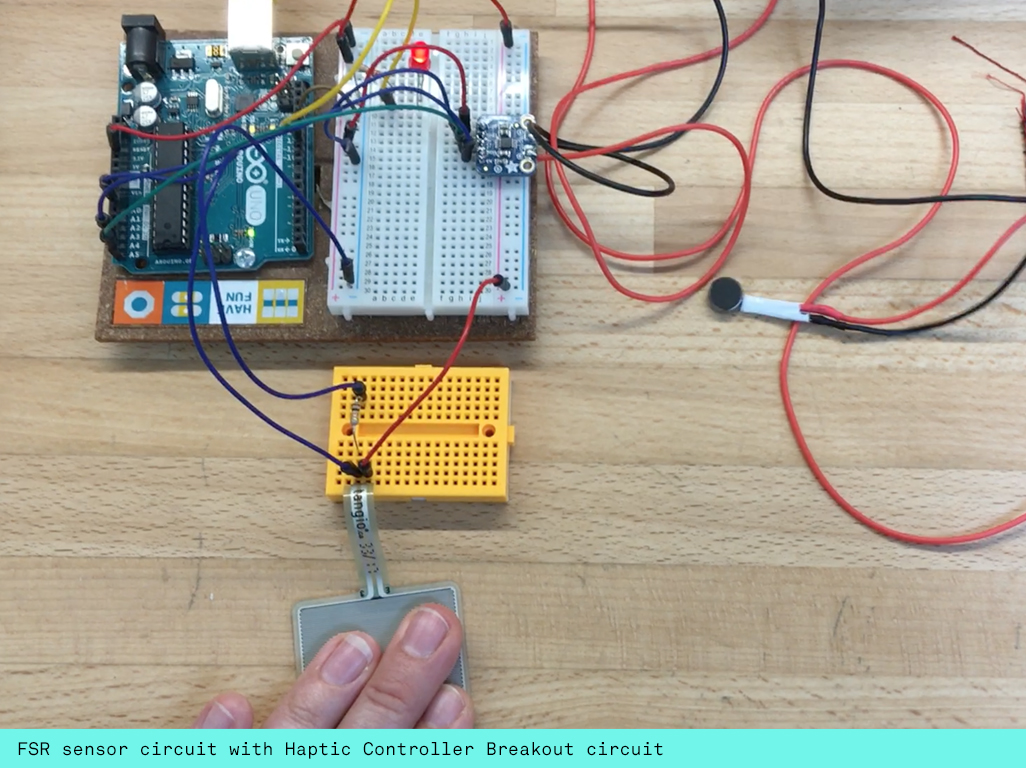
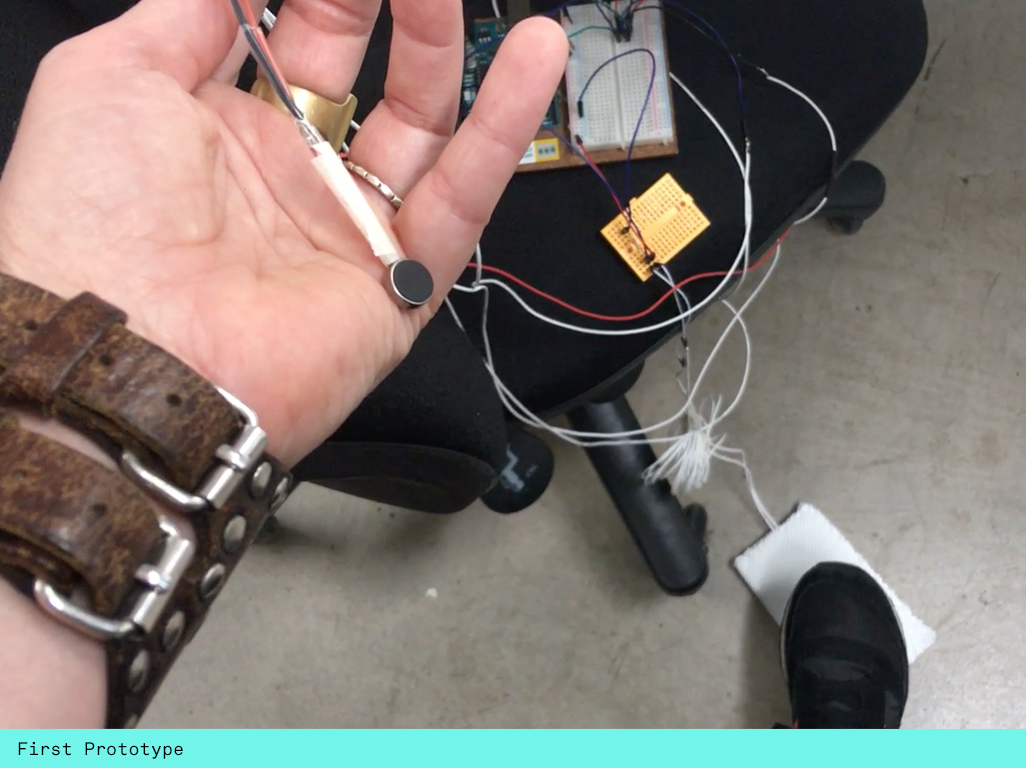
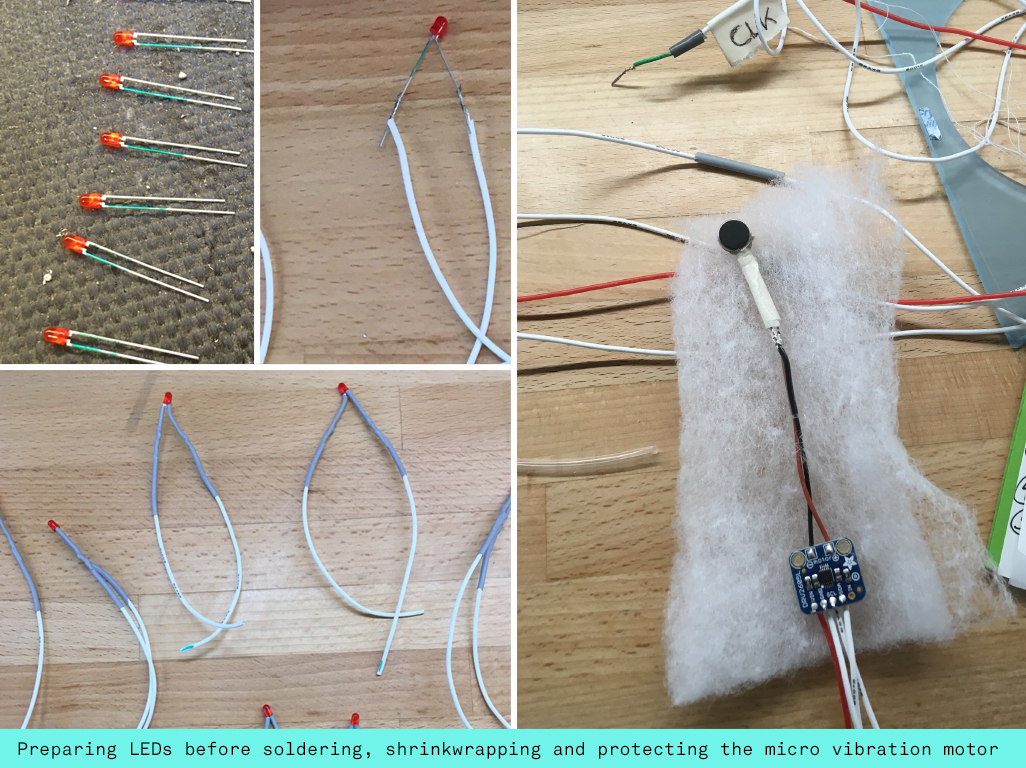
I then decided to use a FSR sensor (Force Sensitive Resistor) and bought the biggest one that I could find so it would be suitable to use for the ball of the foot. It could detect a range from 10g - 10kg. To fit within this range with any sophistication was still a struggle by using one's foot but this challenge fitted the needs of my application. The FSR sensor gave me very clear values in the serial monitor, generally describing a range from around 20 - 1070. I wanted the pressure to light up LEDs and began to build a simple circuit with the FSR sensor lighting up just one LED. I also wanted there to be some feedback within the headset so the person wearing it could sense when the person with the shoe would apply pressure. For this I used the Adafruit DRV2605L Haptic Controller Breakout which accommodates up to 123 different patterns to be programmed on a little mini vibration motor. I made my first prototype including the FSR sensor, one LED and the Haptic Controller Breakout.
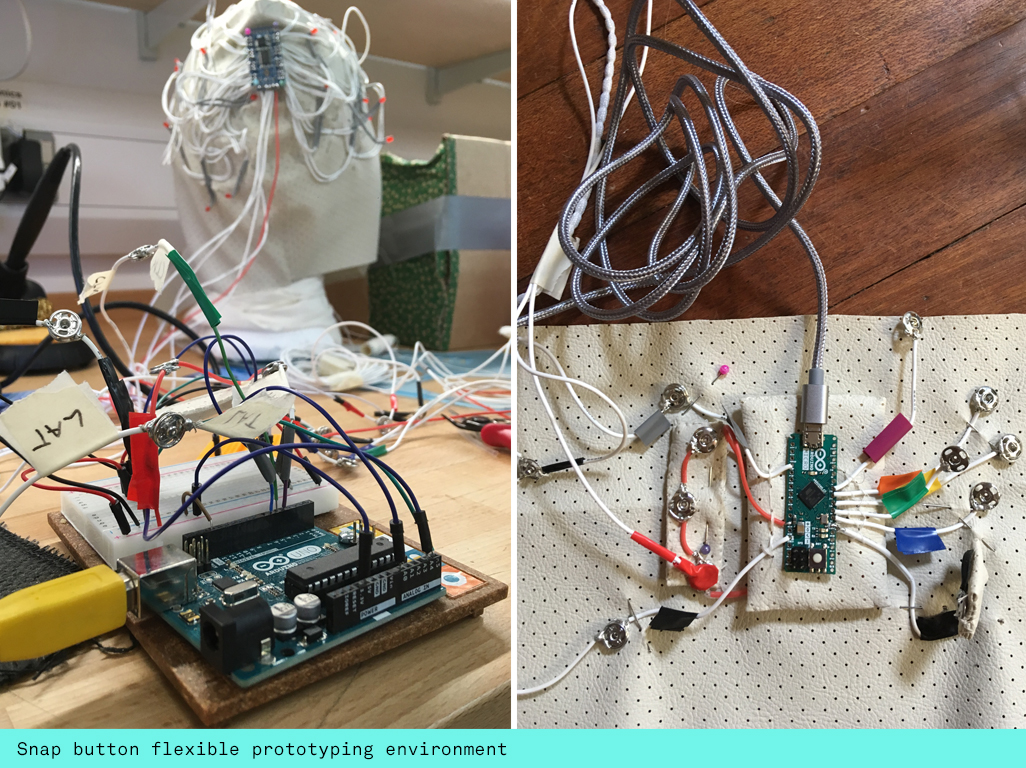
After completing my simple breadboard prototype I was ready to move to the next stage. For my headset I used the TLC 5947 LED driver board that allows you to individually address all it's 24 LED pins. I used this in a previous project (Can You Wear Your Mother) on a garment and knew how to work with it. At this point I made my Fritzing Wiring Diagram so I knew exactly what to do at every step of assembling the electronics.

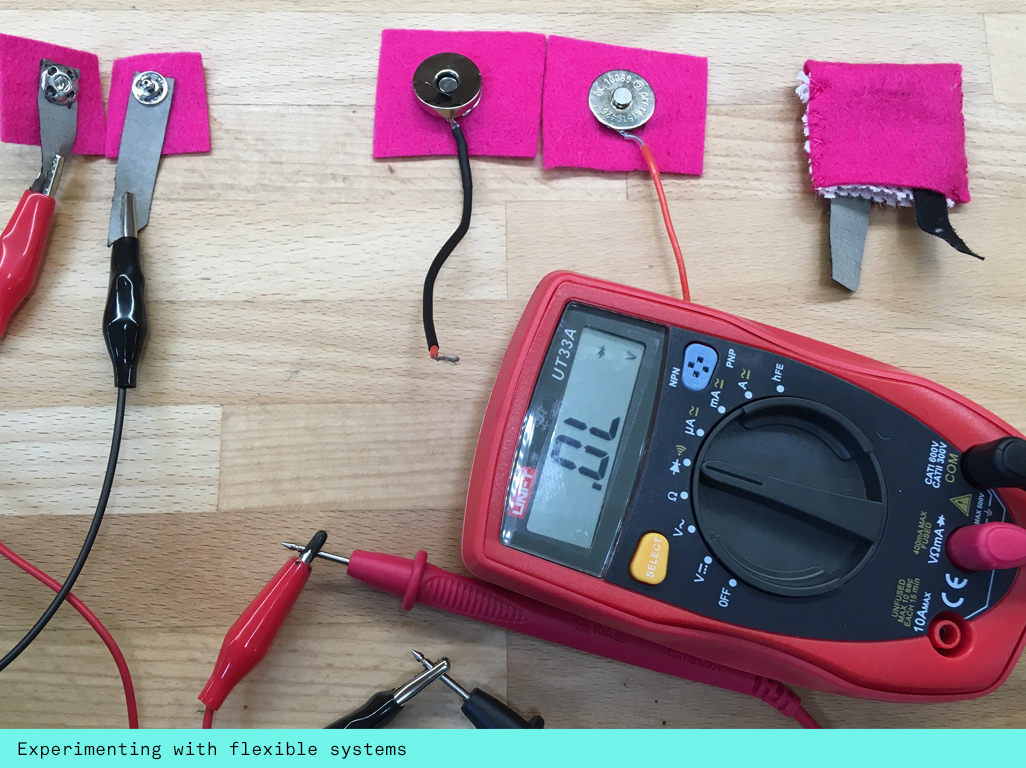
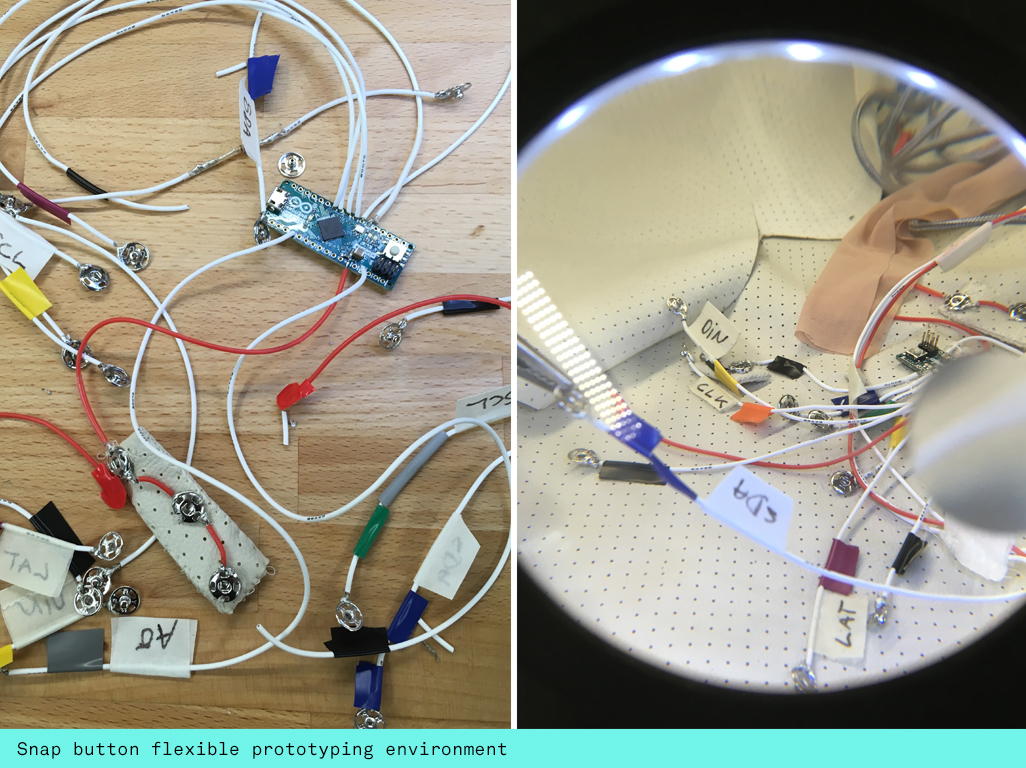
I wanted to keep a semi prototyping environment that allowed me to isolate components for testing. There are many connector options to fix to electronic boards but I wanted to explore magnetic and snap buttons. The magnetic ones were too heavy for my wires so I settled on the snap ones that I soldered to the silicon wires coming out of my arduino micro. I also created another set with jumper wires so I could connect my components to bread board prototyping setups. It takes a little skill to solder the silicon wires to the snap buttons. I normally looped the wires strands around before soldering them, adding lots of solder also on the bit closest to the silicon wrapping. In an ideal scenario you would want to cover the whole connection with hot glue or bespoke pieces of shrinkwrap to make sure the wires don't break off at these weakest points. I added electric tape that seemed a good half way house for protection. I wouldn't recommend this approach for lasting durability though. Yet I was amazed how long these connections lasted, I only had to solder one of them again after nearly 3 week continous use and the garment being used on many people throughout the installation.
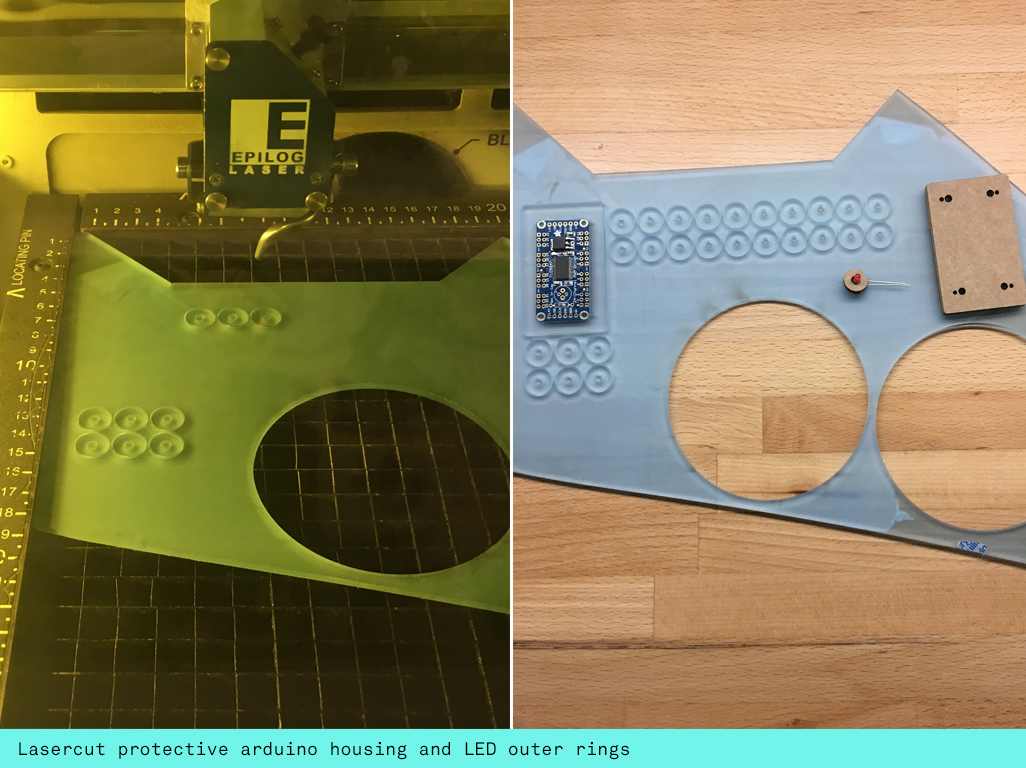
I began by preparing 24 red mini LEDs marking their long (anode) leg with a sharpie pen, then wrapping silicon wire around marking the positive silicon wire again before soldering it. I used grey shrinkwrap with my white silicon wire, which gave it a medical look that I was after. Before I was soldering all the wires to the TLC 5947 I traced around the board and designed my acrylic protective housing. Due to their fragile nature its important that the wires coming out of the pins on the board aren't subjected to any sort of movement - I hotglued some of them. Also for this reason I designed my housing to be 1cm wider than the board, including holes for screws and also for stitches to fasten the whole thing to the headset. Once I drew it up in Illustrator I lasercut it out of a cut-off frosted pale blue acrylic that I found. At this point I also cut 24 circles that would fit around my LEDs to mimick a brain scan headset.
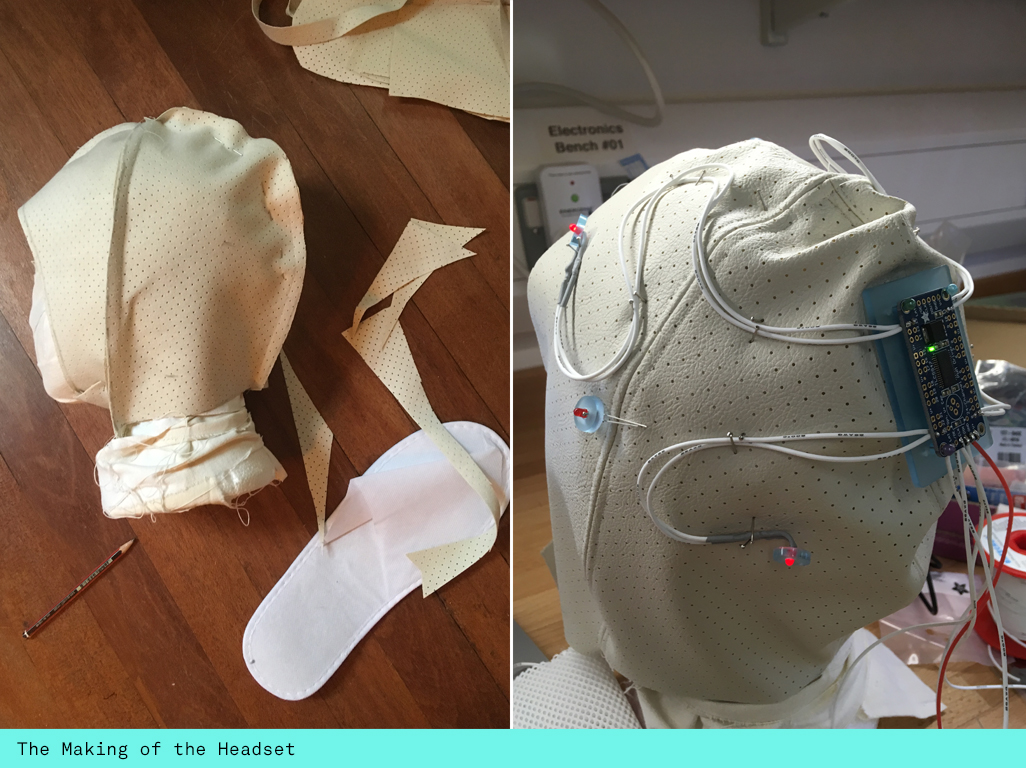
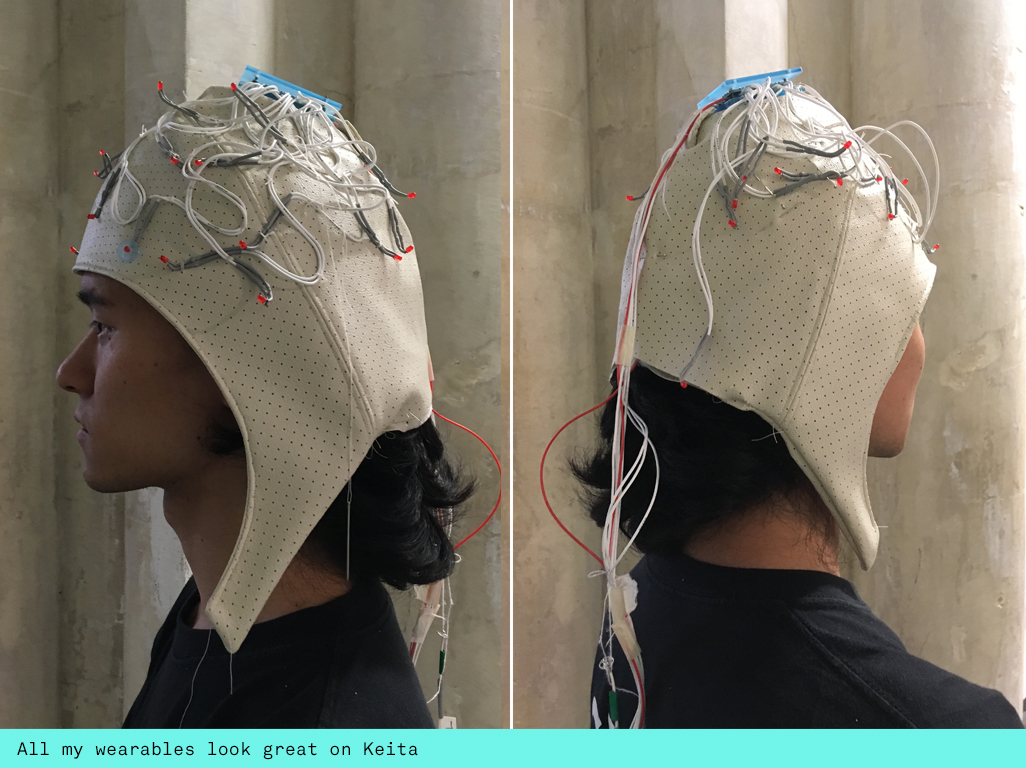
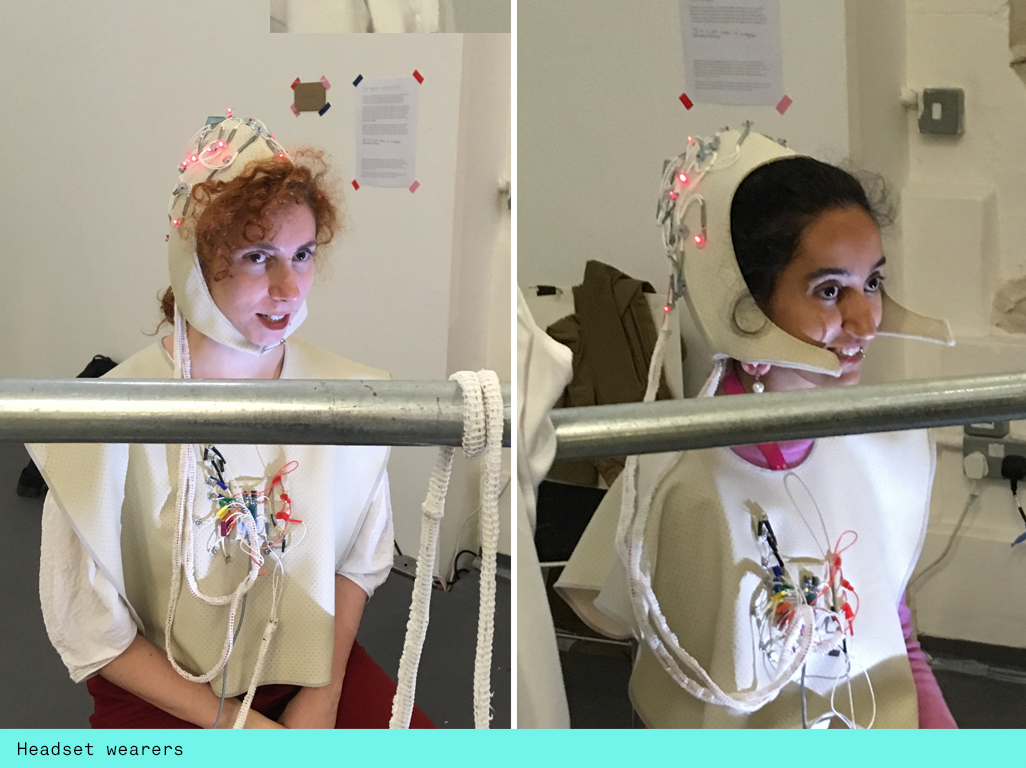
Next I made the headset. I found some great off-white vinyl fabric with tiny holes in it, almost mimicking breadboards. I made the pattern for the headset on a styrofoam head, modelling it on images of brain scan masks. To make it quite solid I created an inner and out shape and then sewed them together, leaving a small hole at the back to fit my little micro vibration motor and haptic controller board. I wrapped the components in protective padding and then tucked them to the back. Next I fixed my LED drive board and handstitched all the LED's on.
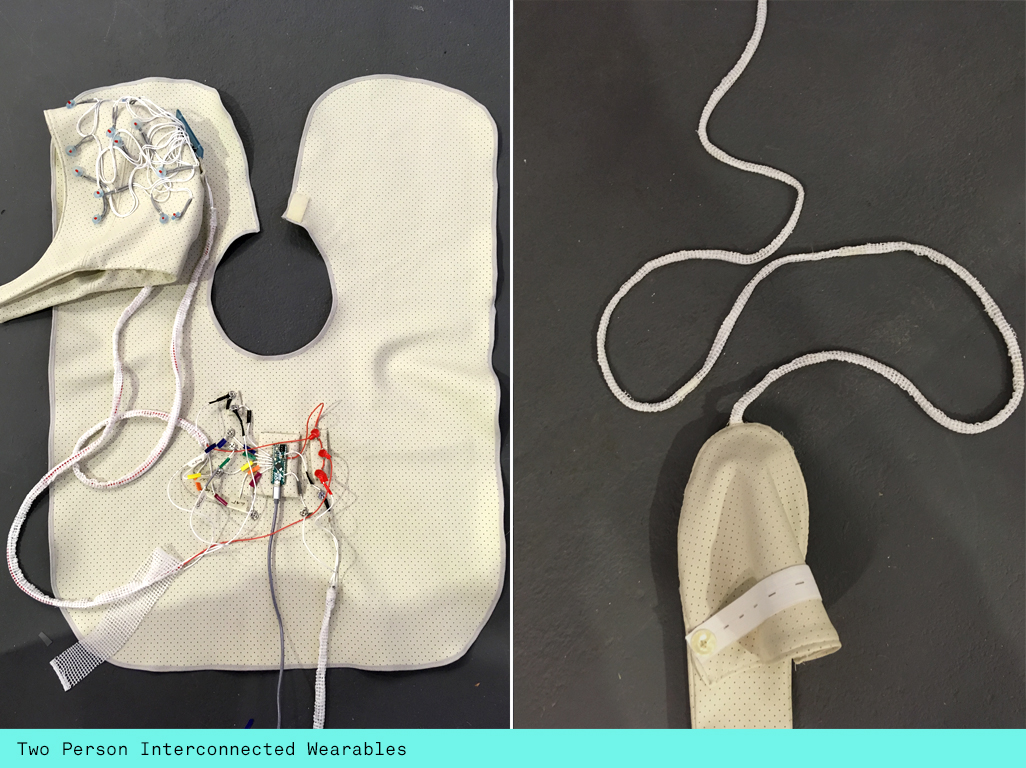
Then I made the electronic slipper, modelling it on a generic throwaway hotel slipper that I had found on holiday just before the project. I soldered the FSR sensor to 1.5m long silicon wires, making sure not to burn the plastic housing and then wrapped it in neoprene stitching all around. Then I tucked it into my slipper making sure the wires were coming out of the front of the toe.
In the Arduino code I mapped the FSR data to five different thresholds and then select different states with one of them being an off state. Then I made these states switch on the different components. I created an array for the 24 pins on the LED driver board and the same for the DVR Haptic controller settings. The Arduino would then switch on sections of six LEDs depending on the state and likewise the different vibration patterns. I then also passed the 'state' and 'FSR' variables to OpenFrameworks.
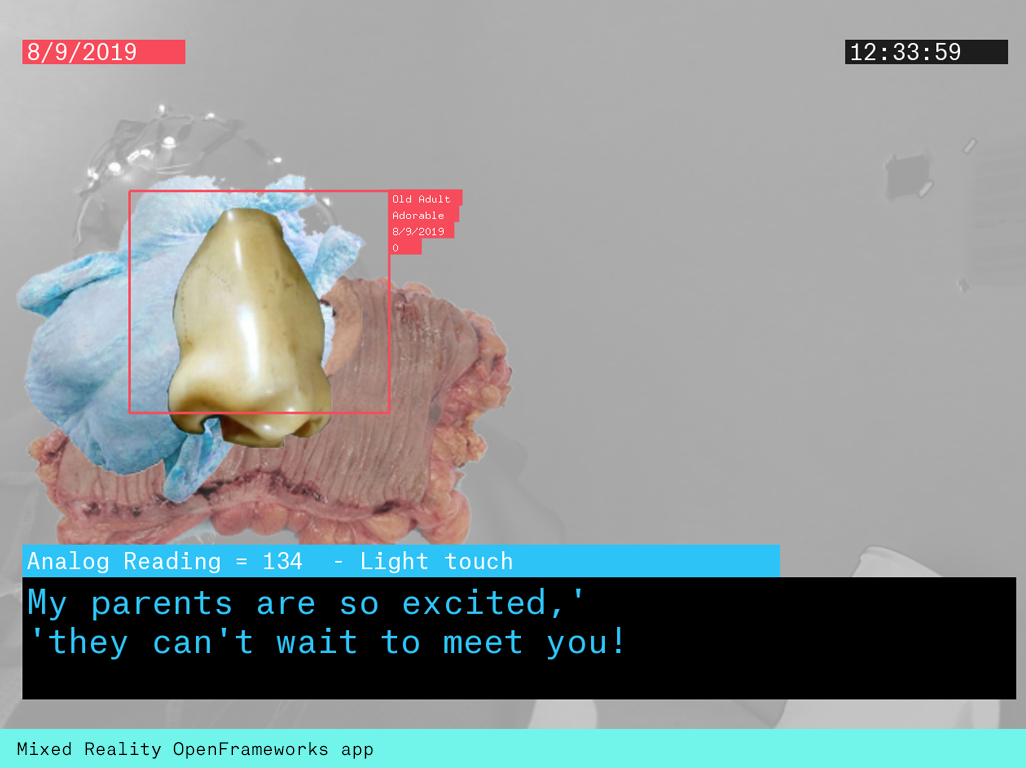
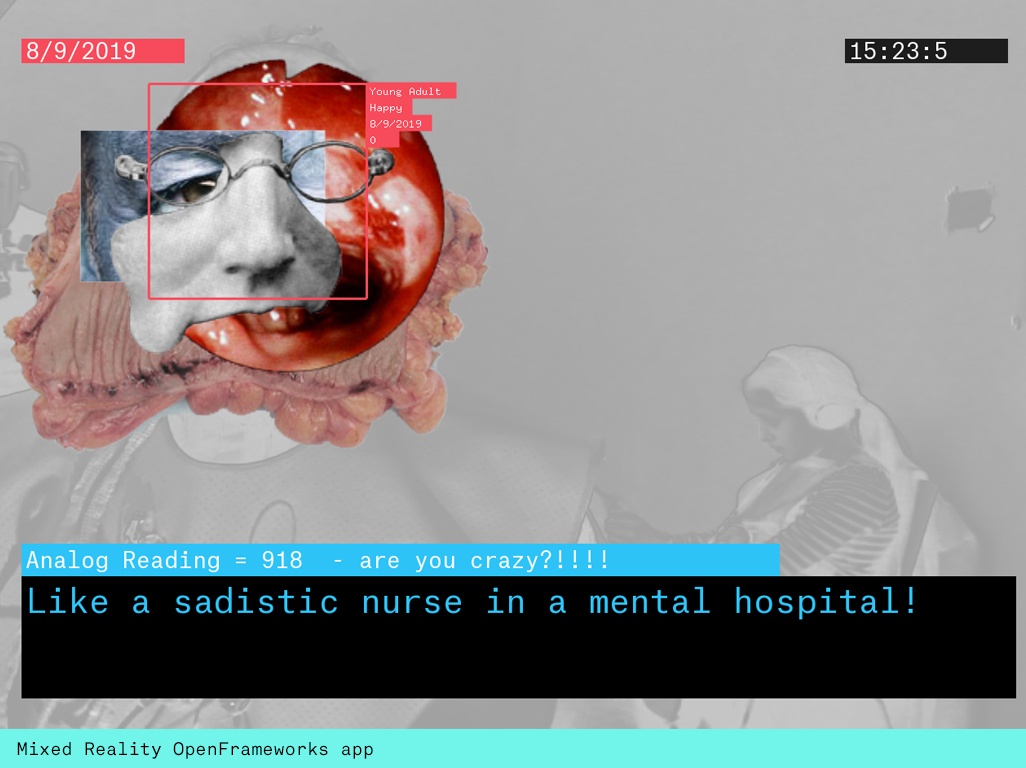
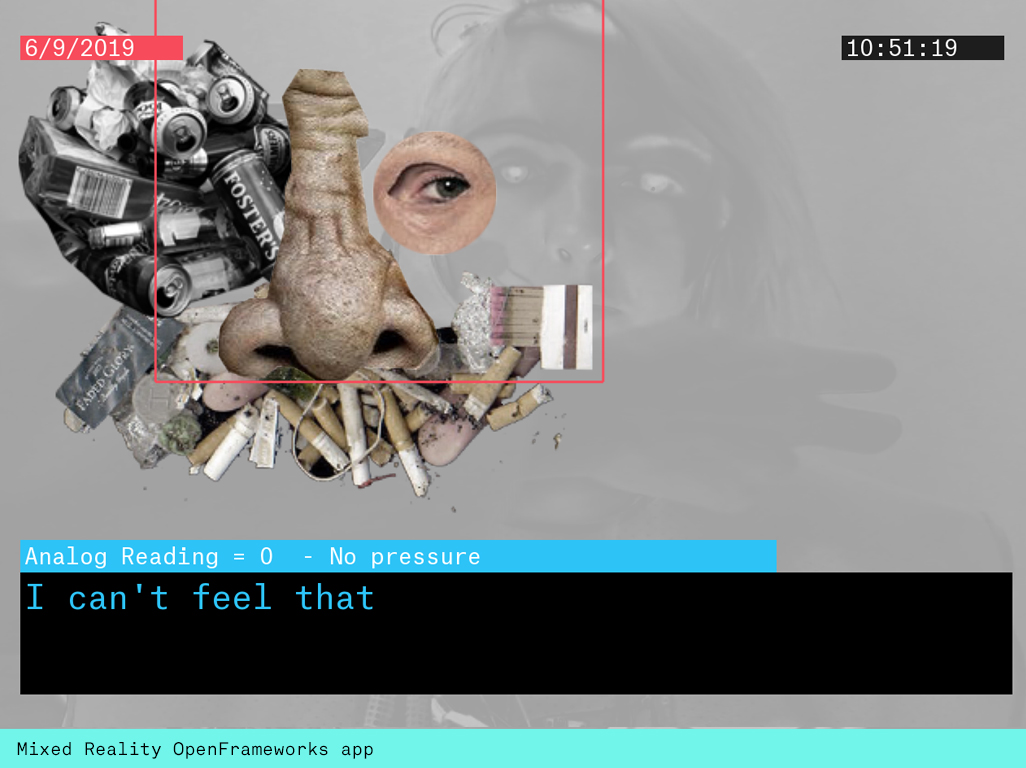
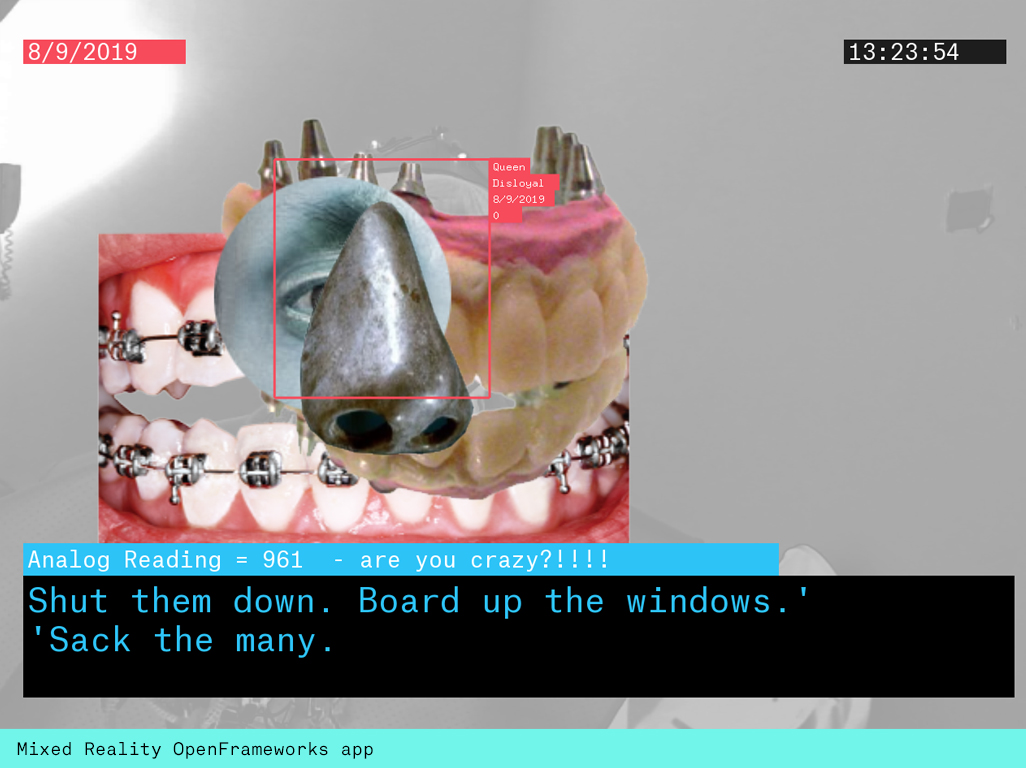
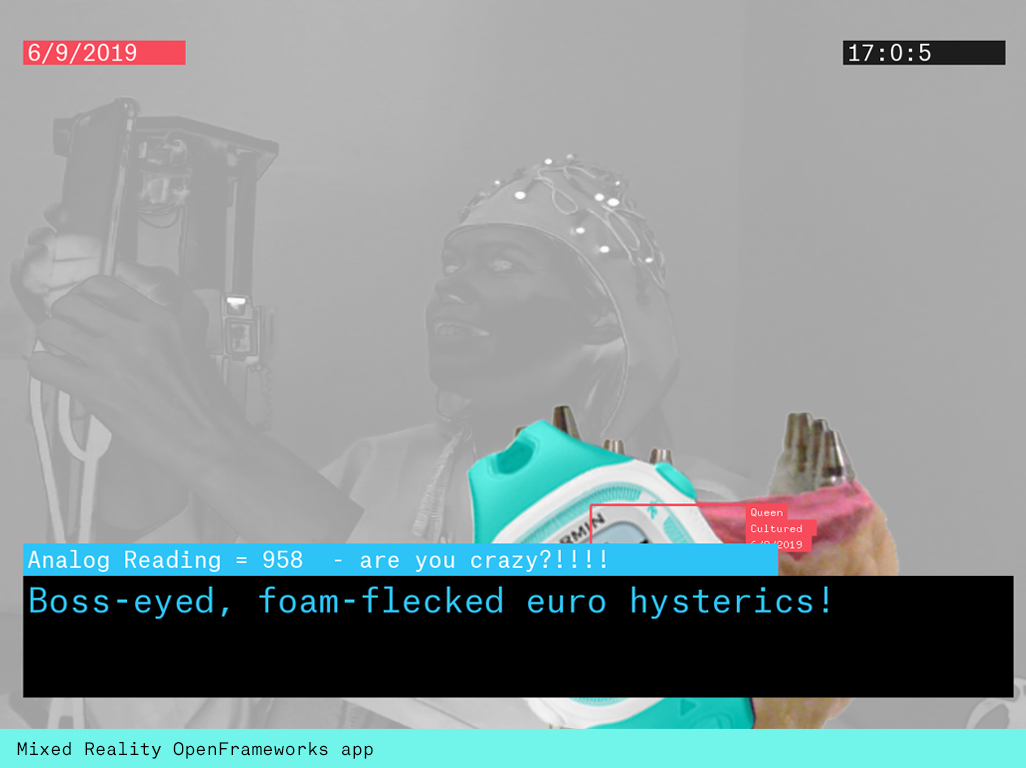
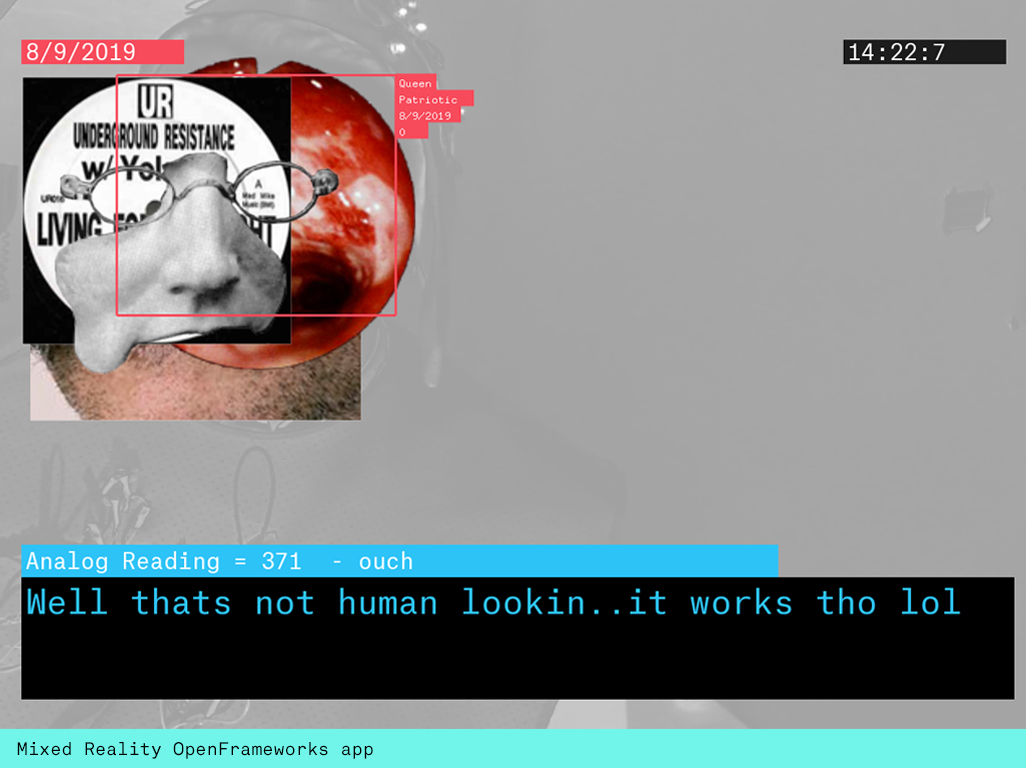
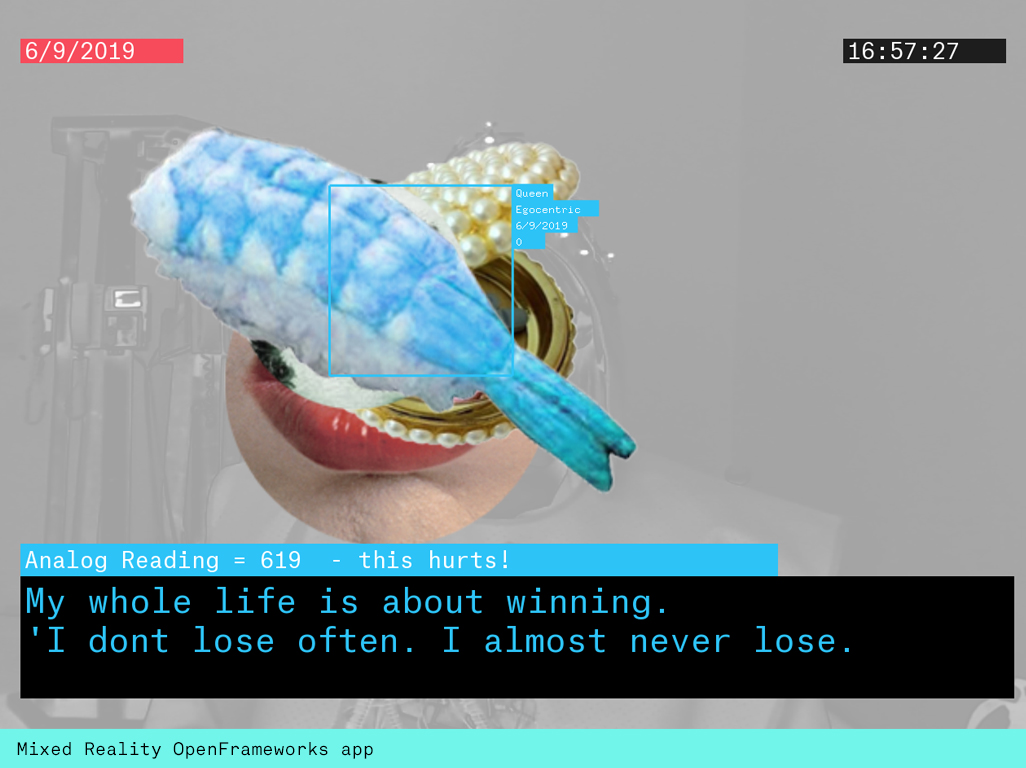
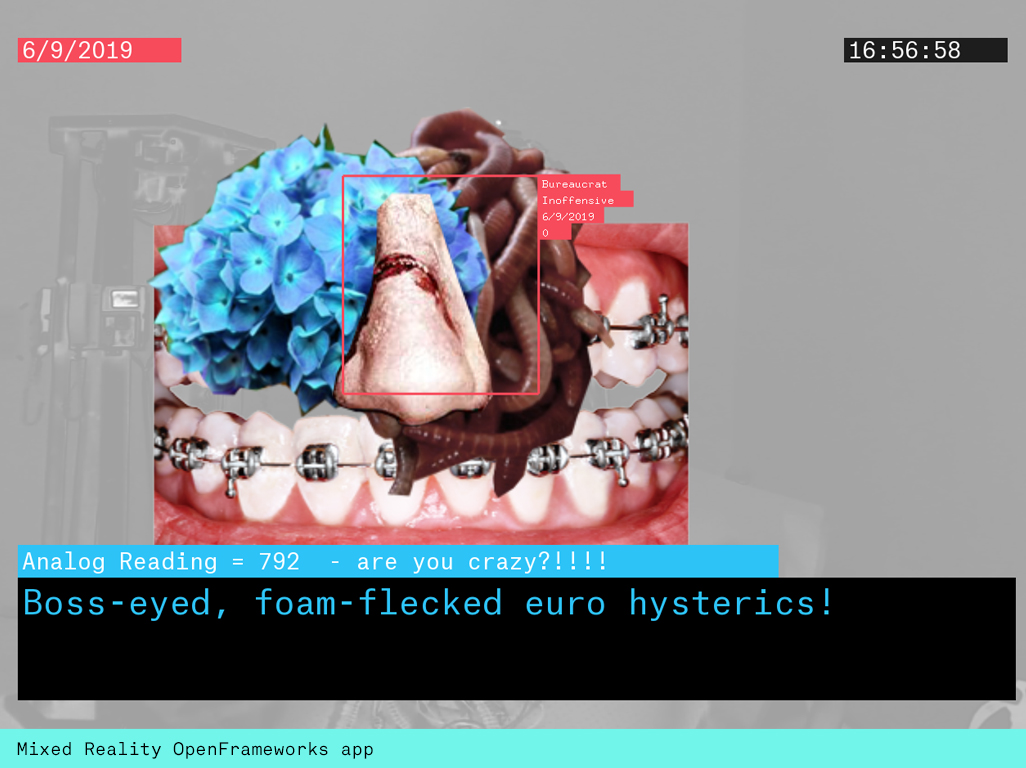
The Computer Vision App
I based the app on two of my previous projects: The Face Casino which maskes a user's face with random Collage Components and The Metaplasm which used accelerometer data to move a random image trail. This app was also based on Kyle McDonald's FaceTracker polyline example and pulled in random images that I prepared in photoshop as pngs and mapped these to the facial coordinates of the person sitting down. I then created several text fields to bring in system information such as the date, time and the analog values of the FSR data. I thresholded the analog data in Arduino and mapped them to different states. Then I brought in the state and the FSR values as two different strings. I did this because I wanted to have the states decide which messages to display and I also wanted to display their actual analog value. Then I created several vectors with my messages and linked them to the different states making the app select these based on the states it was passed from the Arduino. I picked these from bot conversations, AI lyrics generators and Donald Trumps and Katie Hopkin's twitter feeds. The montages the app would compile were truly grotesque and hopefully expressive enough of the data assemblages that exist of all of us. Our own data seen as a composition would be similarily out of context, misleading if not terrifying.
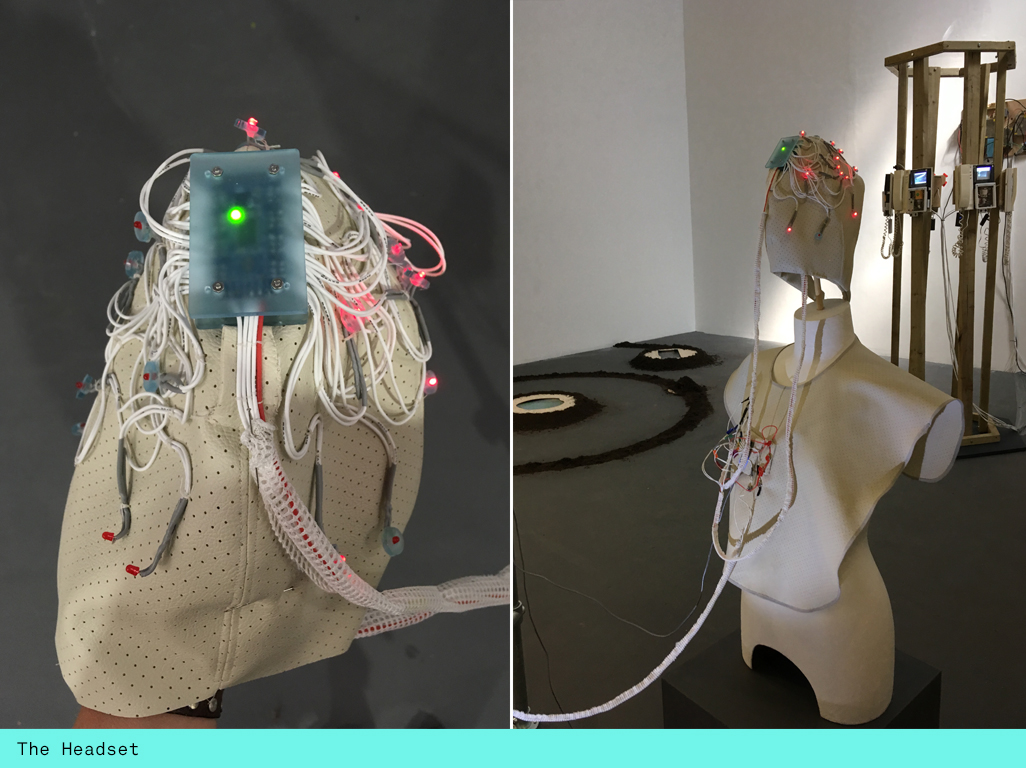
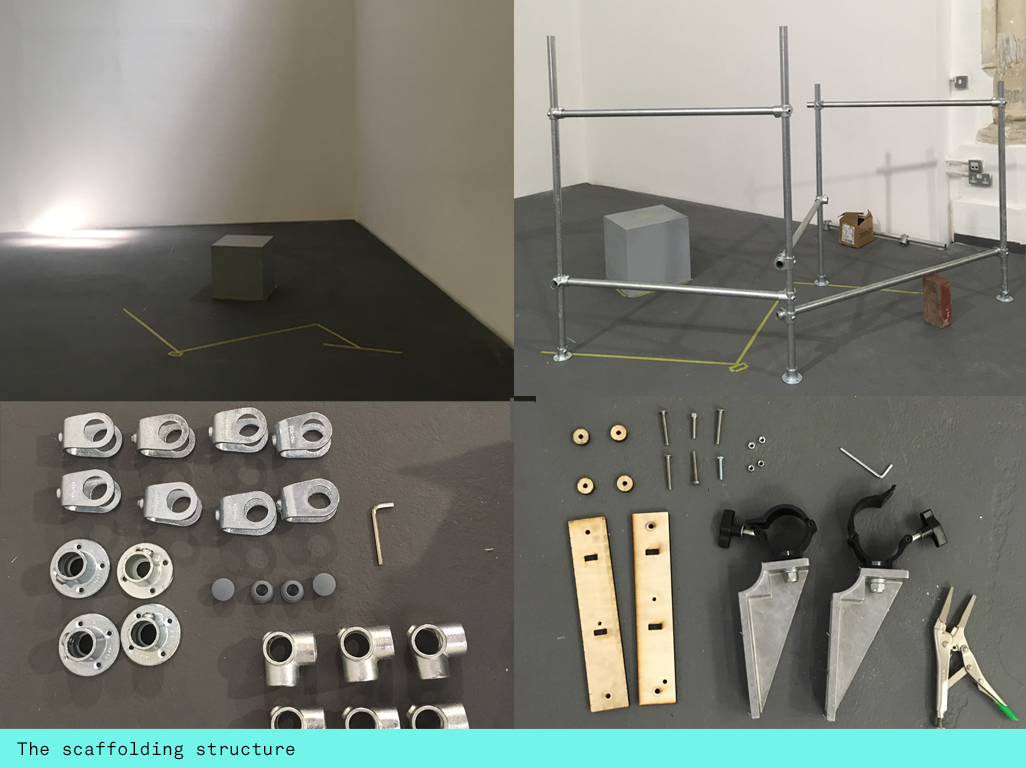
The Installation
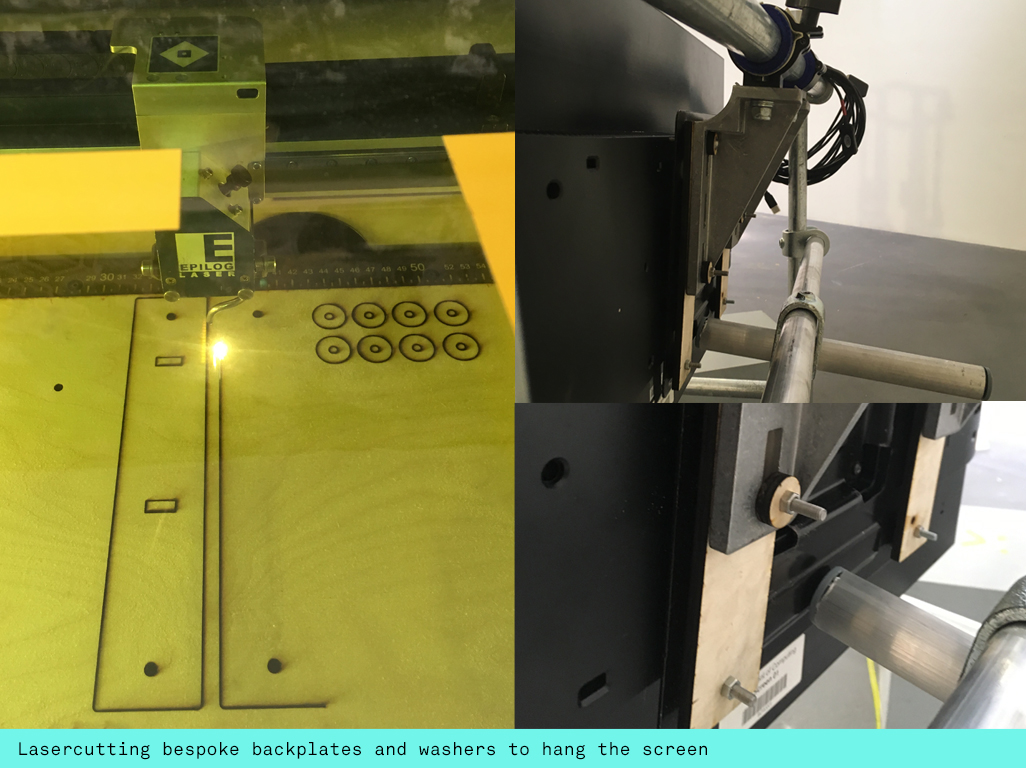
I designed a scaffolding structure to hold my 30inch Samsung screen and create a barrier between the two person wearable. The contraption needed to be stable and yet form an interesting shape. I decided to create a zig zag composition and to decide what lengths I needed I marked this out with tape on the floor where my exhibit would be placed. Then I ordered several 1m lengths and a few longer uprights and cross pieces of handrail as it is thinner and more elegant than normal scaffolding. The scaffolding comes with an allen key and was really easy to assemble. My biggest challenge was hanging the 30inch Samsung screen which is really heavy. For this I used some triangular clamps that Pete pointed me towards as they use them on the rig in G05. I then needed to design and laser cut bespoke back plates and washers to help fit the tube clamp with the back plate of the monitor. I then used cut up yoga matts to pad out the handrail so the scaffolding clamps would fit on and I also added another cut off handrail piece to stop the screen from tilting backwards. Finally to make the structure stable I drilled and screwed it into the floor.
Future development
I had initially planned to integrate a pulse sensor and would definitely want to add this coming out of the headset and attaching it to the ear lobe of the wearer. Then I would want to feed the pulse data into the computer vision application to inform the selection of images masking the face. I also would like to use machine learning in combination with the computer vision app, making it select images based on personality or using deep learning together with the pulse rate data. There is also scope for different touch and maybe even stretch sensors as inputs. Ultimately the headset could respond to a whole variety of inputs and also use other electronics as outputs. I am keen to explore this territory much further in the future.
Self evaluation
I'm really pleased with the end result. There were some data latency issues though that I would definitely want to resolve going forward. I spoke to a few technologists about them and there could be many reasons such as hidden buffers on the openFrameworks side or noise from the fabric covered silicon wires that were looped around the scaffolding. I will carry on investigating these bugs. It didn't seem to matter much to the audience though.
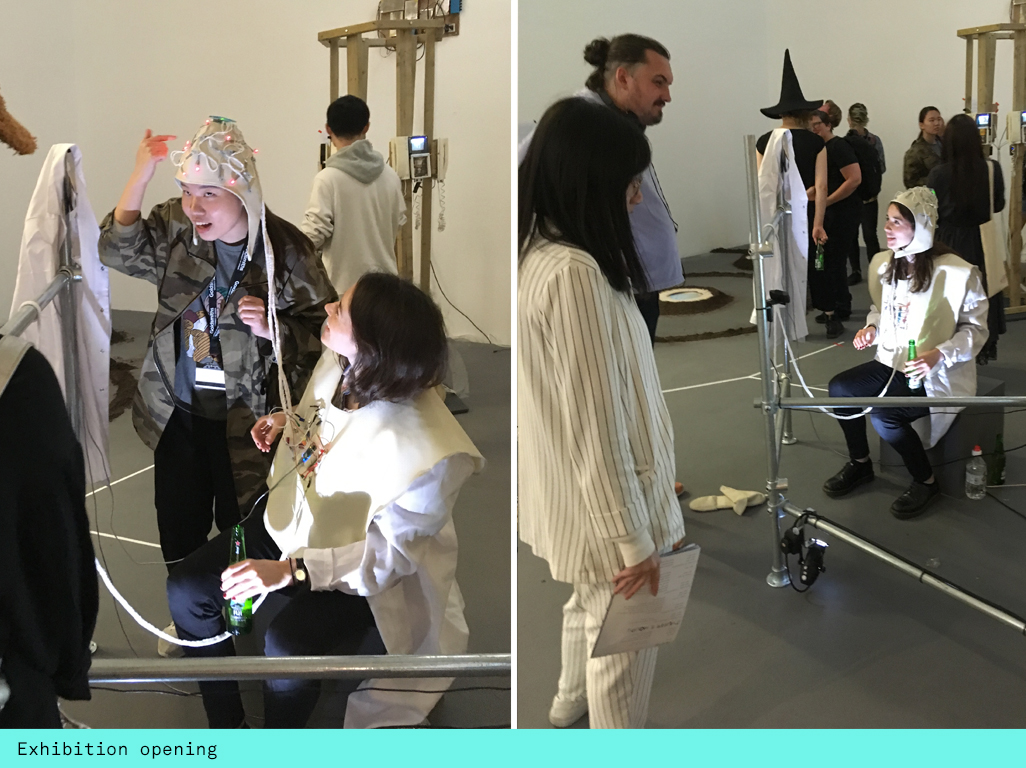
Previously I was advised to hire actors for my installations to bring them to life. I decided to experiment with this concept and hired Megan from the undergrads for the opening night. She did a fantastic job wearing the headset, operating the installation and engaging with the audience whilst I was able to explain the piece and socialise. Interestingly though the whole installation only really came to life when I allowed visitors to try on the wearables on the following three days. I decided that this experiential aspect is actually a big part of my artworks. I enjoy the theatre and staging aspects of this as well as witnessing the different feedback from the wearers. Allowing for and designing for audience participation is probably the biggest insight for me going forward.
References
N. Katherine Hayles, Unthought: The Power of the Cognitive Nonconscious (University of Chicago Press 2017)
Susan Kozel, Closer (MIT Press 2008) https://mitpress.mit.edu/books/closer
Patricia Ticineto Clough, The Autoaffection of the Brain and the Nonhuman Unconscious
Lucy Suchman, Human-Machine Reconfigurations: Plans and Situated Actions
Richard Szeliski, Computer Vision: Algorithms and Applications
Labs.rs Invisible Infrastructures : The Exciting life of Internet Packet
Kobakant https://www.kobakant.at
Panja Göbel, Post-Anthropocene Symbiotic Assemblages
Panja Göbel, Can you wear your mother
Panja Göbel, The Paw
Panja Göbel, Face casino
Panja Göbel, The Metaplasm
Kyle Mc Donald Blogpost on Polylines
Haptic Controller Breakout DRV2605L