B o T
Childhood...whether it was ideal or haunted, whether we feel nostalgic about it or we want to forget it. There's always a plane flying us back there, so that we can resolve or evaluate things, make peace with it or find shelter... This project is about a music box that is turned by a stepper motor, playing Brian Eno's "Music for Airports 1:1" melody.
produced by: Petros Veloussis
Inspiration & Concept
The inspiration on that came from my love for music boxes plus other similar instruments with nostalgic and childlike sounds, which seem to call something from our past and where we seem to be very emotionally responsive when we hear them. Additionally, the "Music for Airports" album's quiet and contemplative atmosphere, as well as the variety of emotions I feel every time I listen to it and the sense of slipping in and out of it. A year ago, I believed it could be a very good match, combining what a music box and this tune represent, both musically and emotionally. In a symbolic manner, it could be like a flight back to our childhood, a connection with the child within us. The whole concept was finalised, when I recently came across Quadrature's project, where they used motors to control music boxes , but in a different fashion. http://http://www.creativeapplications.net/sound/12-sound-sequencer-comprised-of-12-digitally-controlled-music-boxes/
This idea is part of a bigger conception of having multiple instances of music boxes, playing the same melody as here and gradually getting them out of phase. What I liked on my project and motivated me, is the overall physicality in form and the variety of tasks required. Moreover, its deep symbolism and the inner emotional interaction it creates (to me at least) , as it can evoke a memory, an experience or a feeling.
Music Box
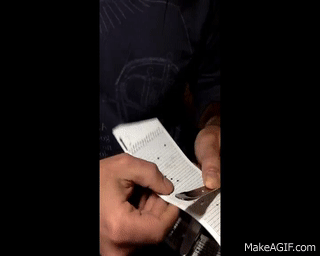
The type of music box I’m using can be fed with a roll of musical grid card paper on which, I had to punch holes which represent the notes of my melody. That could also be seen as a paper version of the MIDI editor somehow. As the paper with the holes is pulled by the music box mechanism, it triggers the appropriate tine that corresponds to the note I’d already programmed. To reach that stage, I initially had to use a music software to transcribe the melody in MIDI, in order to be straight forward and easy enough to punch the holes on the paper. This is a process that may take hours and requires that you are very well focused and accurate. One of the musical issues I came across, was that in the original record, the melody has long lasting notes and is played by instruments with sustained sounds. On the contrary, music boxes are capable of playnig only staccato and can't follow these aspects. This is the main reason that almost all the well known tunes we hear on music boxes, are re-arranged to fill the melody gaps with arpeggios and other clichés, thus making those melodies "music box friendly". In my case, I decided to leave the melody as it is on the record, as these gaps between the notes of the melody will be filled in the future by the scaled up version of the multiple music boxes.
Technical
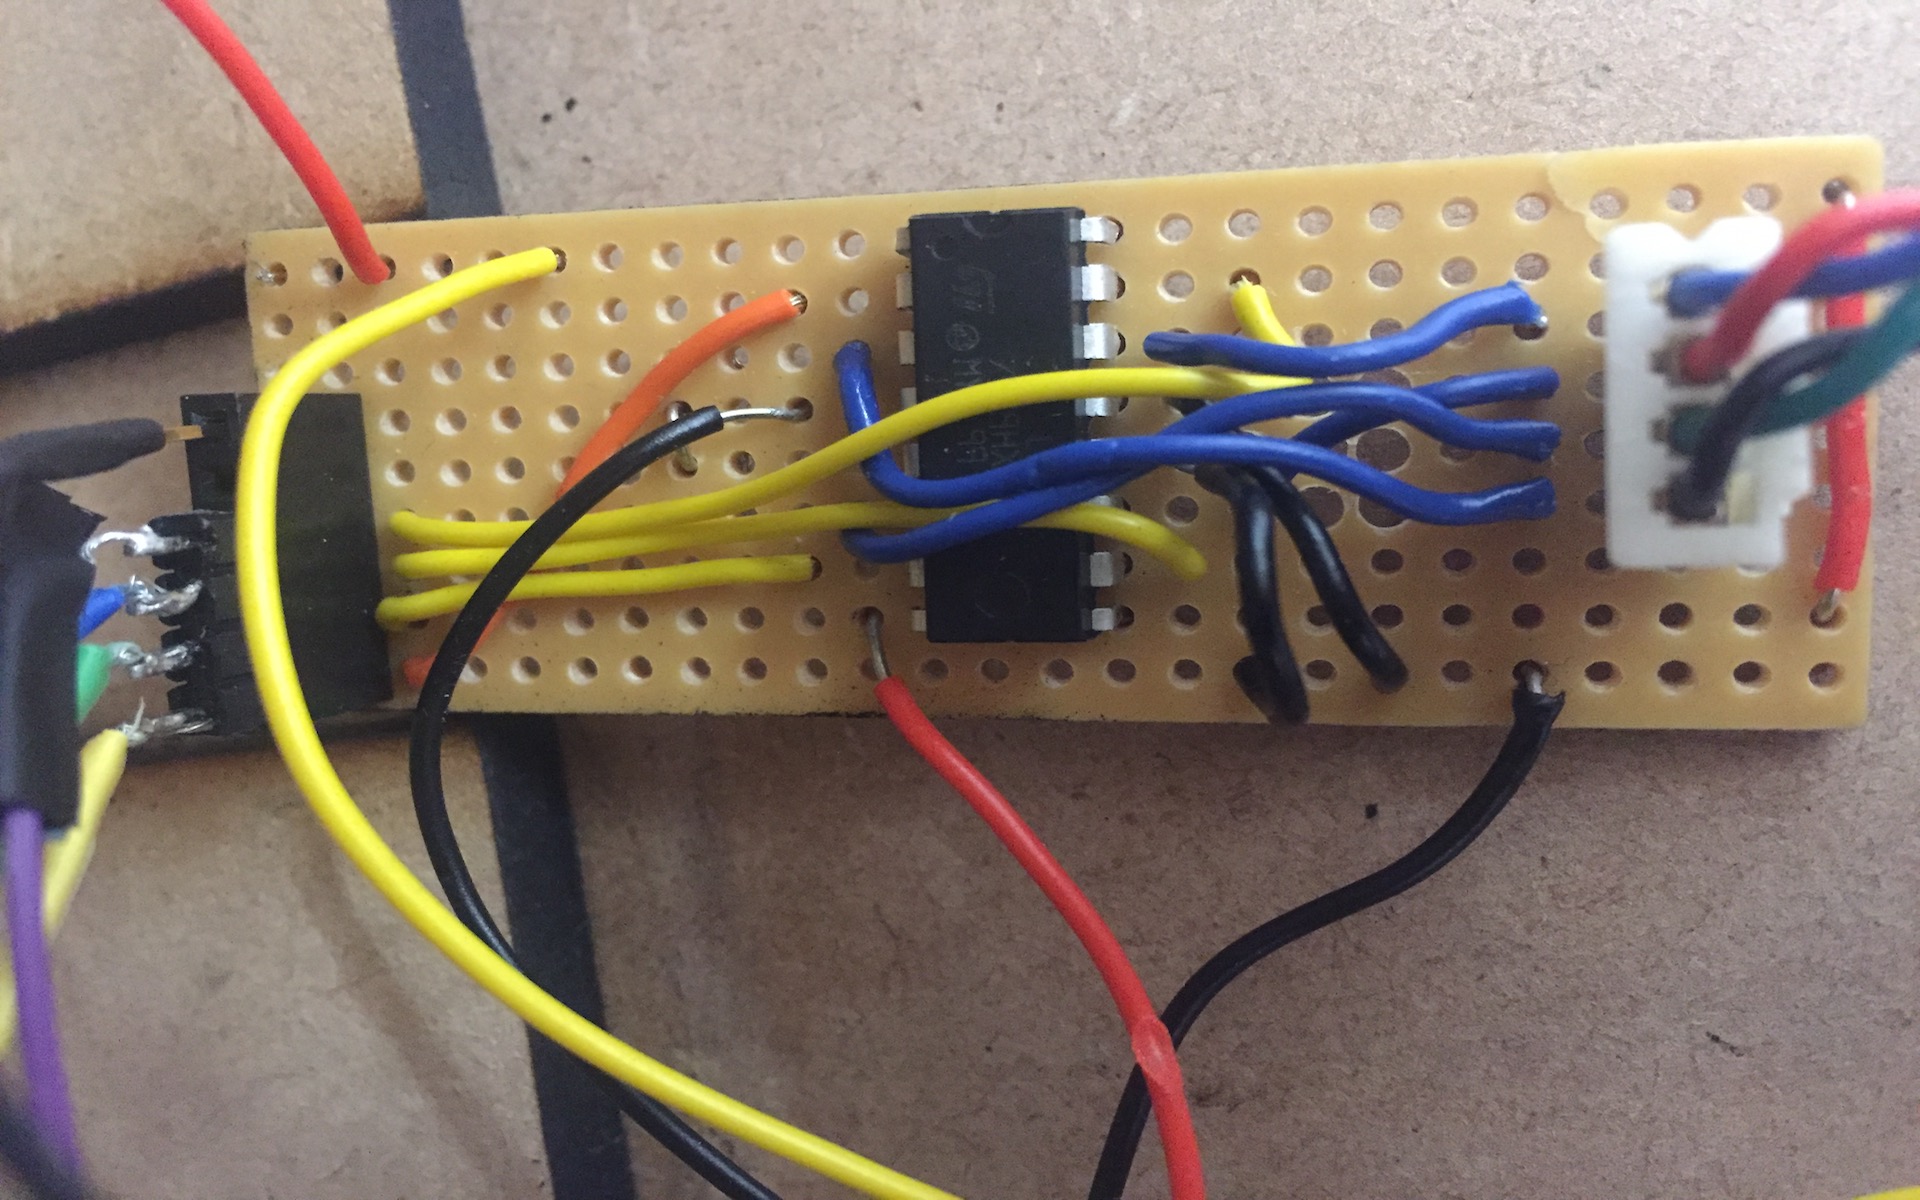
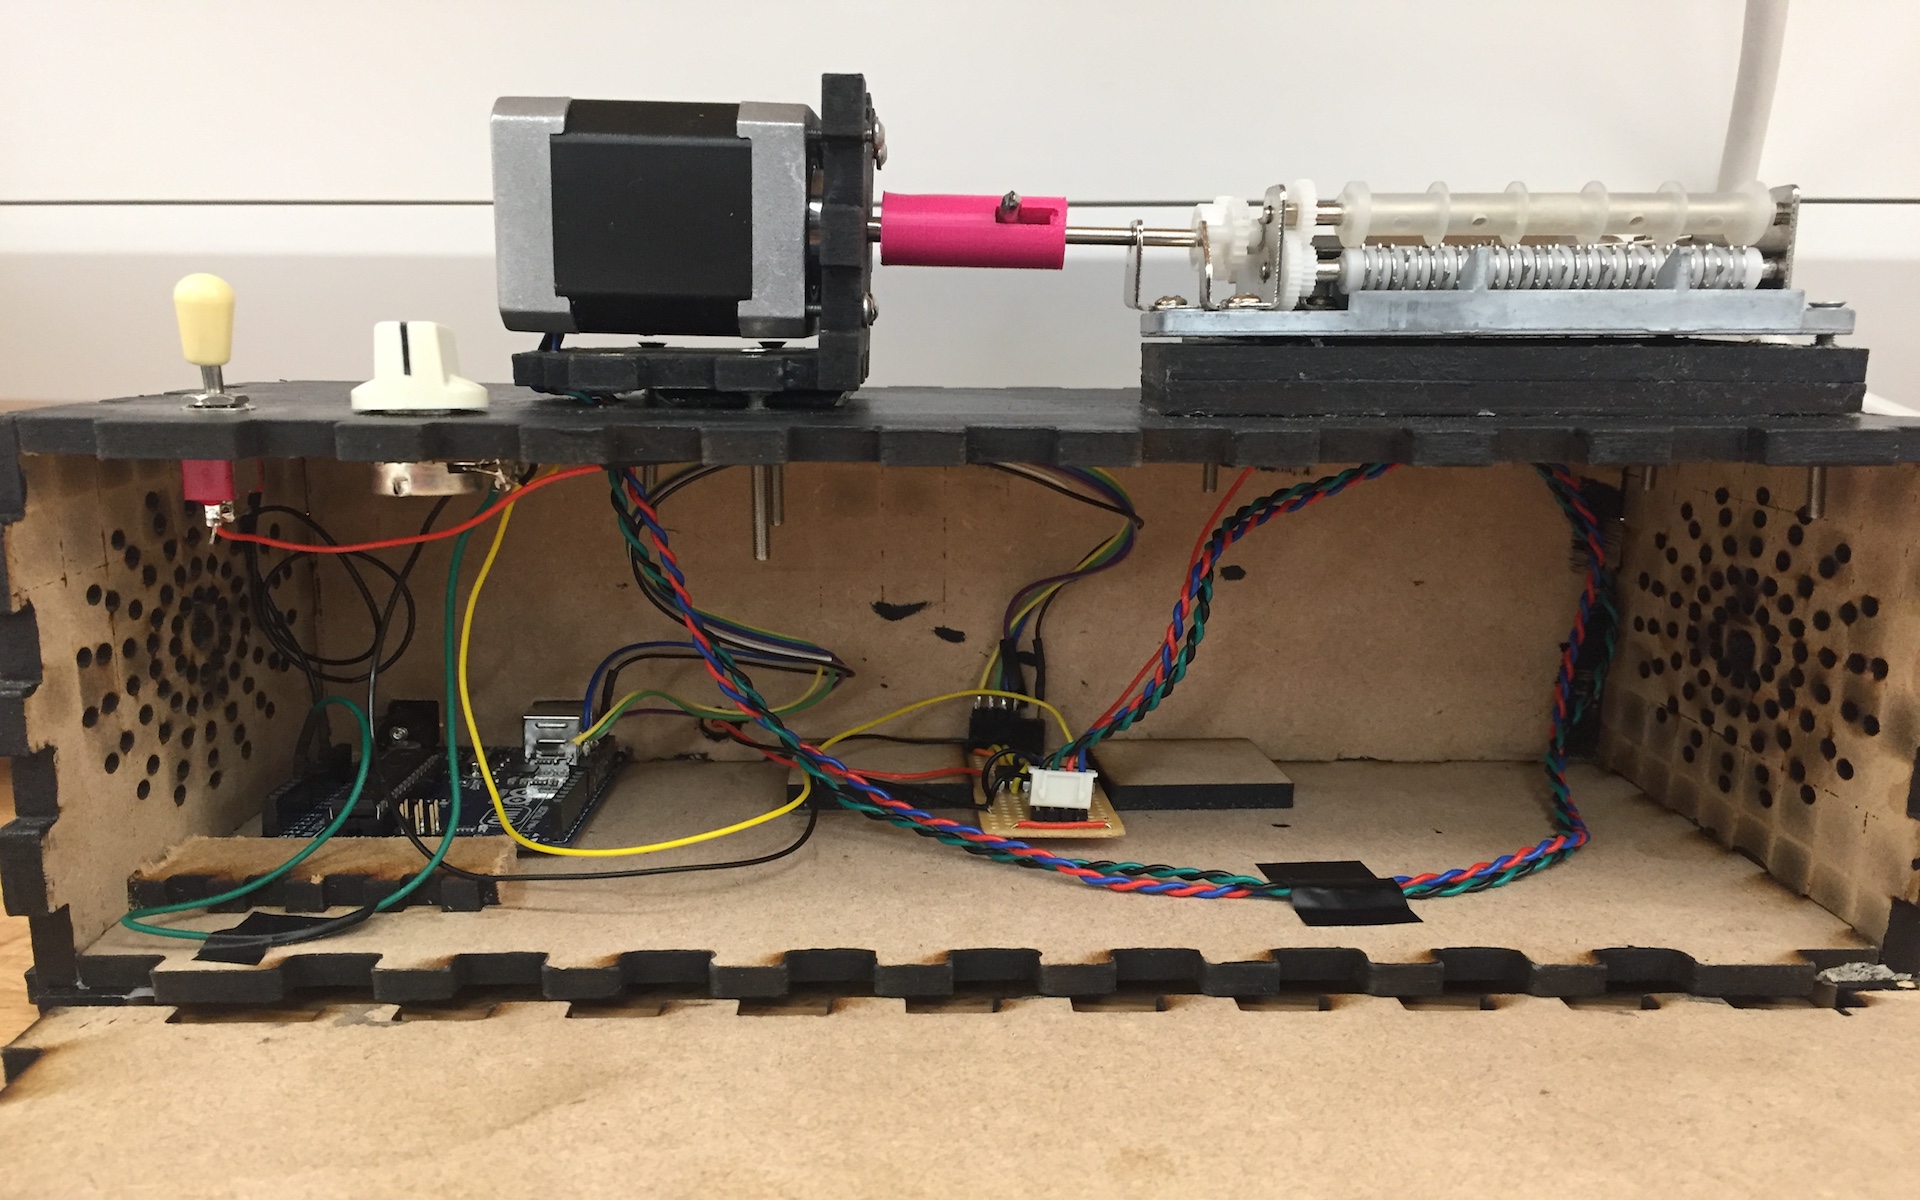
The main hardware components used in this project are an arduino Uno, a bipolar stepper motor as an output, a 10k Ohm potentiometer controlling the motor speed and an On/Off toggle switch, as my two inputs and a L293D H-Bridge to drive the motor. The whole circuit was powered by both arduino Uno and an external 9V power supply.
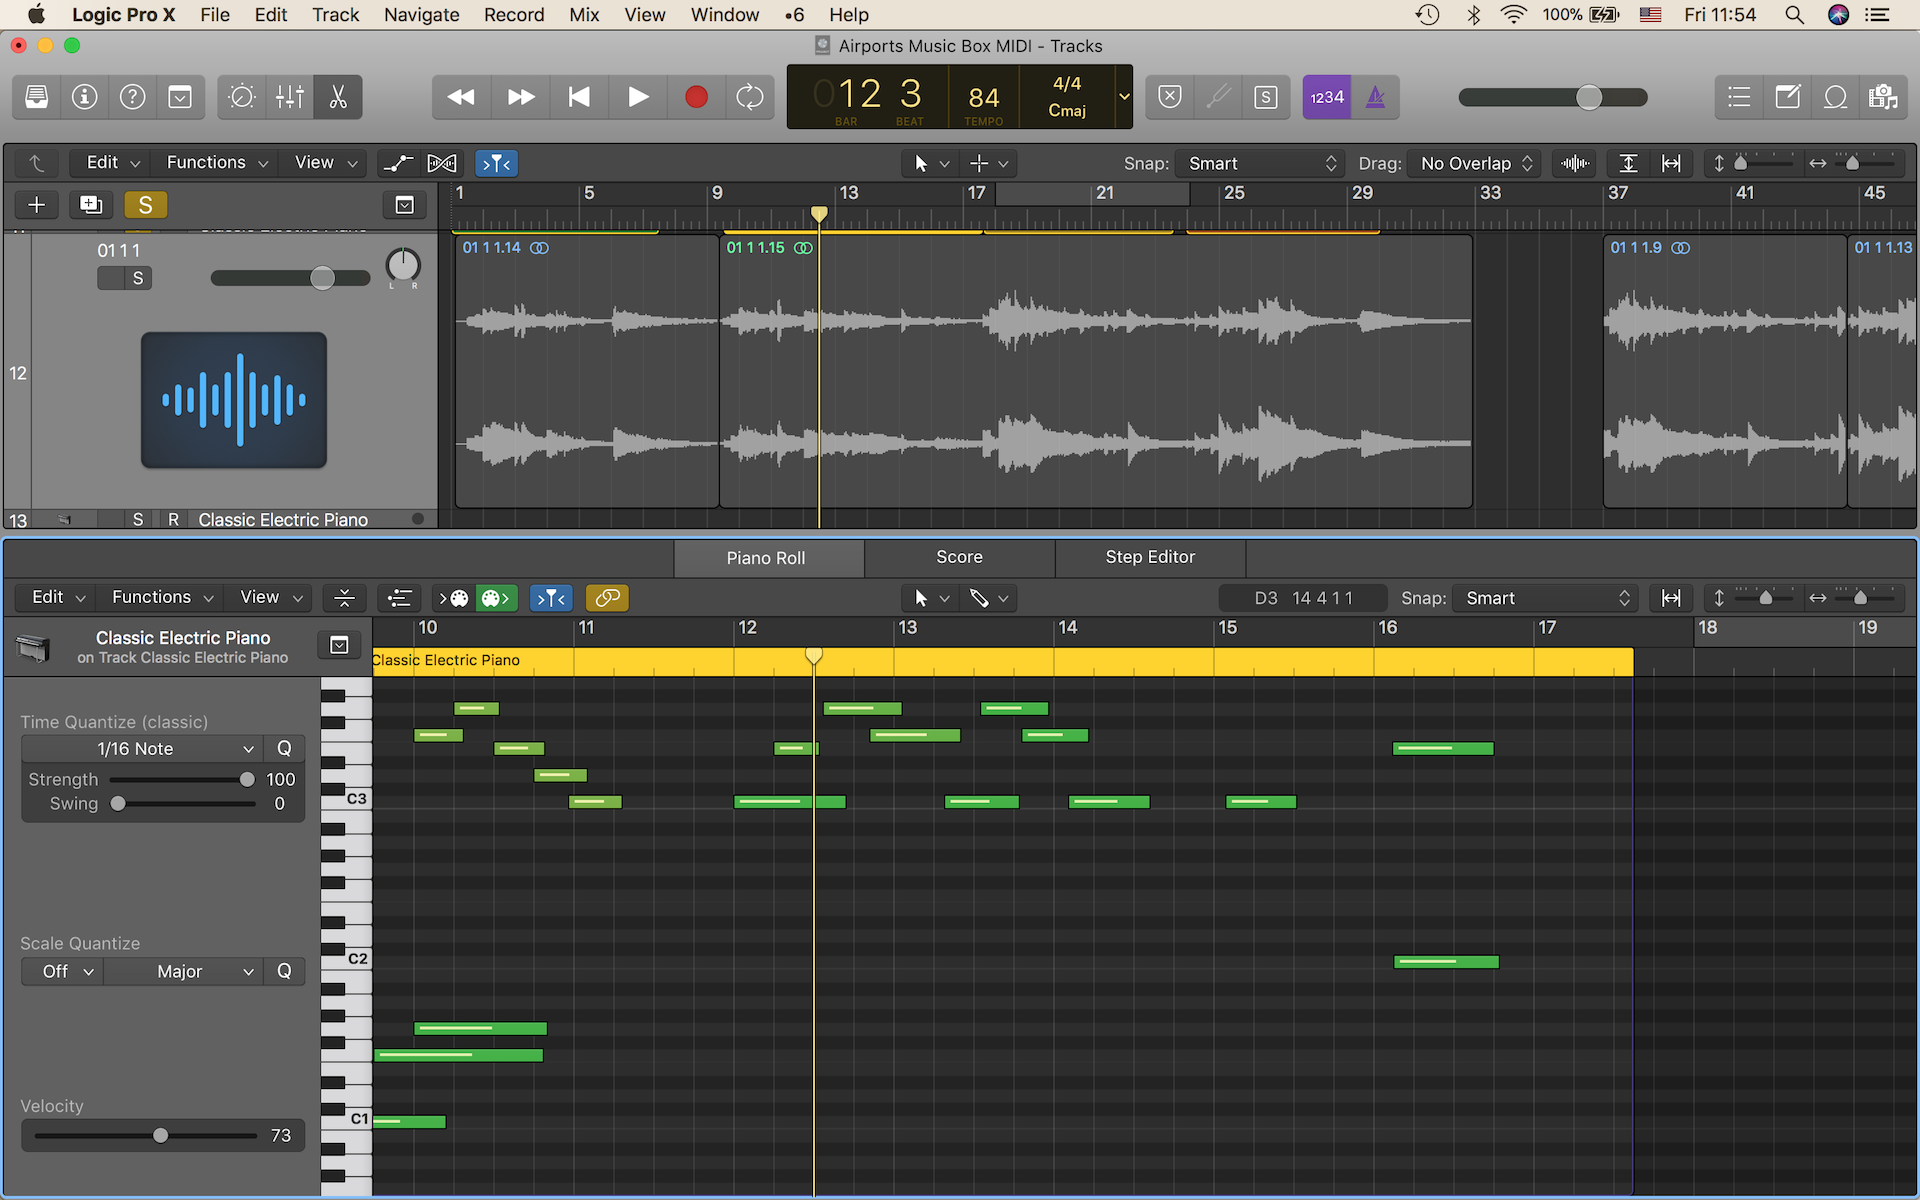
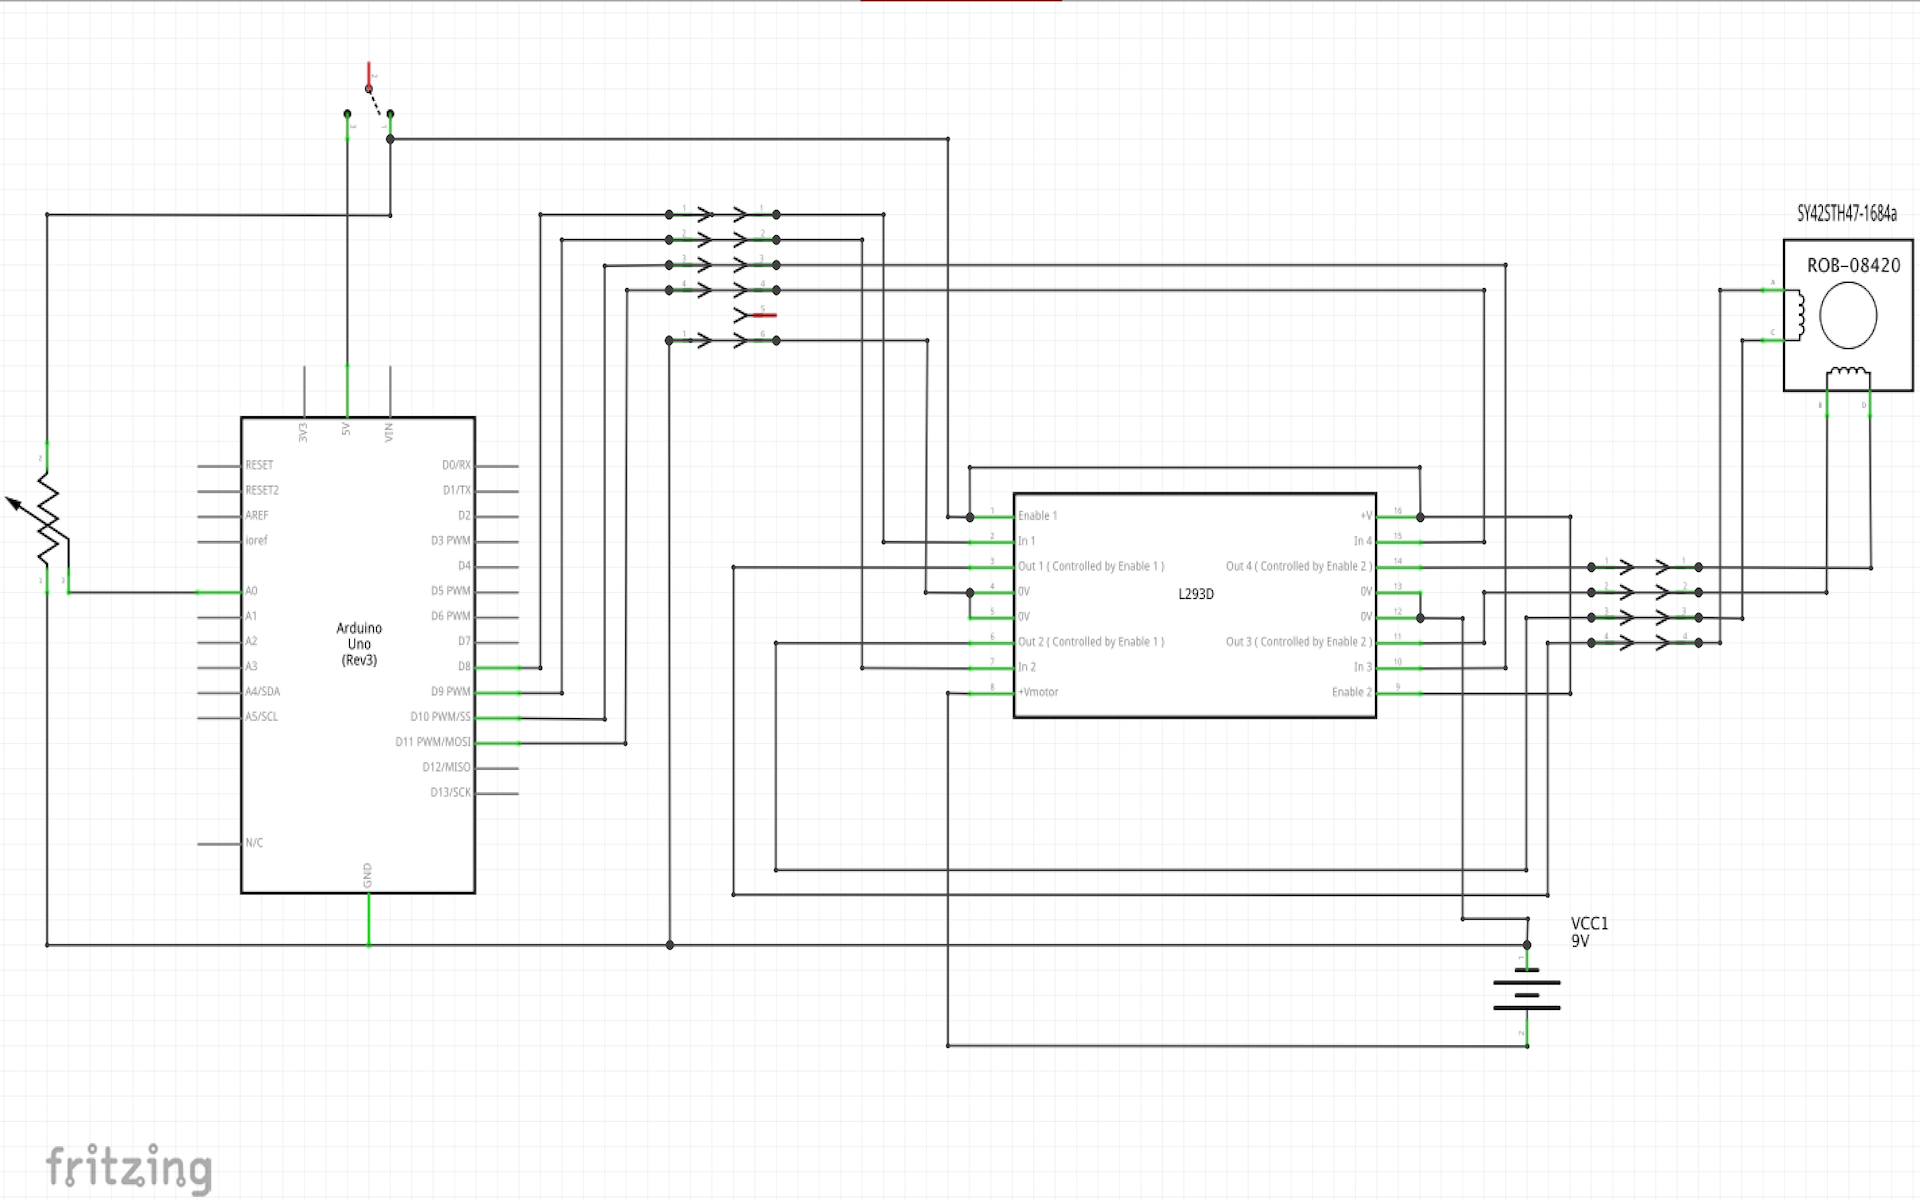
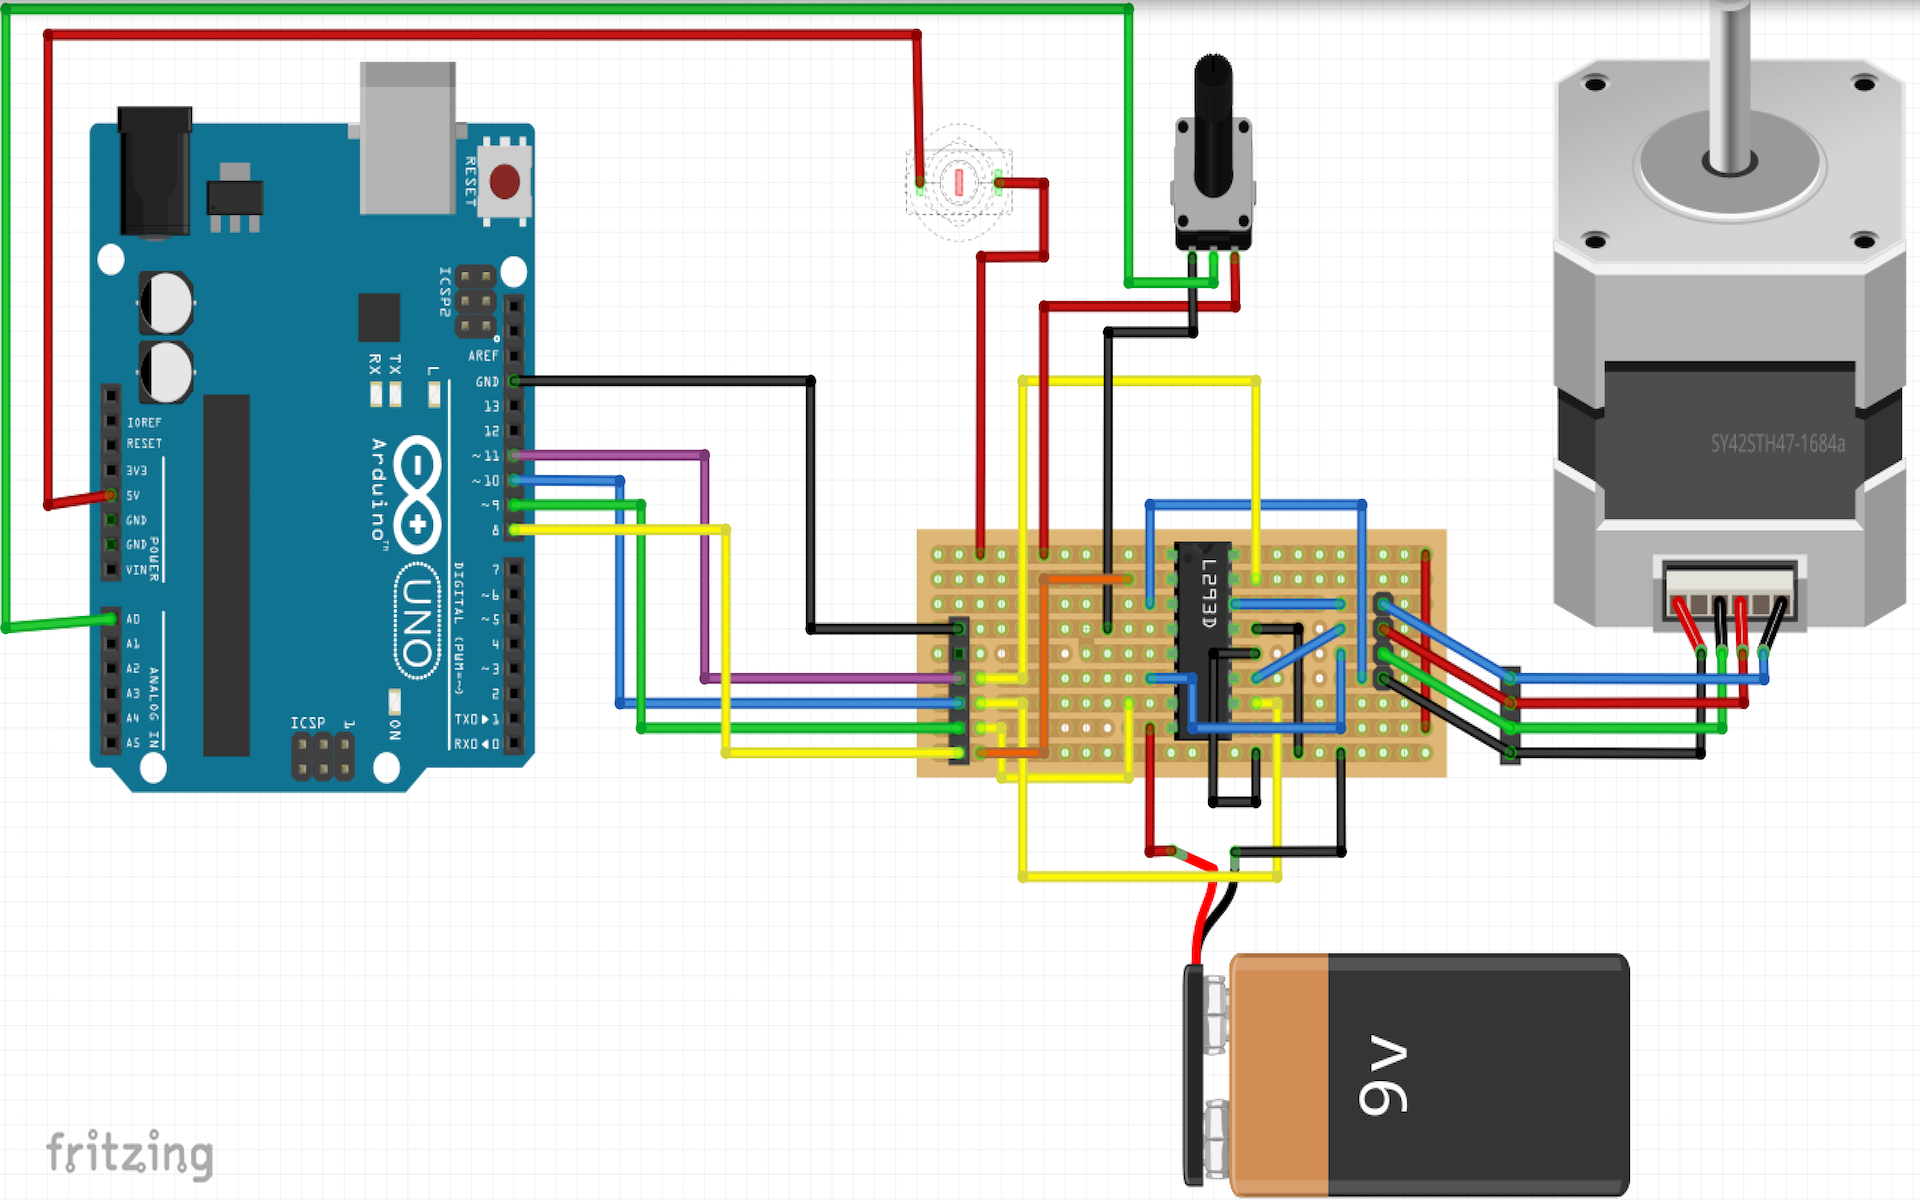
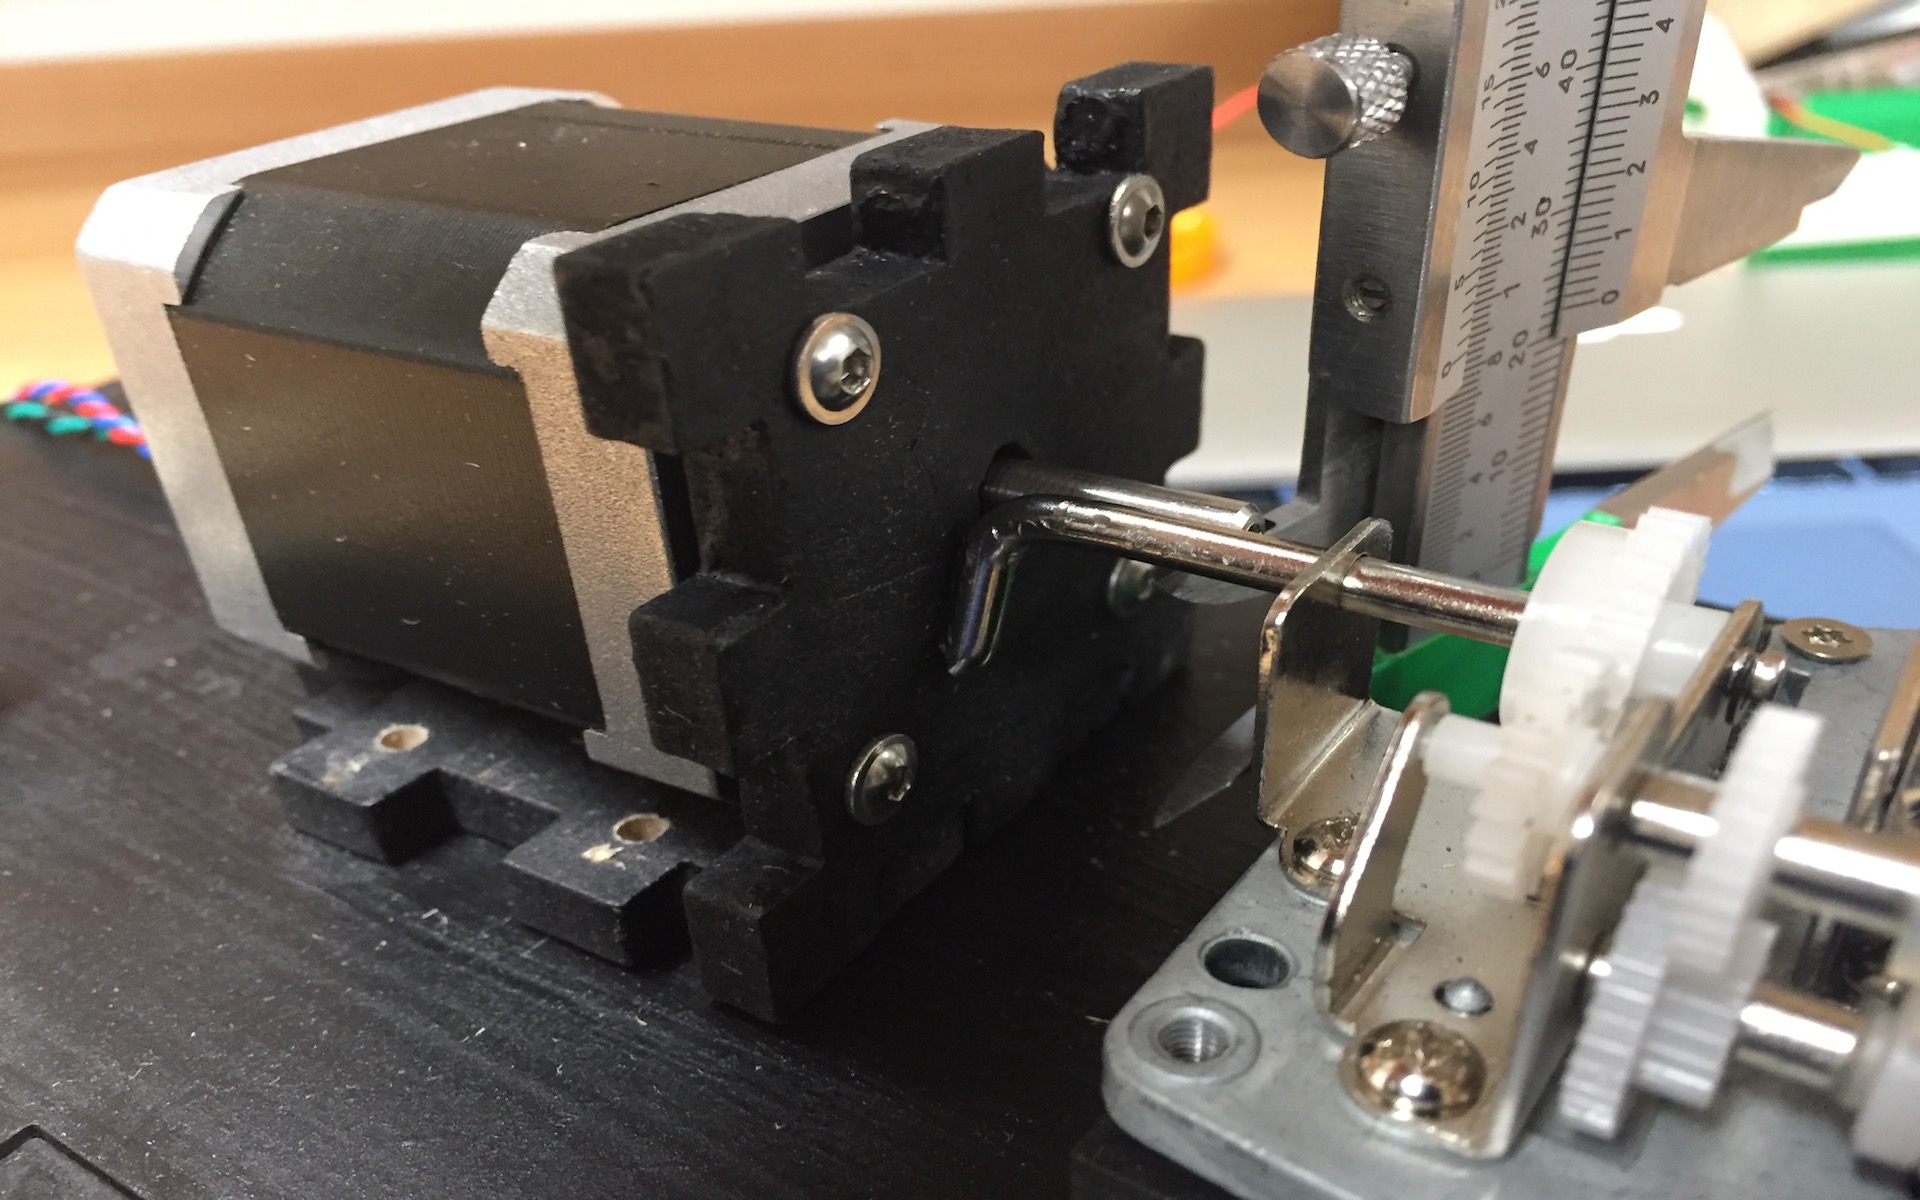
It was the first time I used a stepper motor and given that there was not a particular example in the arduino book, I had to research on how to wire, drive and program them, as well as how they work. Bipolar stepper motors contain two electromagnetic coils, with two leads per phase and the central shaft which has magnets mounted on it. By letting the current flow through the coils, in a particular order, they will create magnetic fields respectively, which repulse or attract the shaft's magnets causing it to rotate at one or more steps. What I needed for my project was just to continuously rotate the stepper motor in a counter clockwise direction (in order to crank the music box clockwise, as both axes are facing opposite each other) and also vary and control its speed. To drive my motor I borrowed a code example using the Stepper library (credits in my code file) which I tuned and changed during the project, according to what I needed.
My first prototype on breadboard, was based on a 15 note music box, which the stepper could crank easily and gave me the desired result, but because of some musical limitations (regarding small notes range, absence of sharps or flats etc), I decided to change to a 30 note, double size one. All musical problems were resolved then, but given the new music box’s bigger size and weight it was harder for the motor to turn. As its speed increased, the torque was decreasing, resulting in not reaching the desired speed that the tempo of the melody required. Raising the voltage level didn’t make a big difference and found out with a lot of troubleshooting and some help, that I could dither the stepper motor signal at a higher frequency and phase correct PWM. By including a few new lines of code in my program, I had the speed and torque I was after and so my music box was playing in the desired tempo. The only thing was that the noise of the motor was raised in volume and in a higher frequency, but didn’t bother me, in any way. That industrial-like sound added to my overall concept, implying the airplane's noise or the sound of a split flap display.
FABRICATION
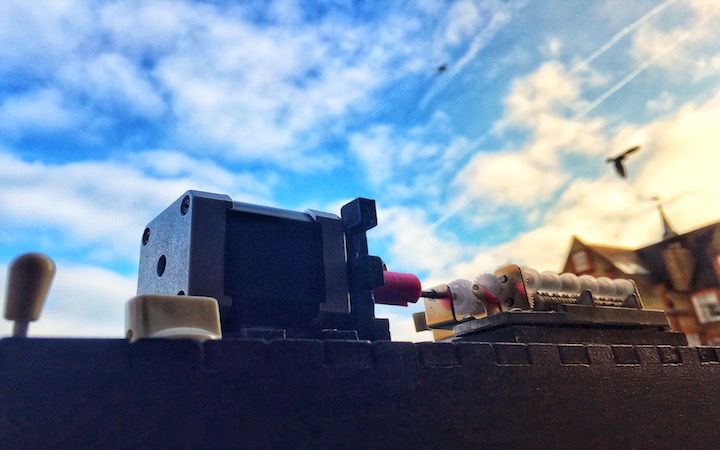
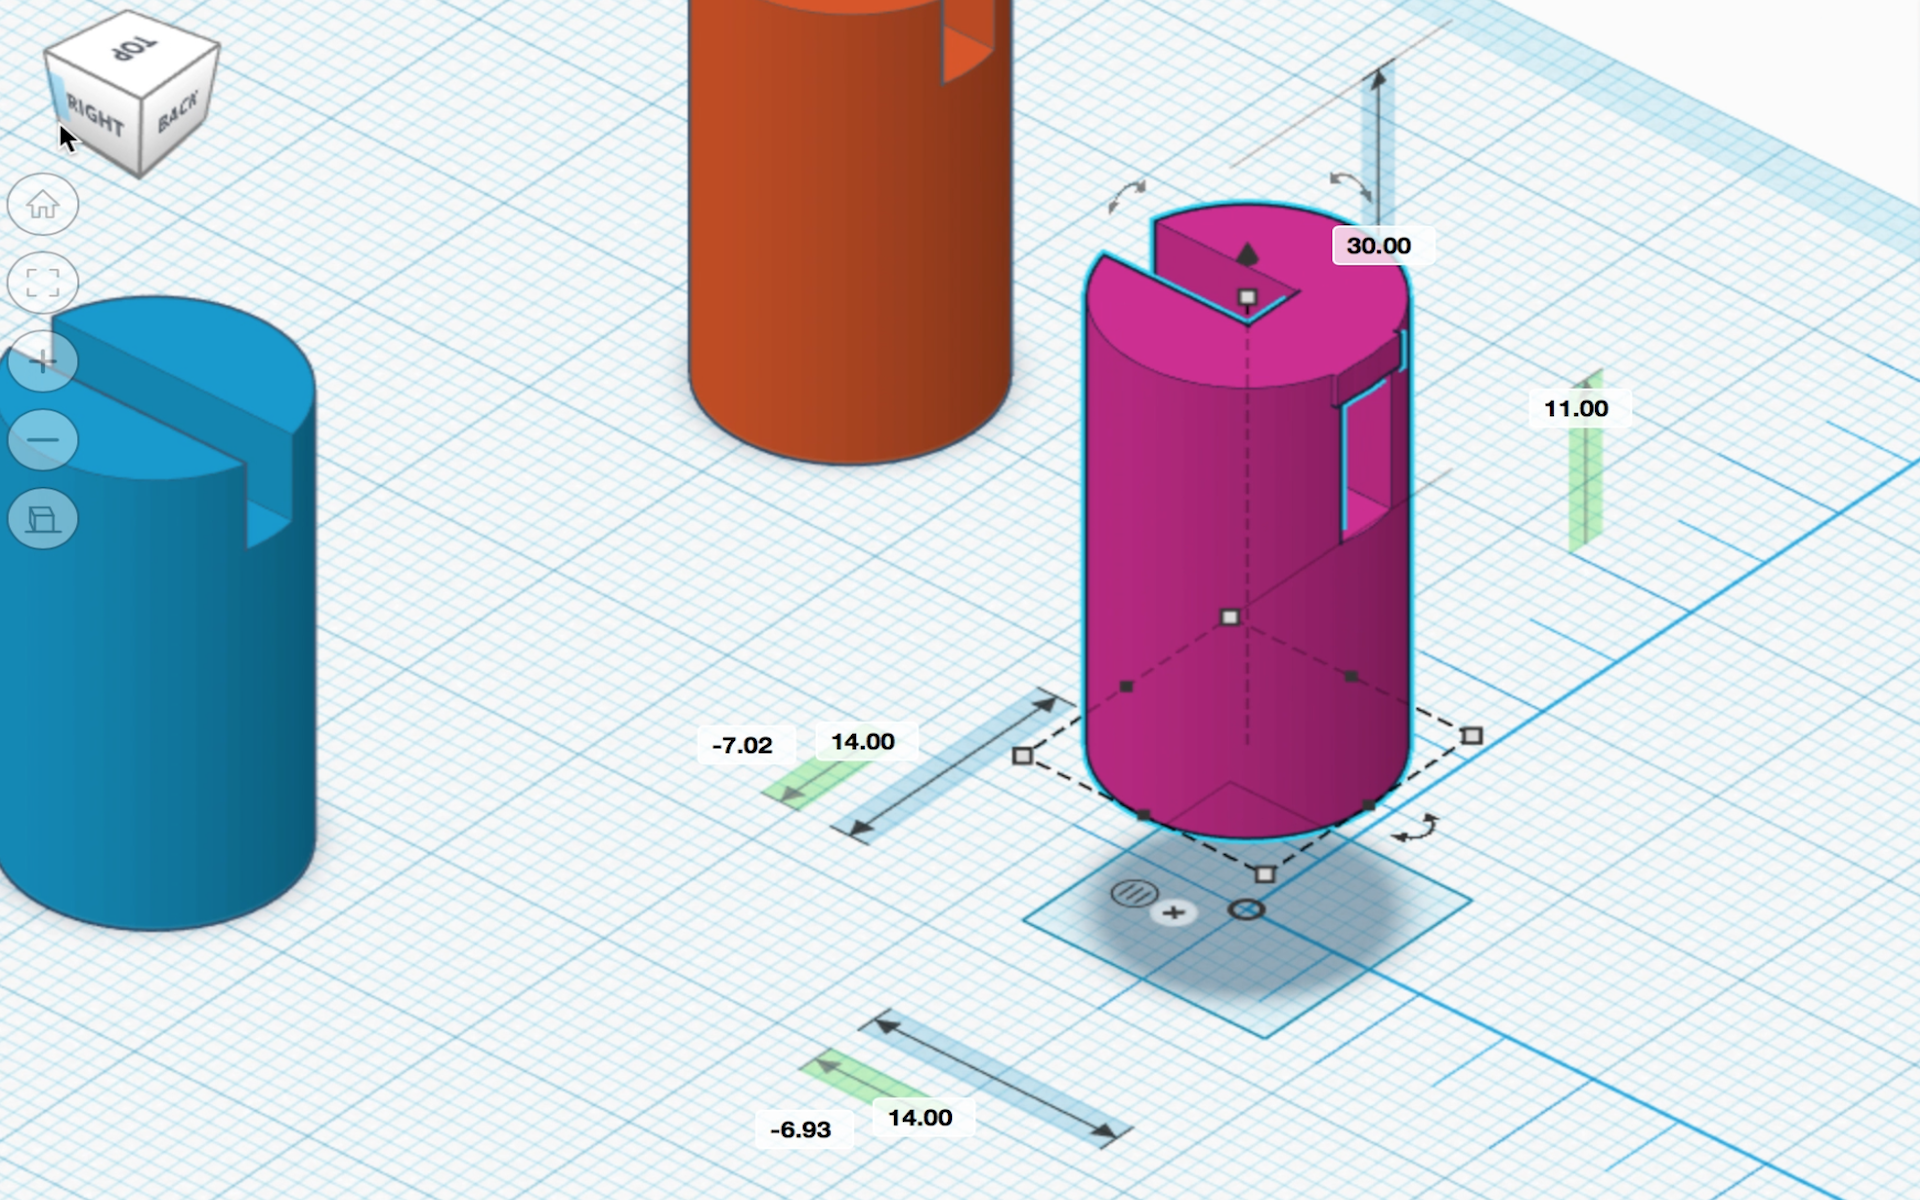
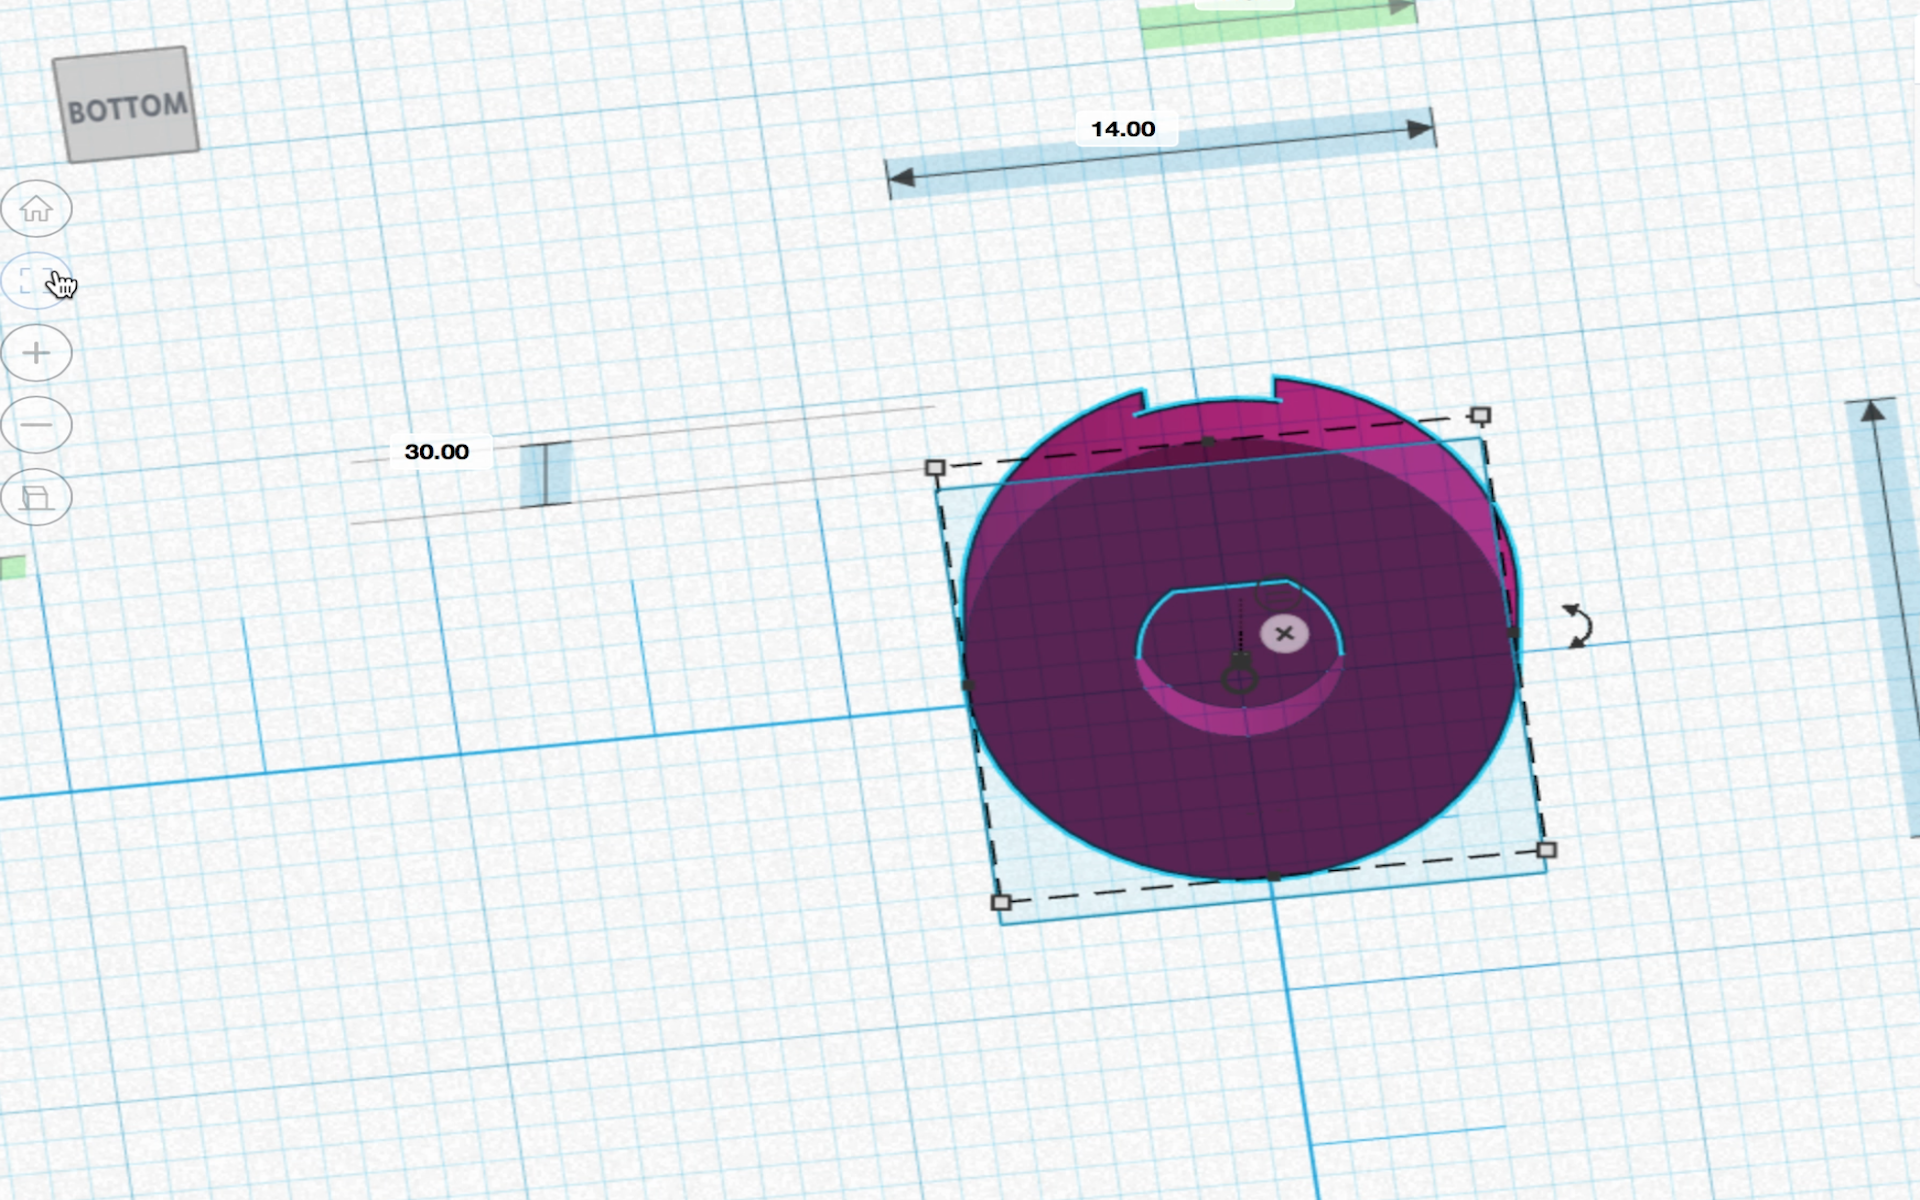
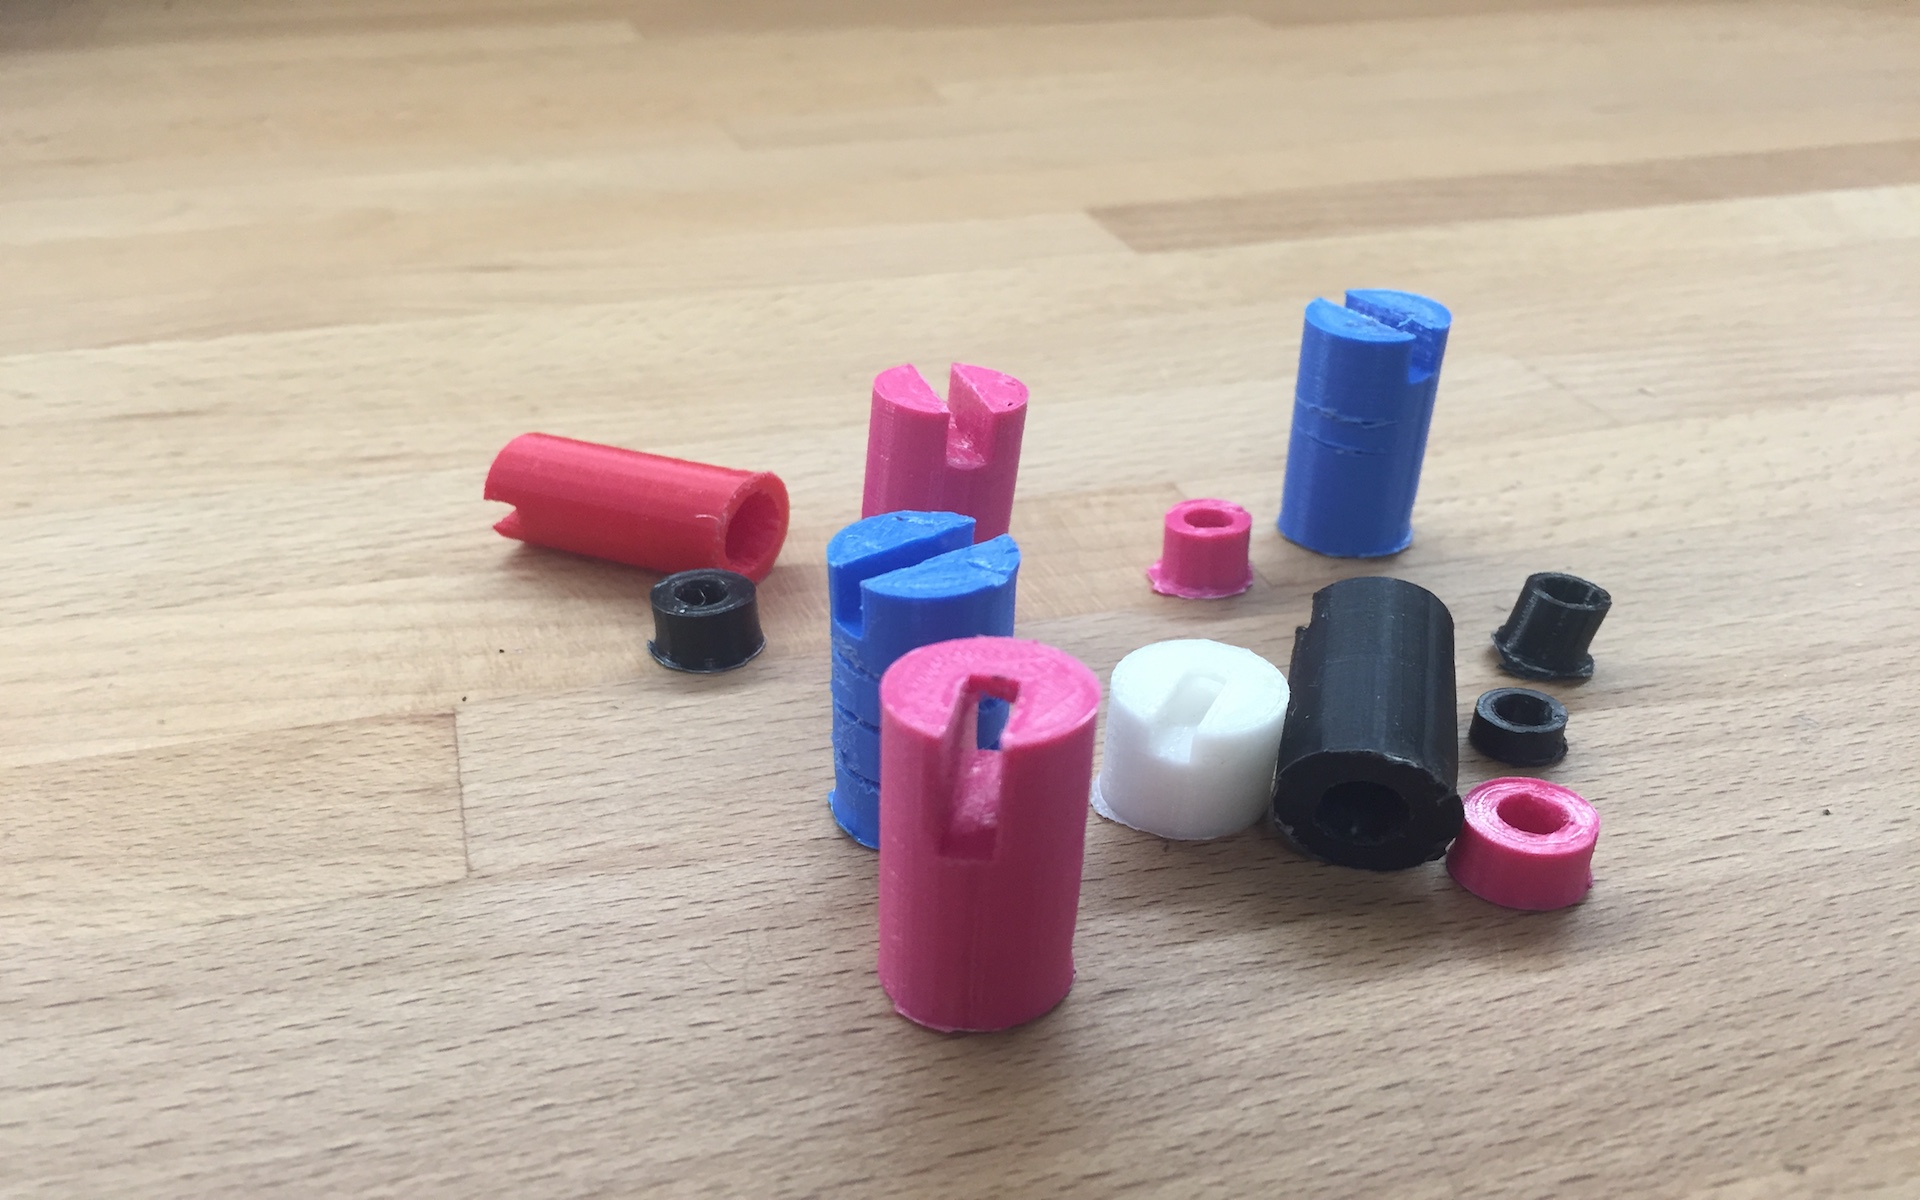
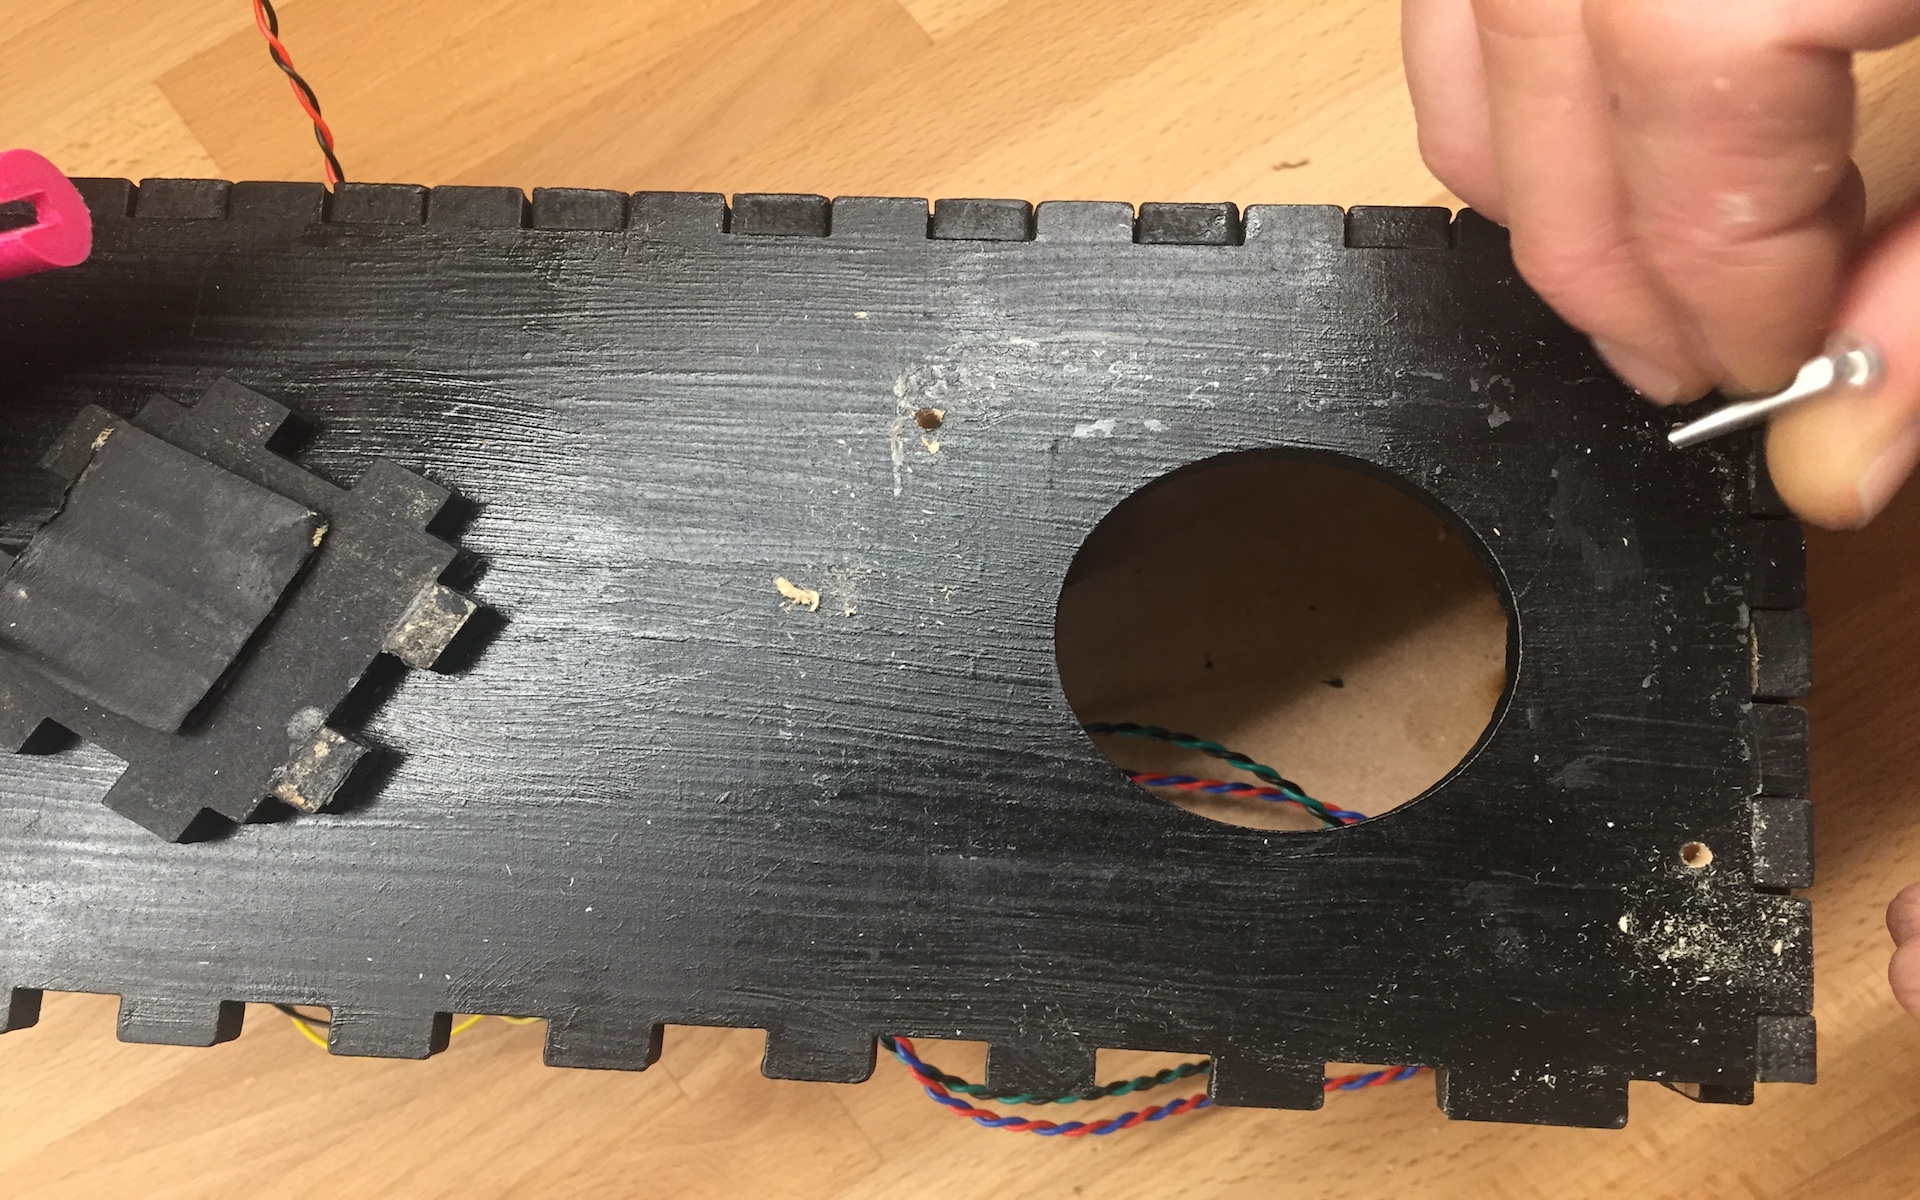
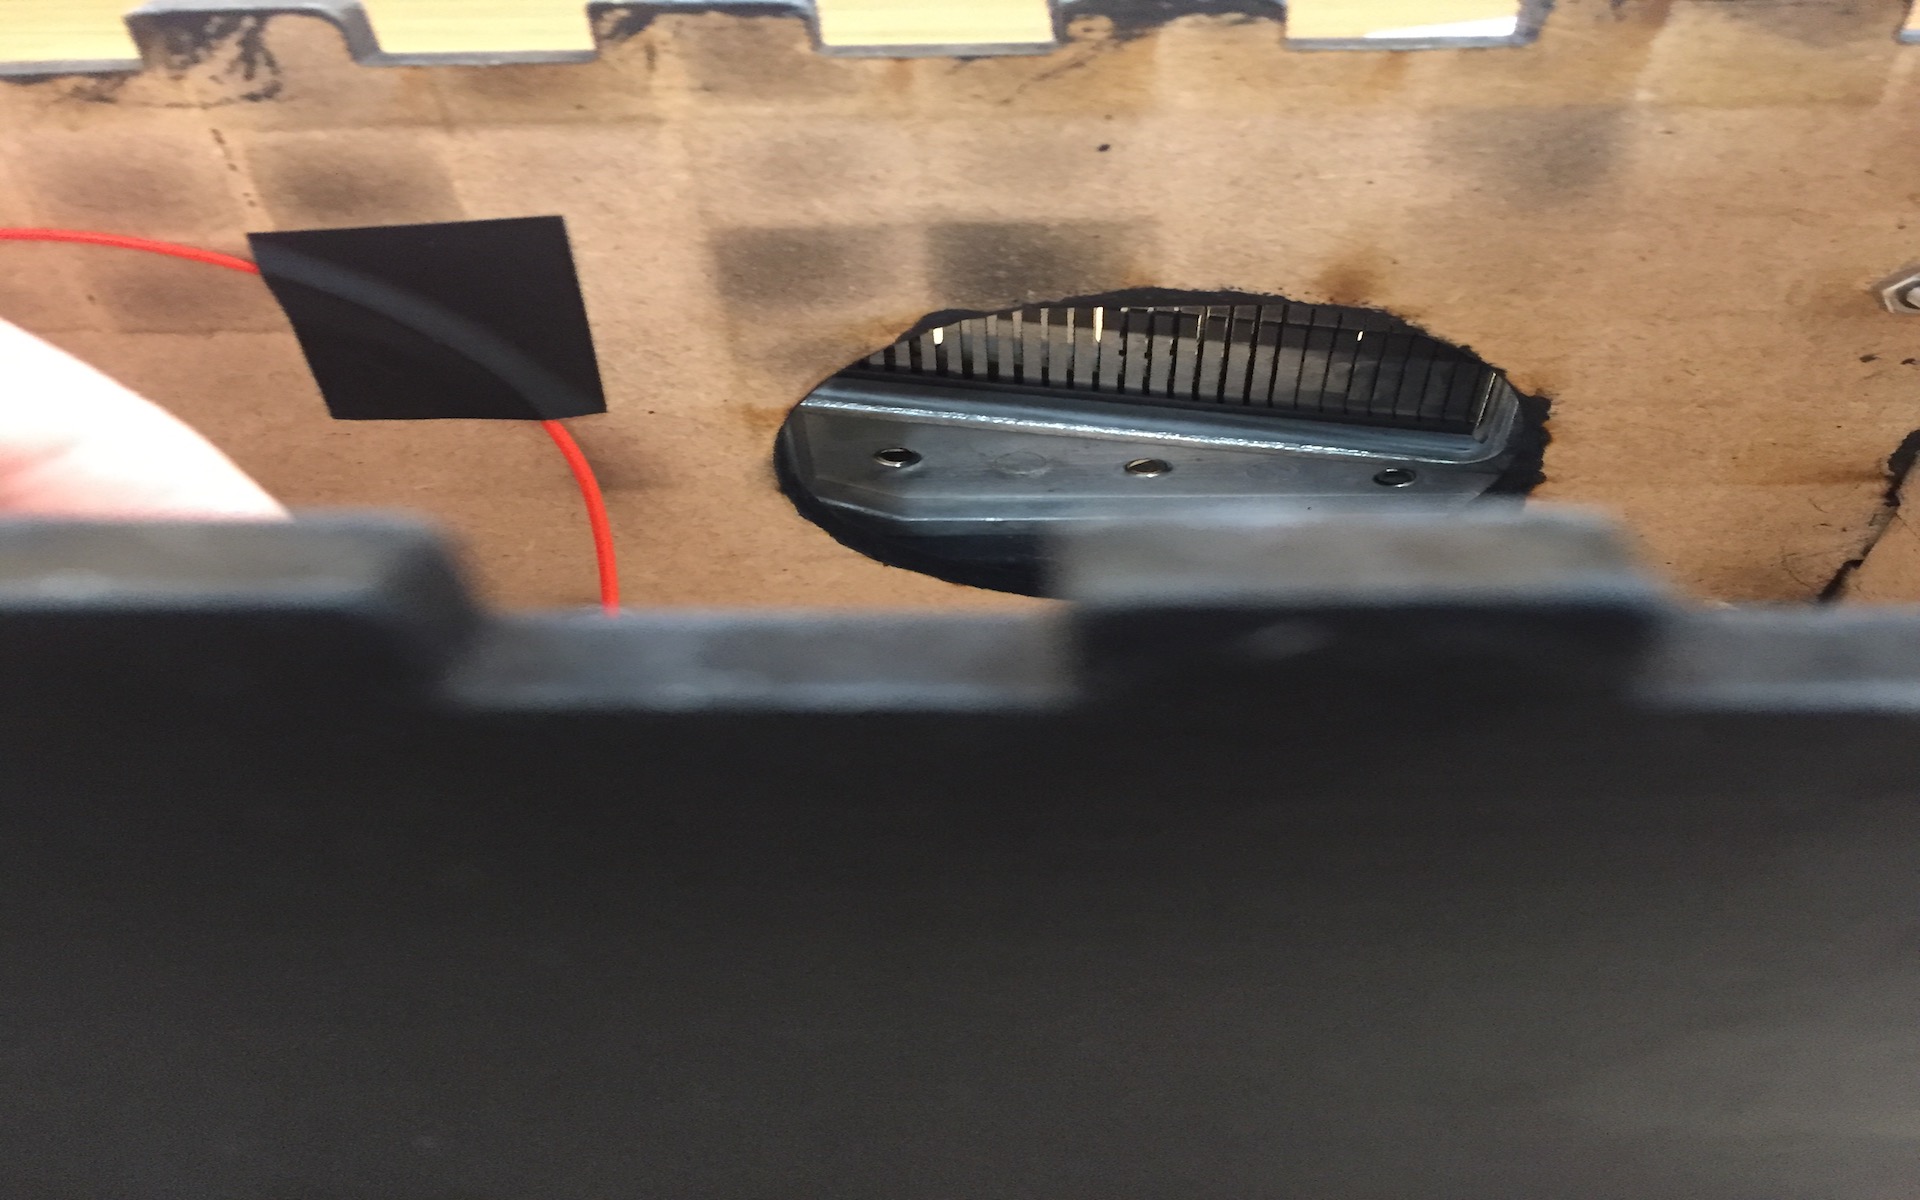
This project involved a wide variety of fabrication techniques, both physical and digital. One of the most crucial parts, was the coupling that joins the motor to the music box, so as to lock both their axes, while aligned to each other and rotate. This was designed, 3D printed and tested many times, until it was finally functional, so I guess it could be one of the project's key points. Also, I had to cut a small part of the crankshaft with the saw in order to have an "L" shape and fit in the coupling. I designed an MDF box to place the motor and the music box on, as well as to house in my electronics and function as a kind of speaker.
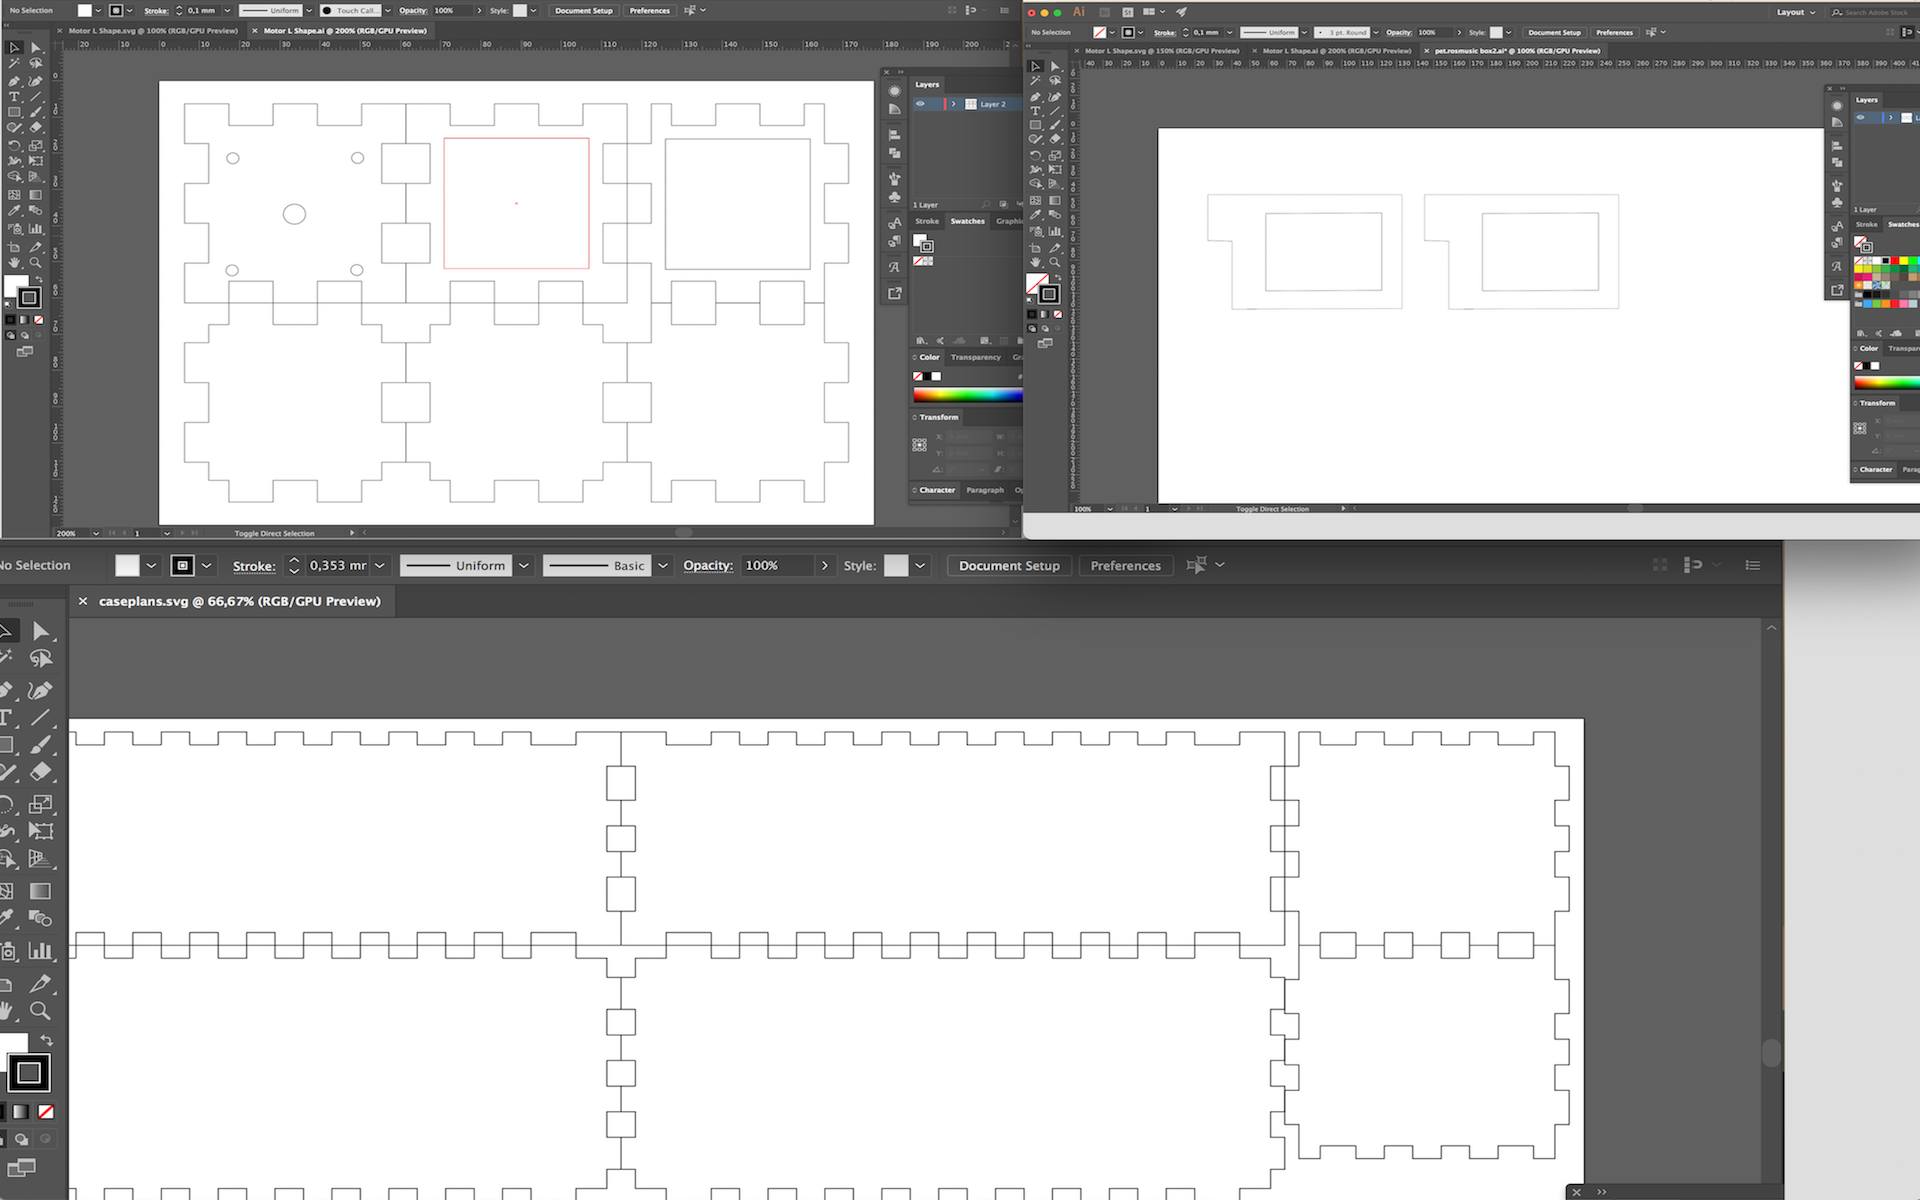
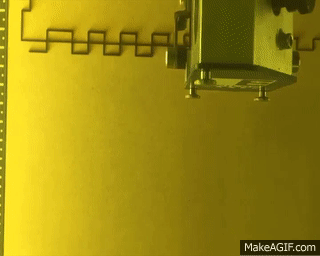
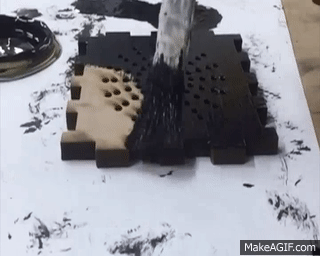
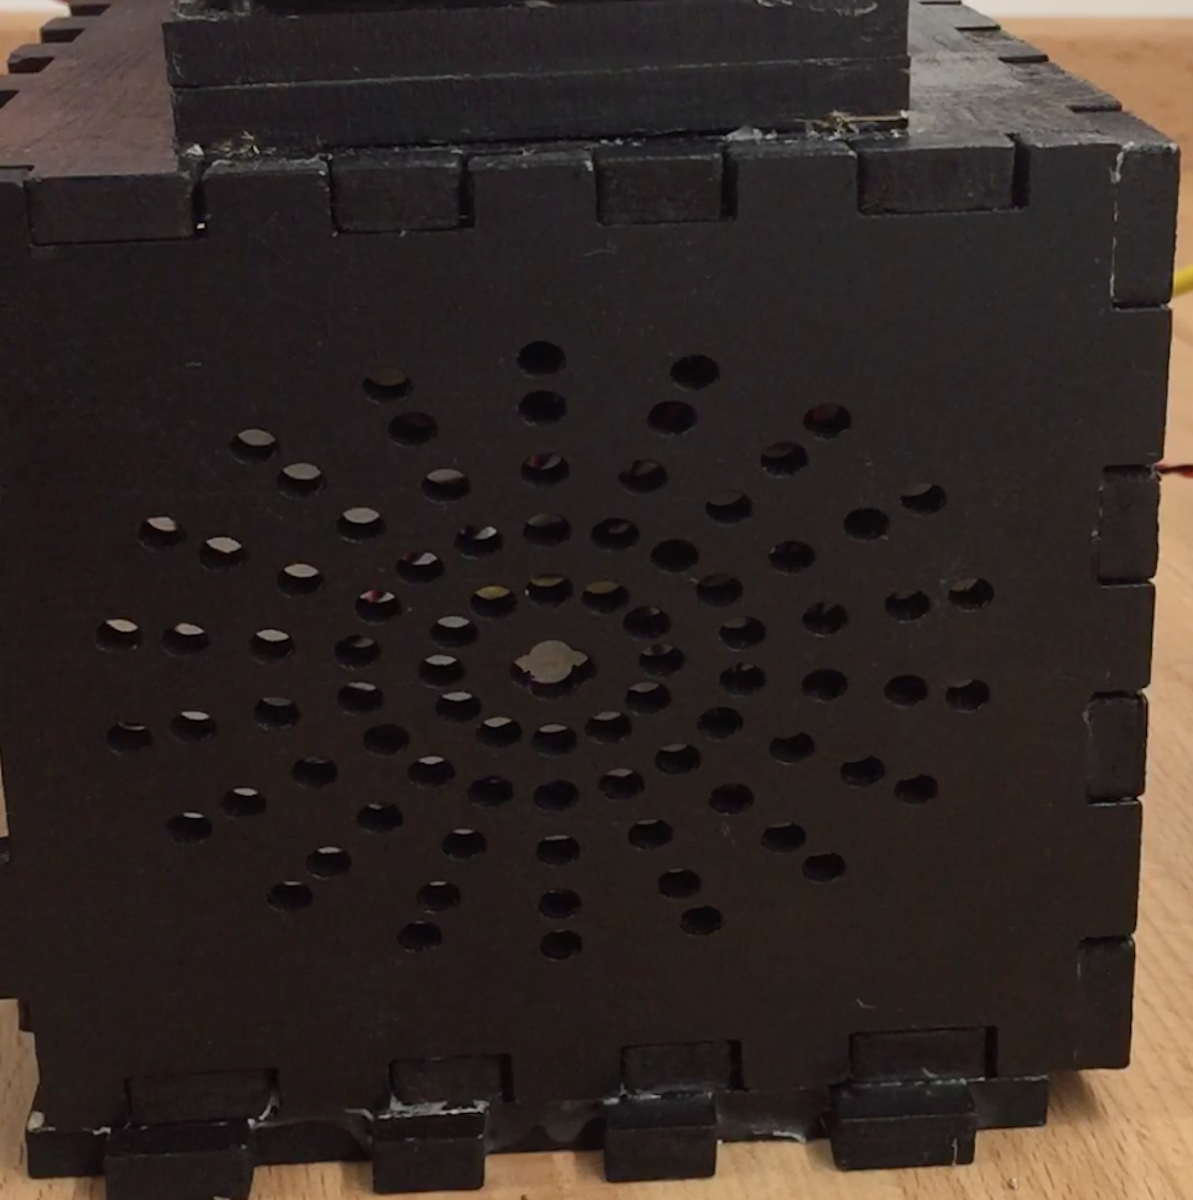
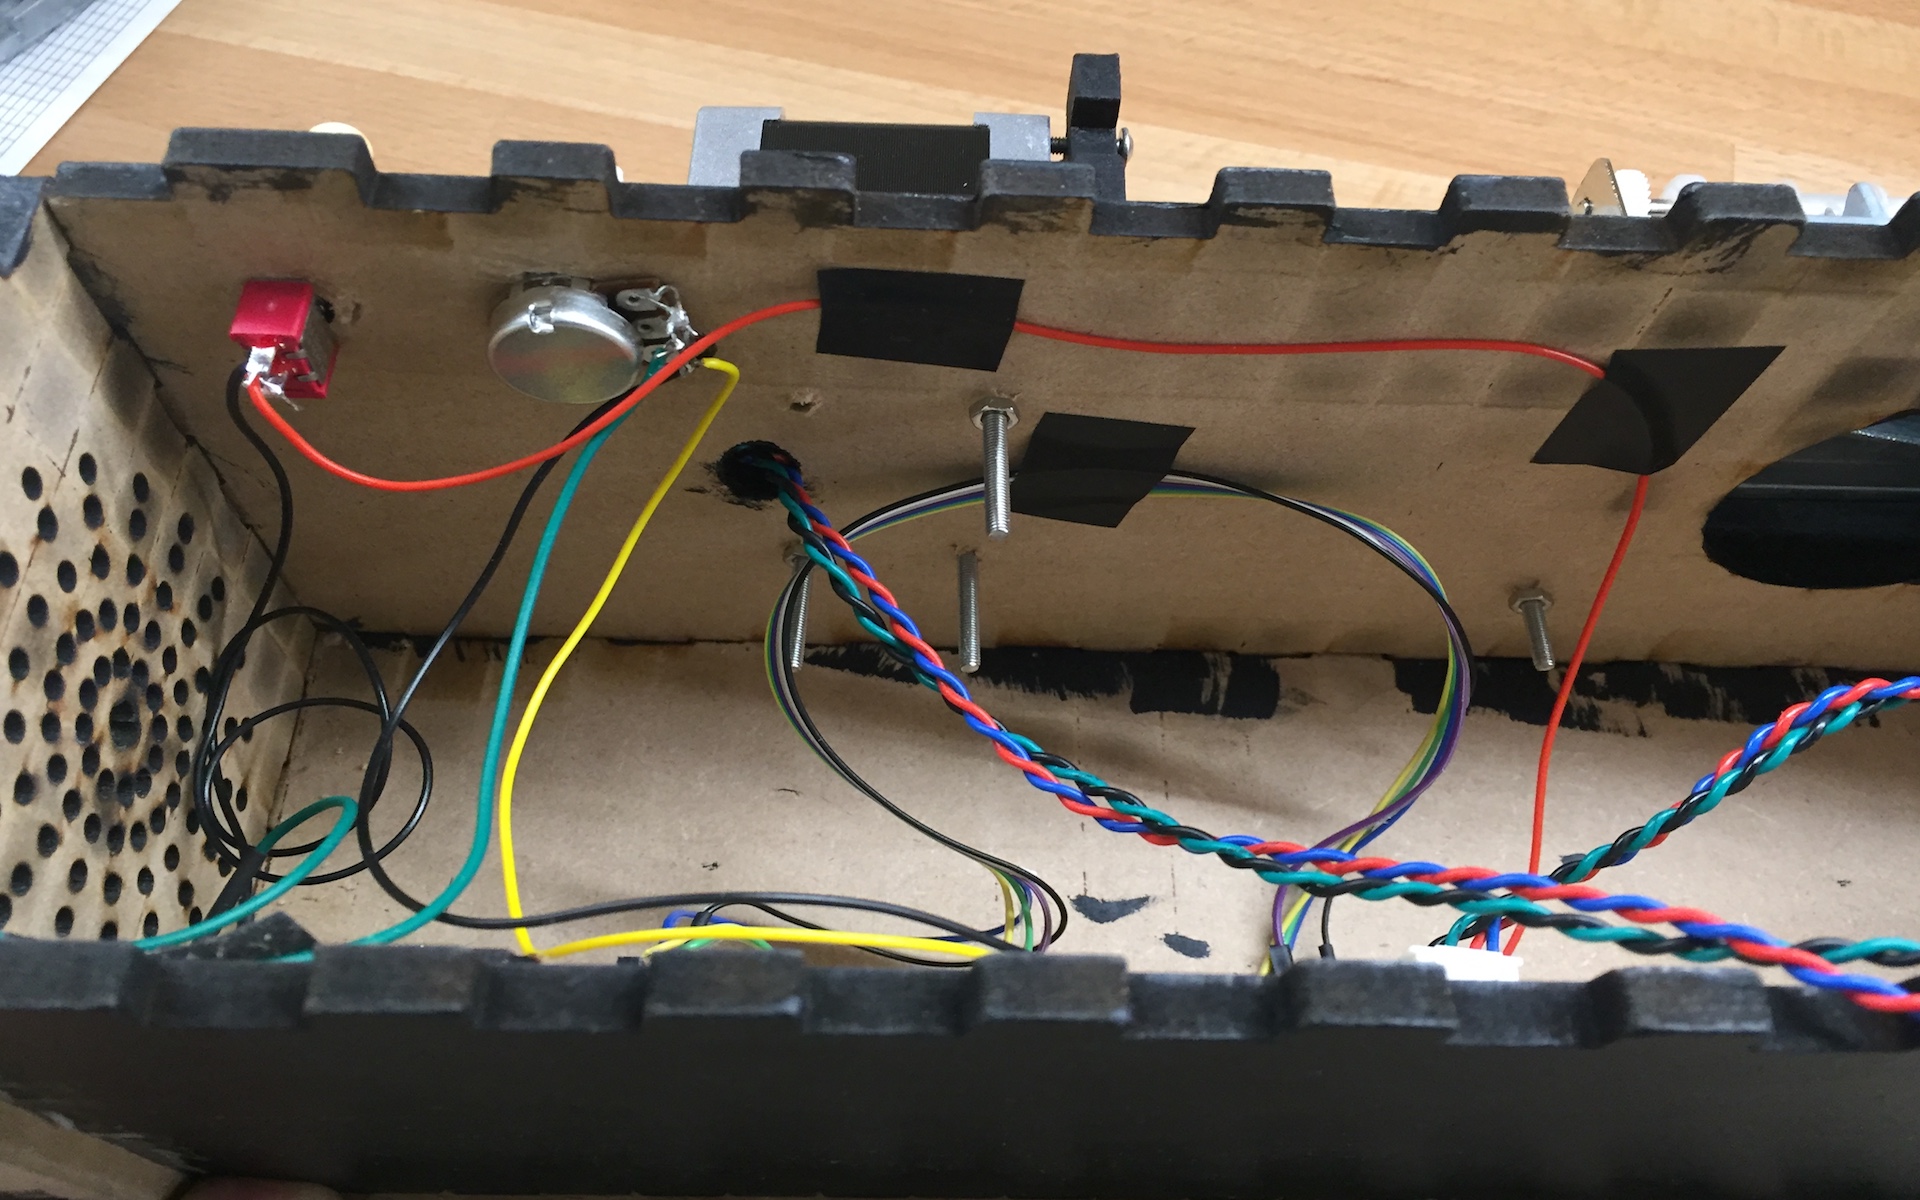
To improve its acoustics, I made a few little holes on the sides of the box and a bigger one just underneath the music box's base. In this way, the sound coming from the tines could get inside the box, at a side that was left intentionally empty, and resonate. Moreover, I added two short MDF legs at the bottom of the box and lifted its base higher, so that it doesn't touch any surface and let the vibrations within last longer. Then, used the laser cutter to have my parts cut and ready for paint. Other designing and laser cutting tasks, included many smaller parts, which function as bases for the motor and music box, in order to be at the desirable height and for their axes to be well aligned. The assembly of these, along with the motor and the music box, at the top of the case, required precise measurement in all 3 dimensions and very careful placement.


FURTHER DEVELOPMENT & CONCLUSION
As mentioned above, my future plan for this work is to scale it up, by using more music boxes and motors that will play this melody in unison before start getting out of sync. After completing this learning process, I feel I laid the foundations to do so. Most of the subject's relevant concepts are already explored now and many things have been thought that they can be improved or added. I would like to see how various factors can influence the timing between the different units and perhaps attempt to construct a music box myself.
Carrying out this project, was a very fascinating experience. I really had fun and enjoyed working on it, although I pushed myself to the limits. The emotional changes were steep and unexpected and showed me that triumph and total frustration are just a few seconds away. I feel satisfied with the outcome, given that a couple of months ago it seemed almost impossible for me to achieve, due to my electronics and fabrication knowledge. Being patient and breaking a problem into smaller parts, as well as having good time management among various tasks, are valuable key things that I've learned and will keep applying them on future projects.
REFERENCES
http://Thanks for everything @ Konstantin - Matt - Peter (alphabetical order) 🙂
https://www.youtube.com/watch?v=CWu4ieBqGFg&feature=youtu.be
https://www.arduino.cc/en/Tutorial/StepperSpeedControl
https://www.arduino.cc/en/Tutorial/SecretsOfArduinoPWM
https://www.youtube.com/watch?v=HjBhO9iqEc0
http://www.telegraph.co.uk/music/artists/how-brian-eno-created-a-quiet-revolution-in-music/
https://learn.adafruit.com/adafruit-arduino-lesson-16-stepper-motors/overview
http://www.instructables.com/id/Controlling-Bipolar-Stepper-Motors-with-Arduino-wi/