Mapping Space
Interactive Book Sculpture with laser-etched images from body systems, old map of London and microscopic photos of minute structures found in nature with RGB LED strips along the spine of the book.
produced by: Gaytri Geeta Roopnarine
Mapping Space- Book SculptureSection 1
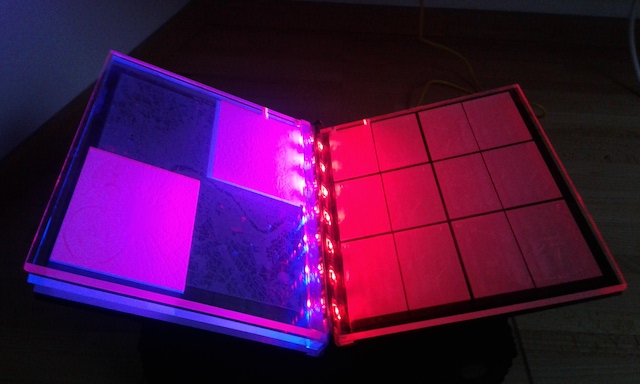
This is an interactive book sculpture made of laser- etched plexiglass plates (20x25x.8cm) with RGB LED strips on the ‘spine’ of each page. Thickness of the book was 5.5cm. It was mounted on a v-shaped wooden podium and supported by a wooden box which housed the Arduino hardware. A hole was cut in the front left panel for the switch button.
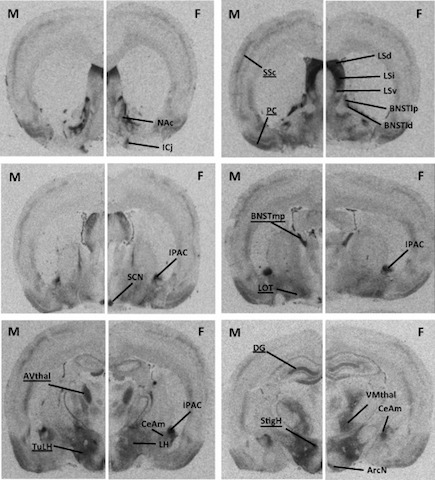
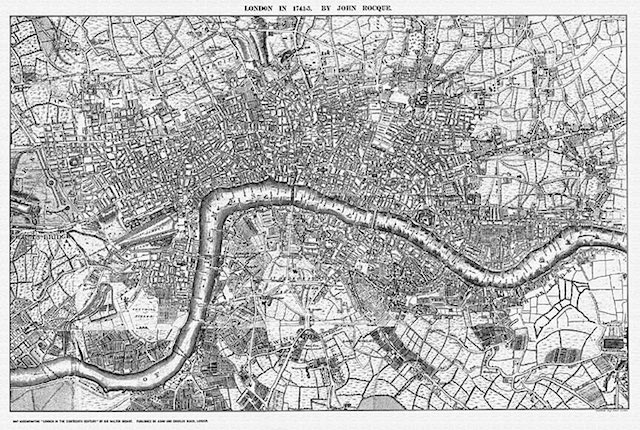
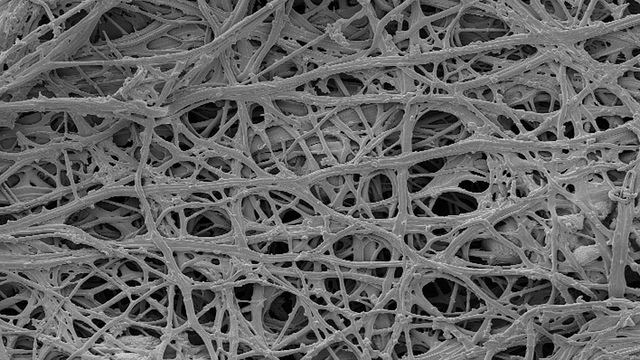
The images were sourced from the web and consists biological systems of the body, SEM photography of microscopic creatures(eg diatoms) and structures such as bee pollen and an old map of London. I felt that I needed to site myself within the city of London and within the ‘loop’ of the river.
The river also references Joseph Conrad’s short story, ‘Heart of Darkness’ in which the narrator sits on a boat on the river Thames as he embarks on his tale of suffering in Africa. In this sculpture, the opposite is taking place. The books ‘lights’ up when the spectator switches on a button. It illuminates various pages of the book, highlighting one image through another, mapping connections in the mind of the viewer.
Themes of invisibility, in making the invisible, visible, using unusual perspectives are a continuation of the projects I have worked with in the past. I am also interested in works that exist on diverse levels and have several layers of meaning. This sculpture could also reference ‘tablets written in God’s hand’ in light and given to Moses., allowing access to a different kind of knowing. It speaks of a narrative in non- textual way using light and images and allowing access to a different kind of knowing. I imagine it being in a dark corner and sending out a beacon of ‘colour-saturated’ light, of mapping light and colour to images.
The code used was an Arduino IDE code that blinks randomly when the book is switched on. Analog LED strips are used which are non-addressable i.e.. they are not individually programable but act as one long LED light along the spine of the book, each giving. a particular random colour along the page. Four LED strips are attached to each page. All the LED lights on the strip are connected in parallel so each light get the same amount of voltage along the length of the strip. Each strip contains seven LED lights along a length of 23.5 centimetres, each slightly shorter than the length of the page. The operating voltage: was 5V
The Micro controller used was Arduino Uno. It uses one input, a pushbutton switch, and six output pins, (2-7) connected to the four RGB LED strips.The positive end of the strip was connected to the anode and the other port(s) in the LED strips was connected to pins 2-7. Although two holders for the wires were soldered onto a perf board, I decided to show the work with the Arduino bread board,
The plexiglass plates were etched with an Epilog Laser Engraving and Cutting machine. The four plexiglass plates were surrounded by a thin sheet of black plexiglass and the spine of the book was covered with black light-proof material so light was fed back within the plate causing the edges of the plate to be back- lit.
Deciding how to place the LED strips into the plexiglass spine was challenging because the LED strips were 10 mm wide whereas the plexiglass was 8 mm and experiments were done to find ways to embed the strips into the book while at the same time creating a flexible but strong backing for the book. At first silicone, used in insulating windows, was placed on the pages to create a soft transparent layer to give support and a channel was created along the spine using black electrical tape to guide the light into the individual plexiglass plates. After assembling the book, it was found that the light was diffused and did not light up the plates and the images adequately. The solution was to start over and stick each led strip directly onto the plate before building up the spine of the book. This worked and gave the light and colour direct access onto the pages.
References
http://www.instructables.com/id/Intro-to-LED-Strips/
https://www.arduino.cc/en/Tutorial/Blink