MAGIC MACHINE Synth Controller
The MAGIC MACHINE is a 5-pin MIDI controller which outputs a MIDI signal to a synthersiser, allowing a user with little or no background in music to create interesting sounds by pressing a few buttons.
produced by: Benjamin Sammon
Concept
The basis of the idea was to find a solution for a few music making problems I experience. I am a synth player and have hardware synthesisers but I also make computer music. My plan was to try to control my traditional synthesisers in a similar way to using a USB controller and a piano role with software synthesisers. My idea quickly escalated into thinking about what kinds of sounds I would want to make and what kind of effects I would be able to use practically.
Part way through the making of my device I decided that I wanted it to be interactive so that anyone, regardless of skill, would be able to use it. Synthesisers can be very daunting, especially if you are not a musician, so creating a box with an interface that would allow even a child to work out how to use became an interesting premise. I also wanted to create a controller that would separate me from the instrument allowing for a new approach. Looking at this through the eyes of someone who was not a musician became an exciting premise for my own musical exploration.
Technical/Fabrication
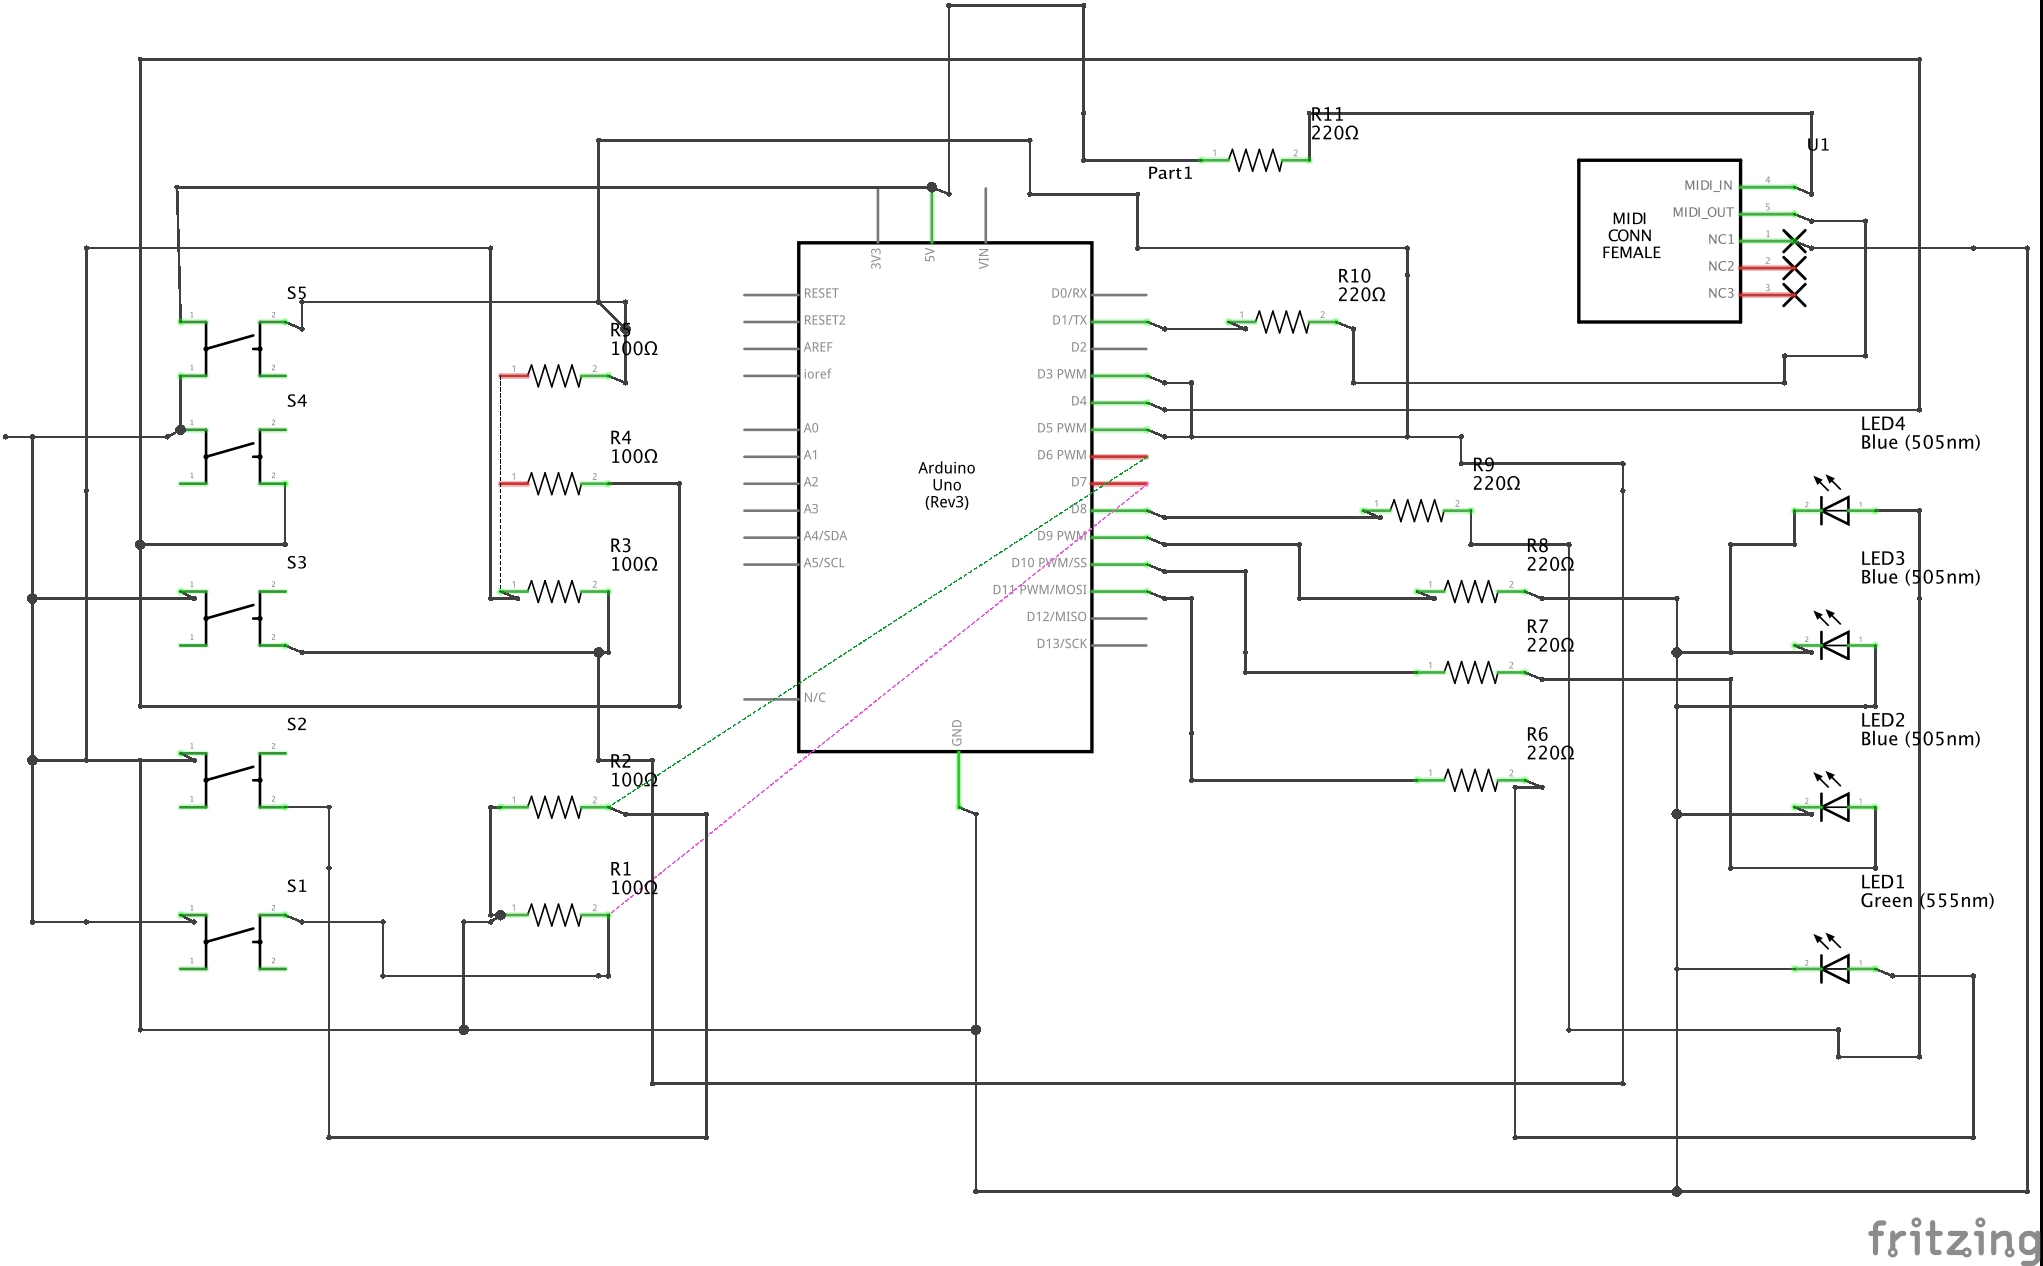
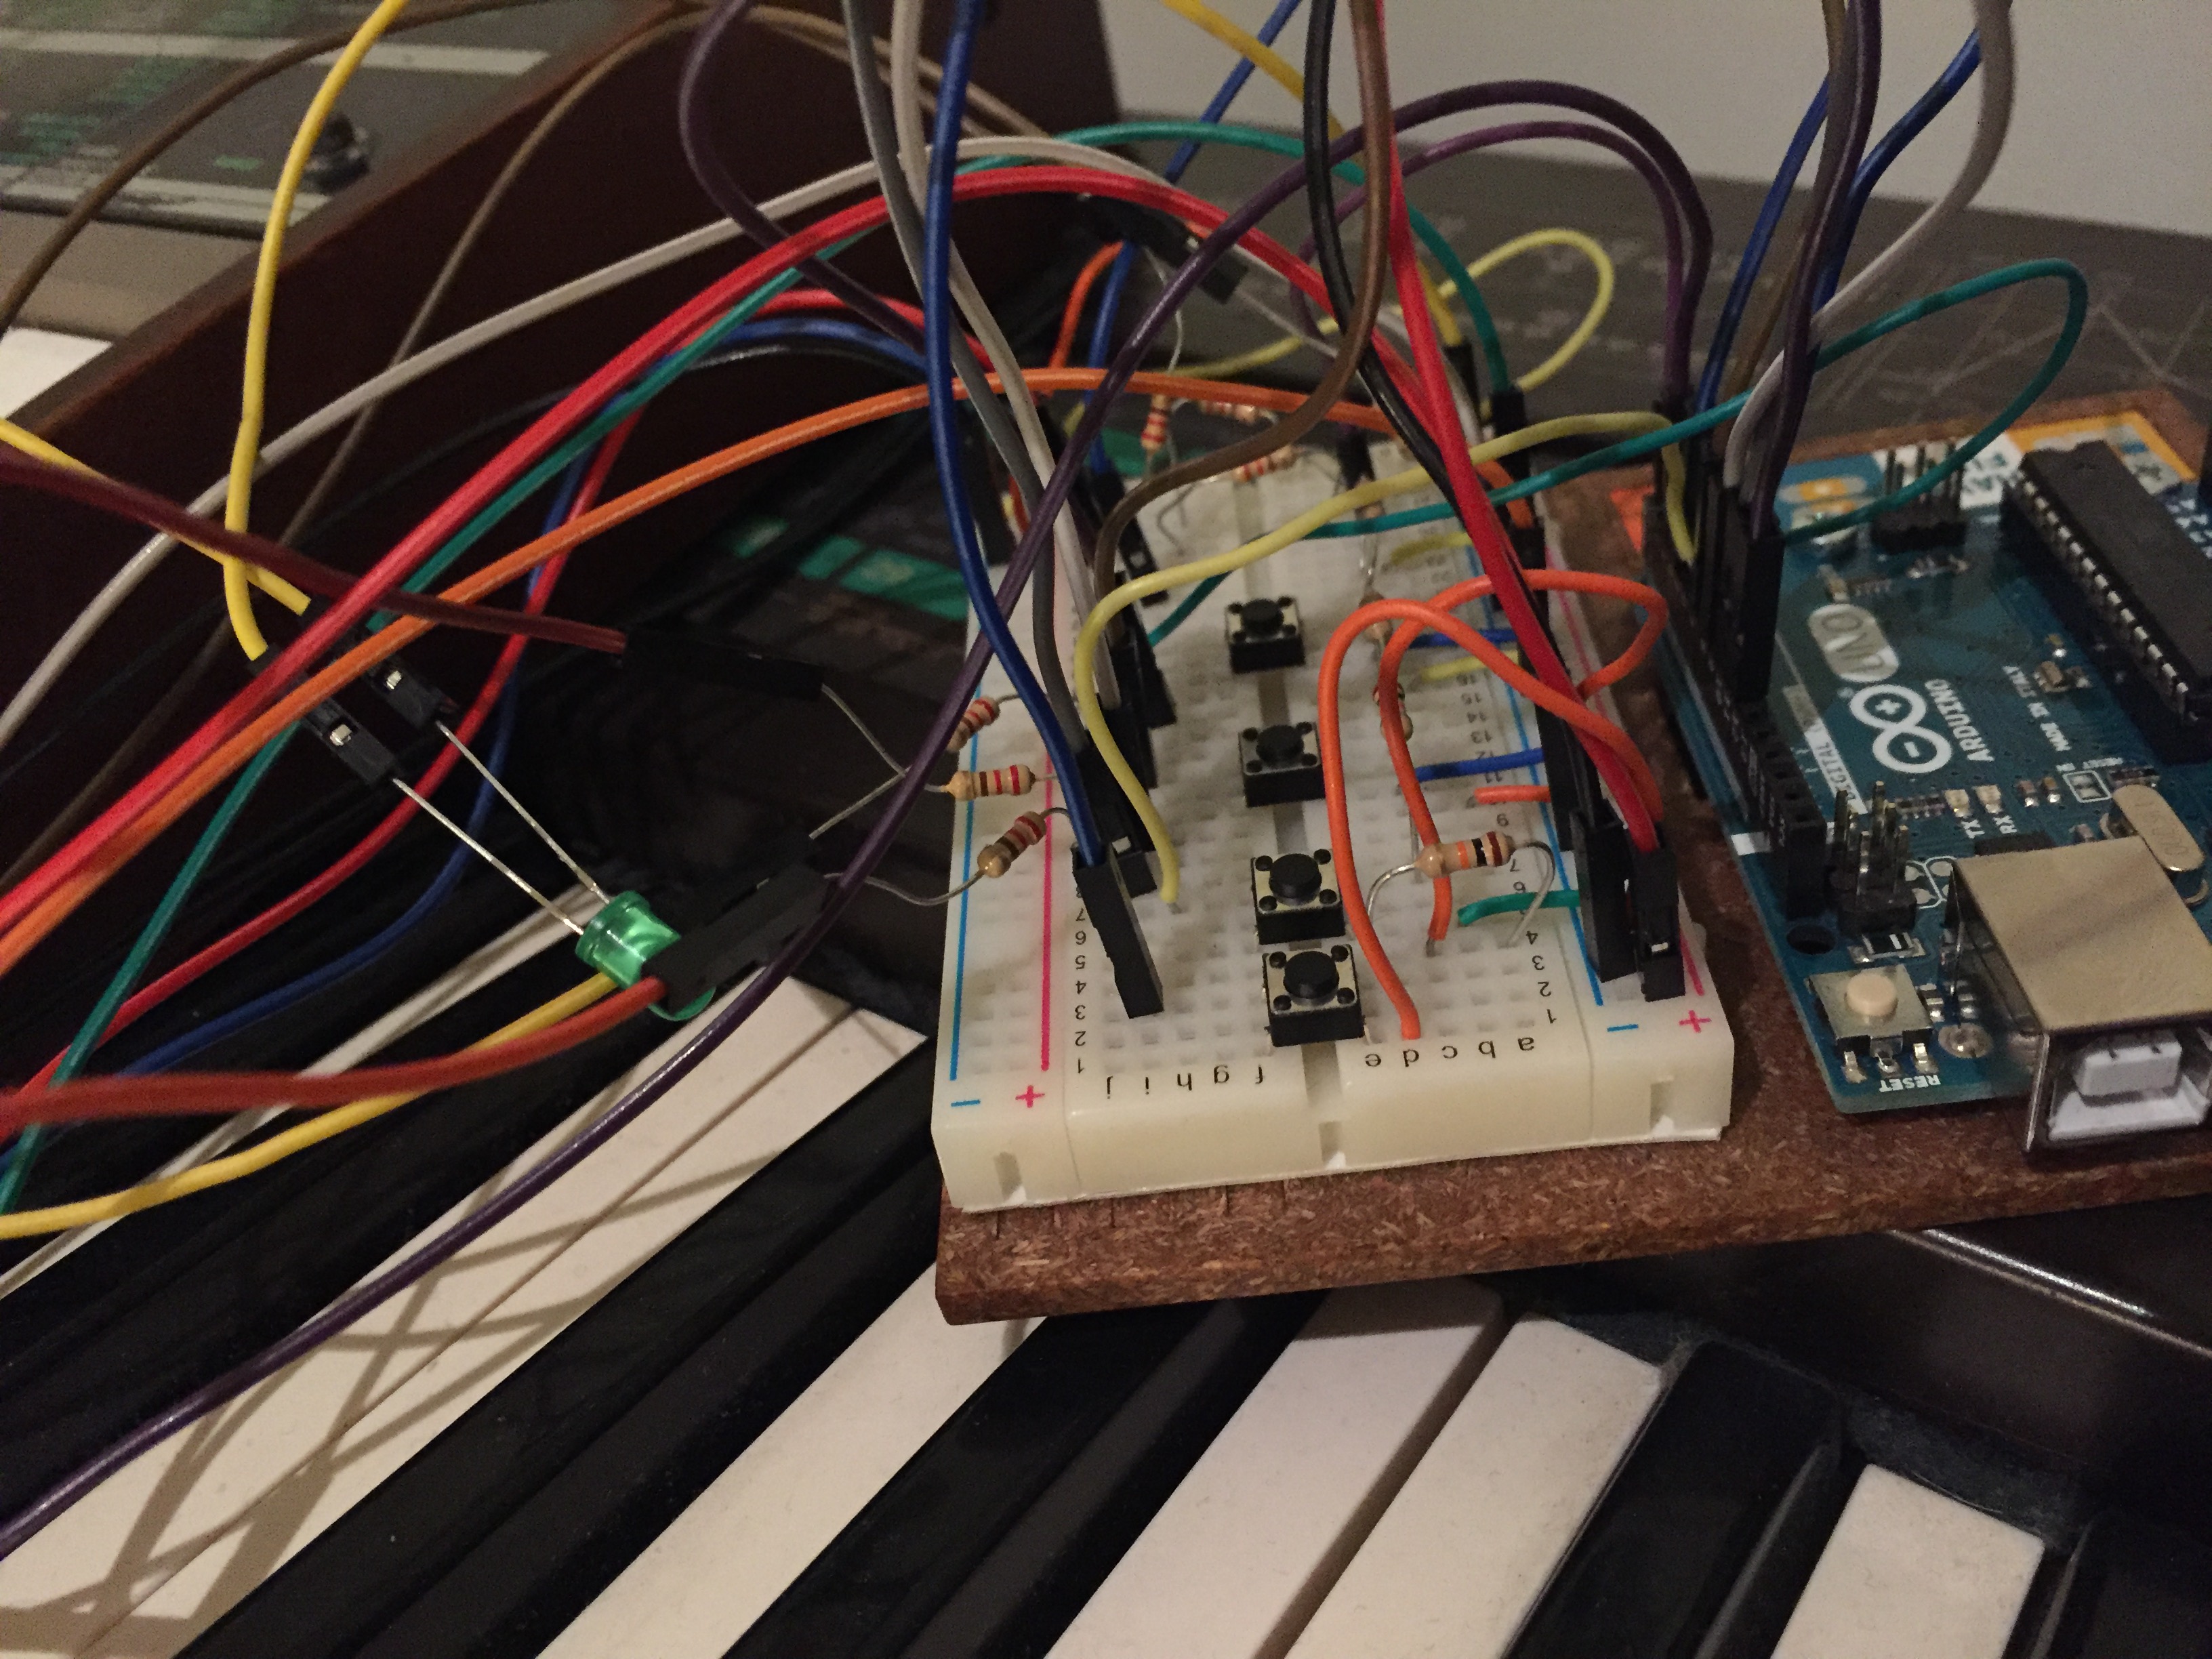
For this concept, I decided to use an Arduino Uno. I began by mapping it out on a breadboard with smaller components, then moving onto soldering and fabricating the project on a larger scale.
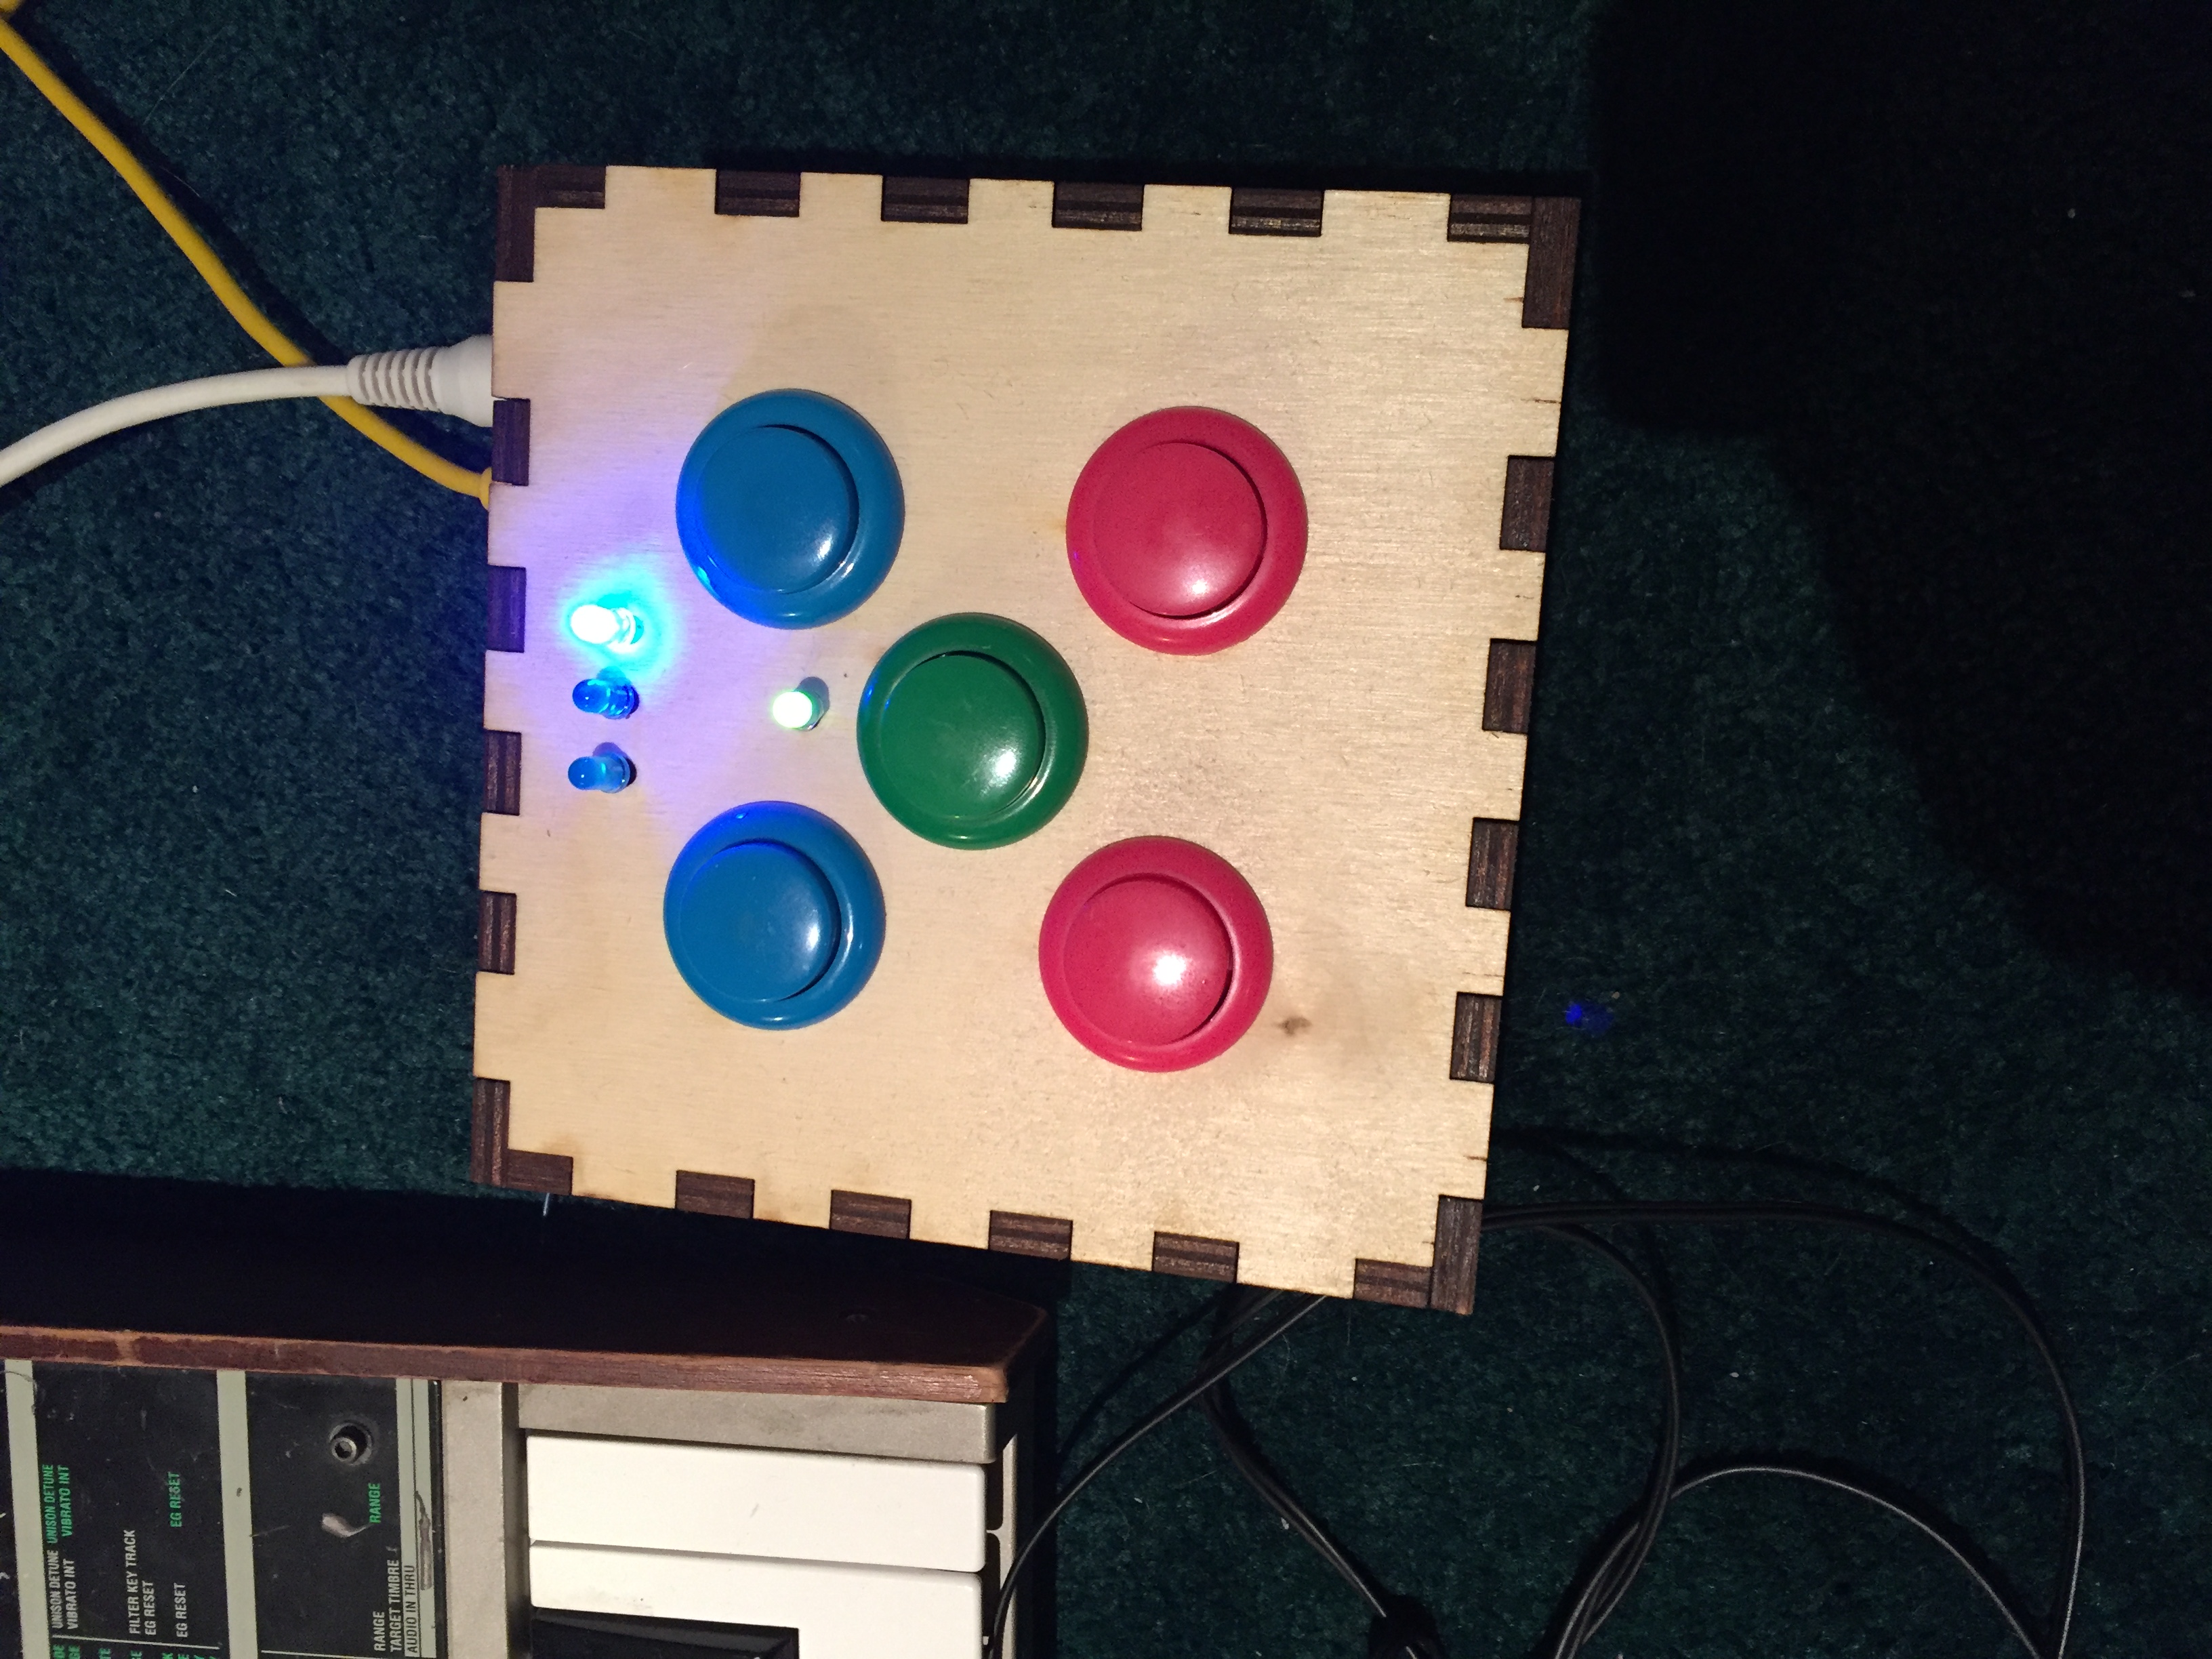
Initially I wanted to create a device using an old computer keyboard with a PS/2 port but I decided to simplify it to make the device more approachable. Instead I used 5 arcade buttons. This included 2 blue buttons to control tempo, two pink buttons to control pitch and a green button as an on/off switch. To make the device even more user friendly I decided to include a green LED which would turn on and off as the green button is turned on and off and 3 blue LED’s flashing along with the tempo, visually displaying what the blue tempo buttons are doing.
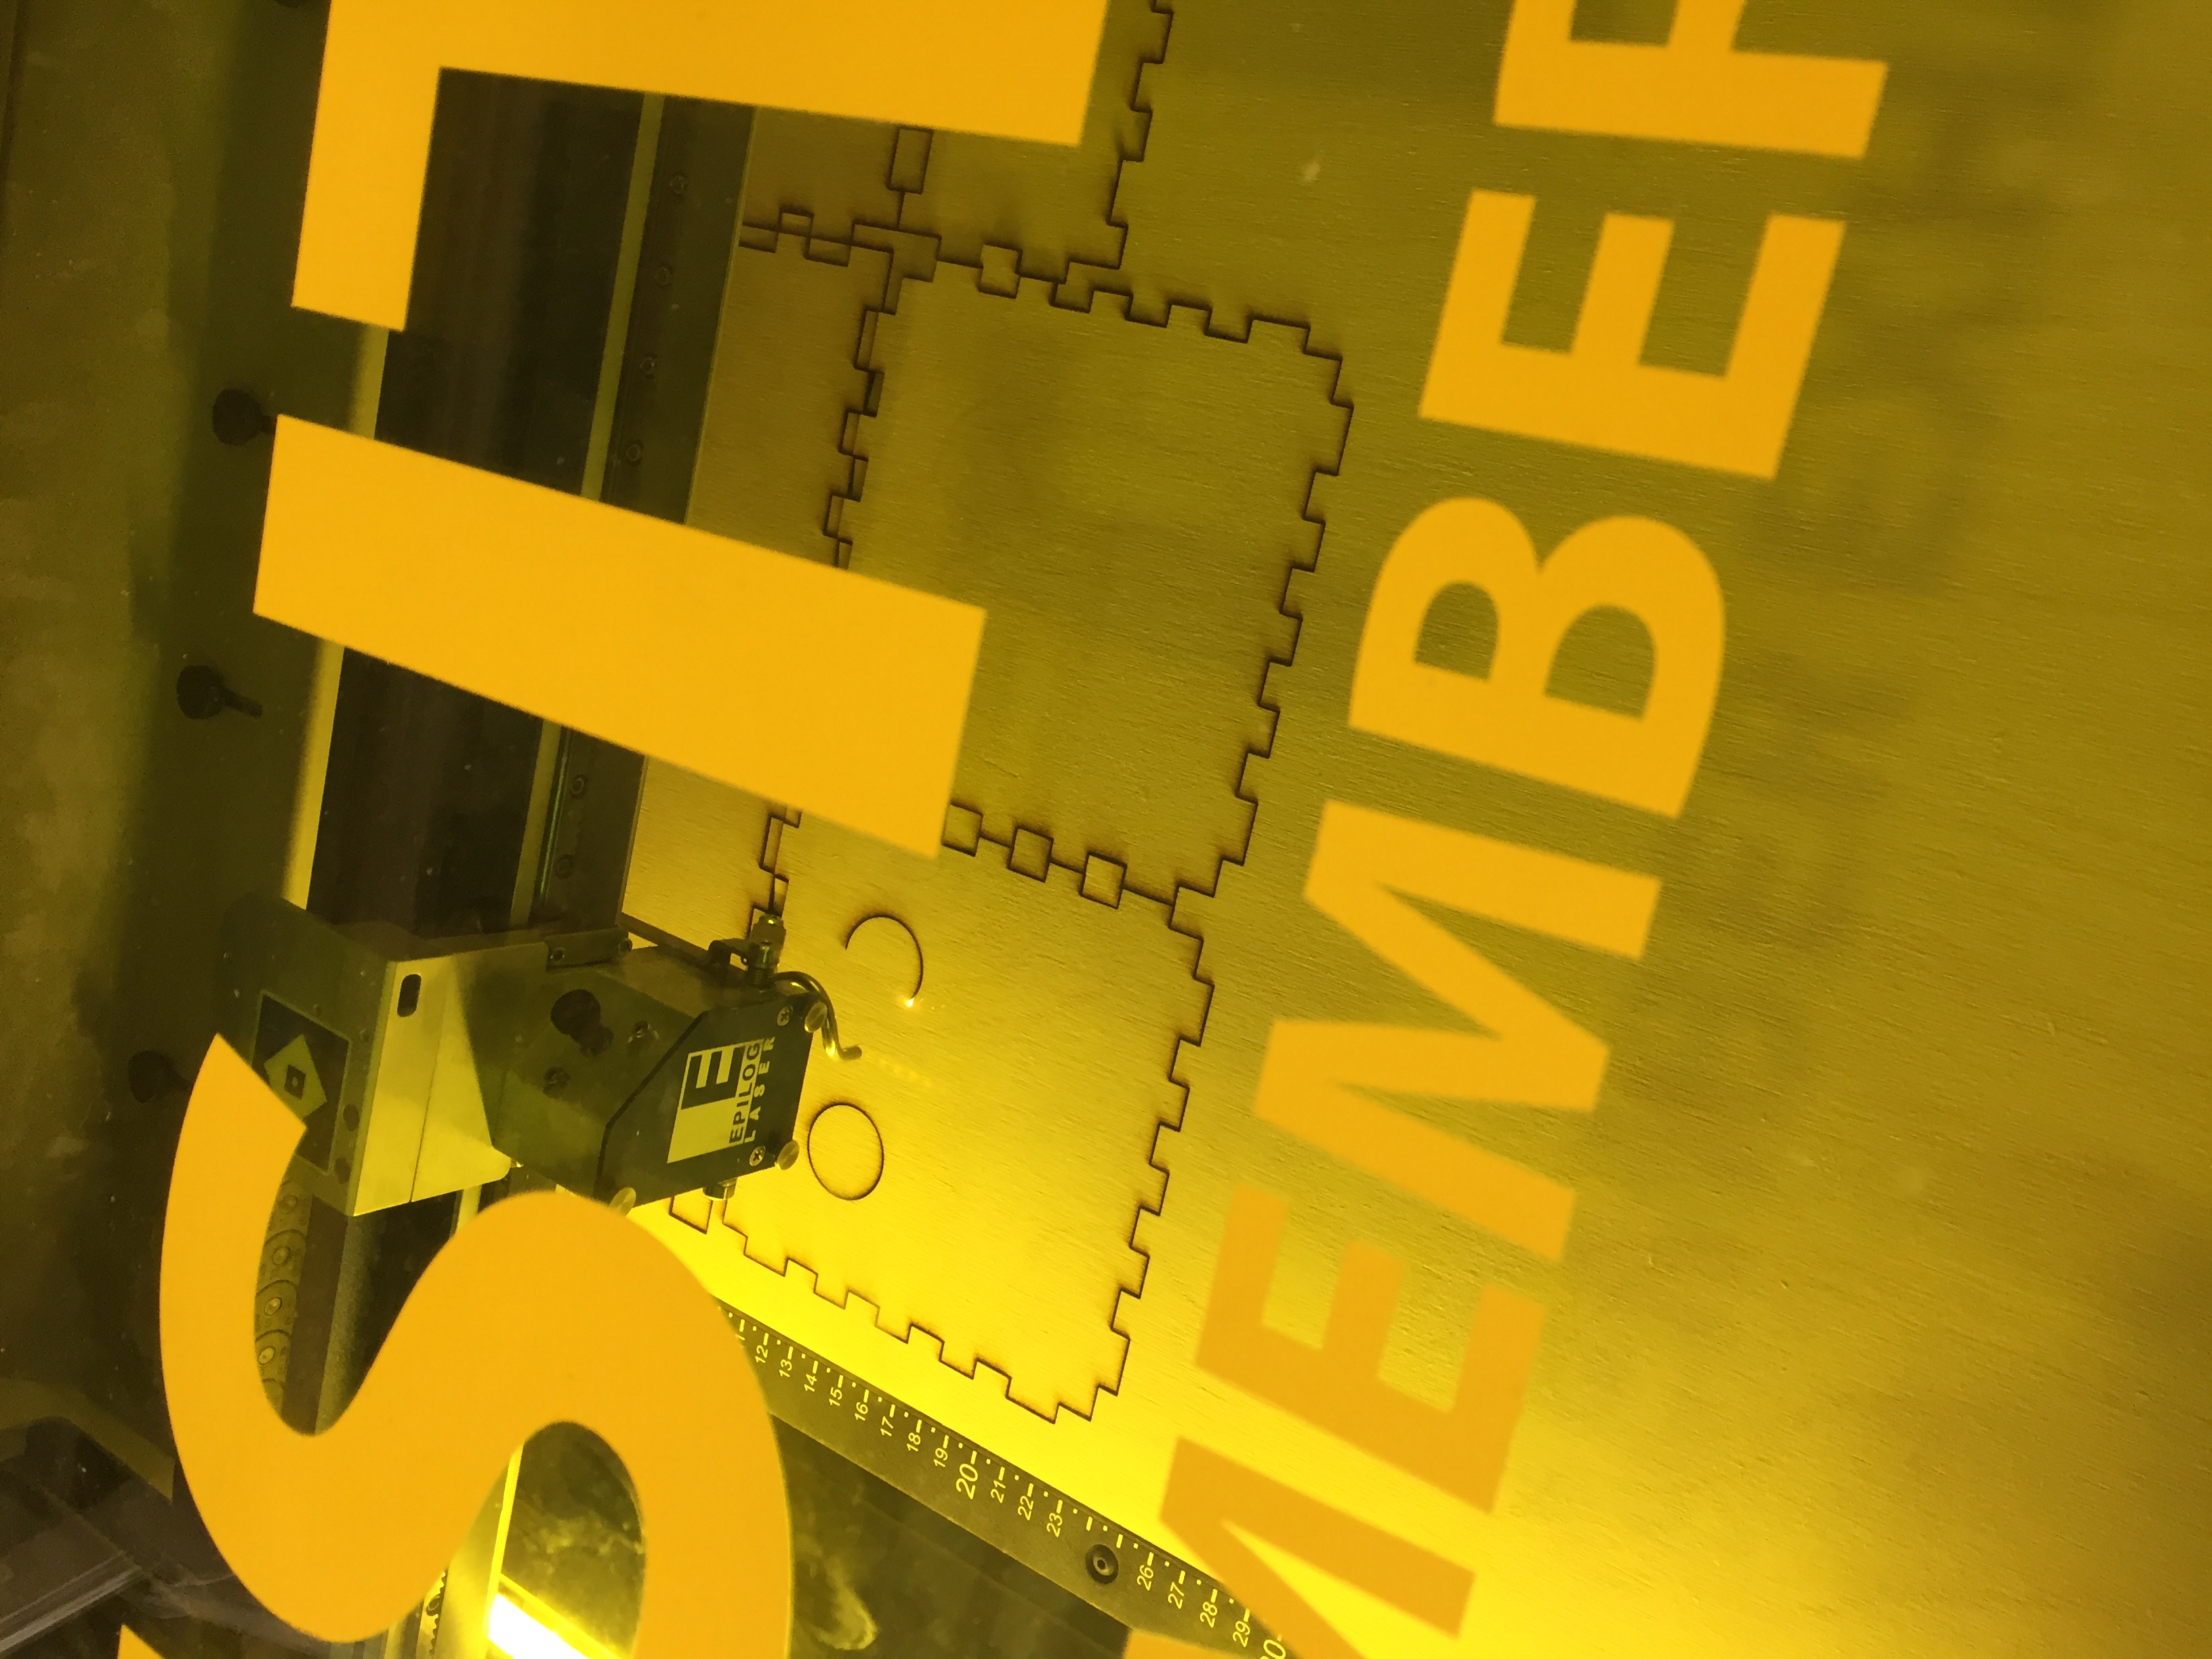
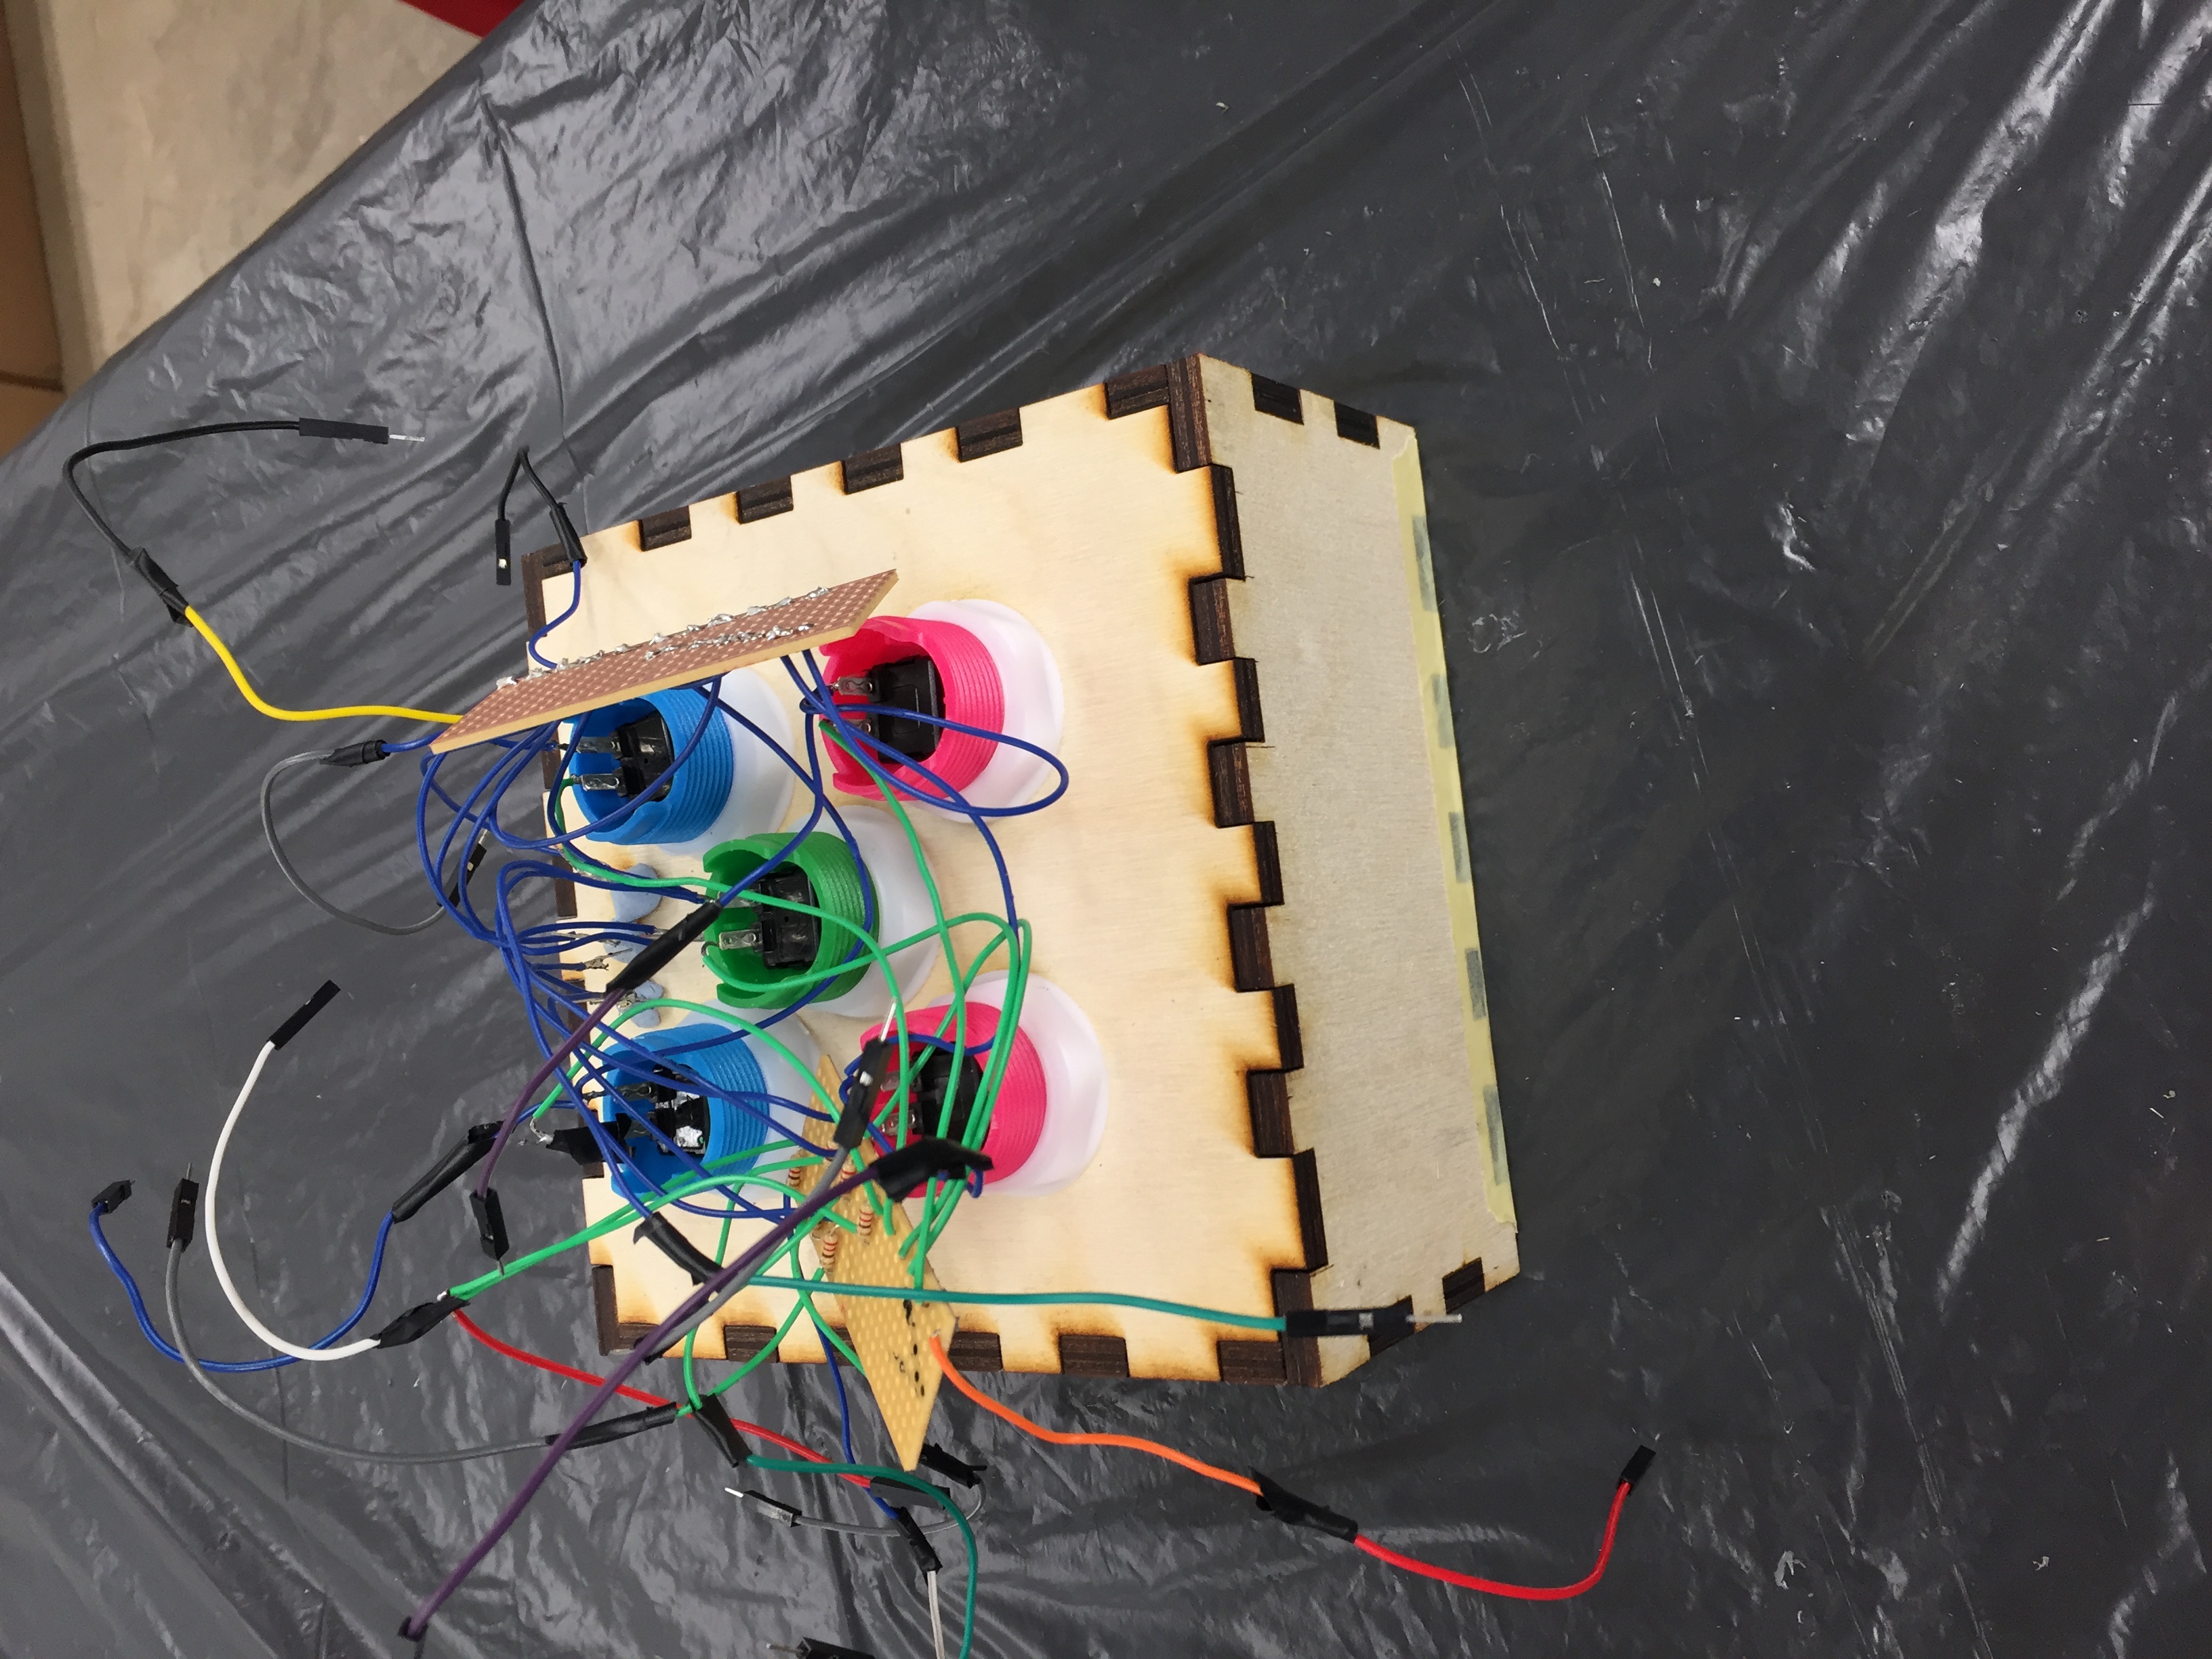
I decided to laser cut a square box enclosure out of wood. Creating my design using Makercase and then adding in the holes for my external components in Adobe Illustrator. I found the fabrication process quite straight forward, there was a small issue with some of my holes being too small but with a bit of filing everything fit in perfectly.
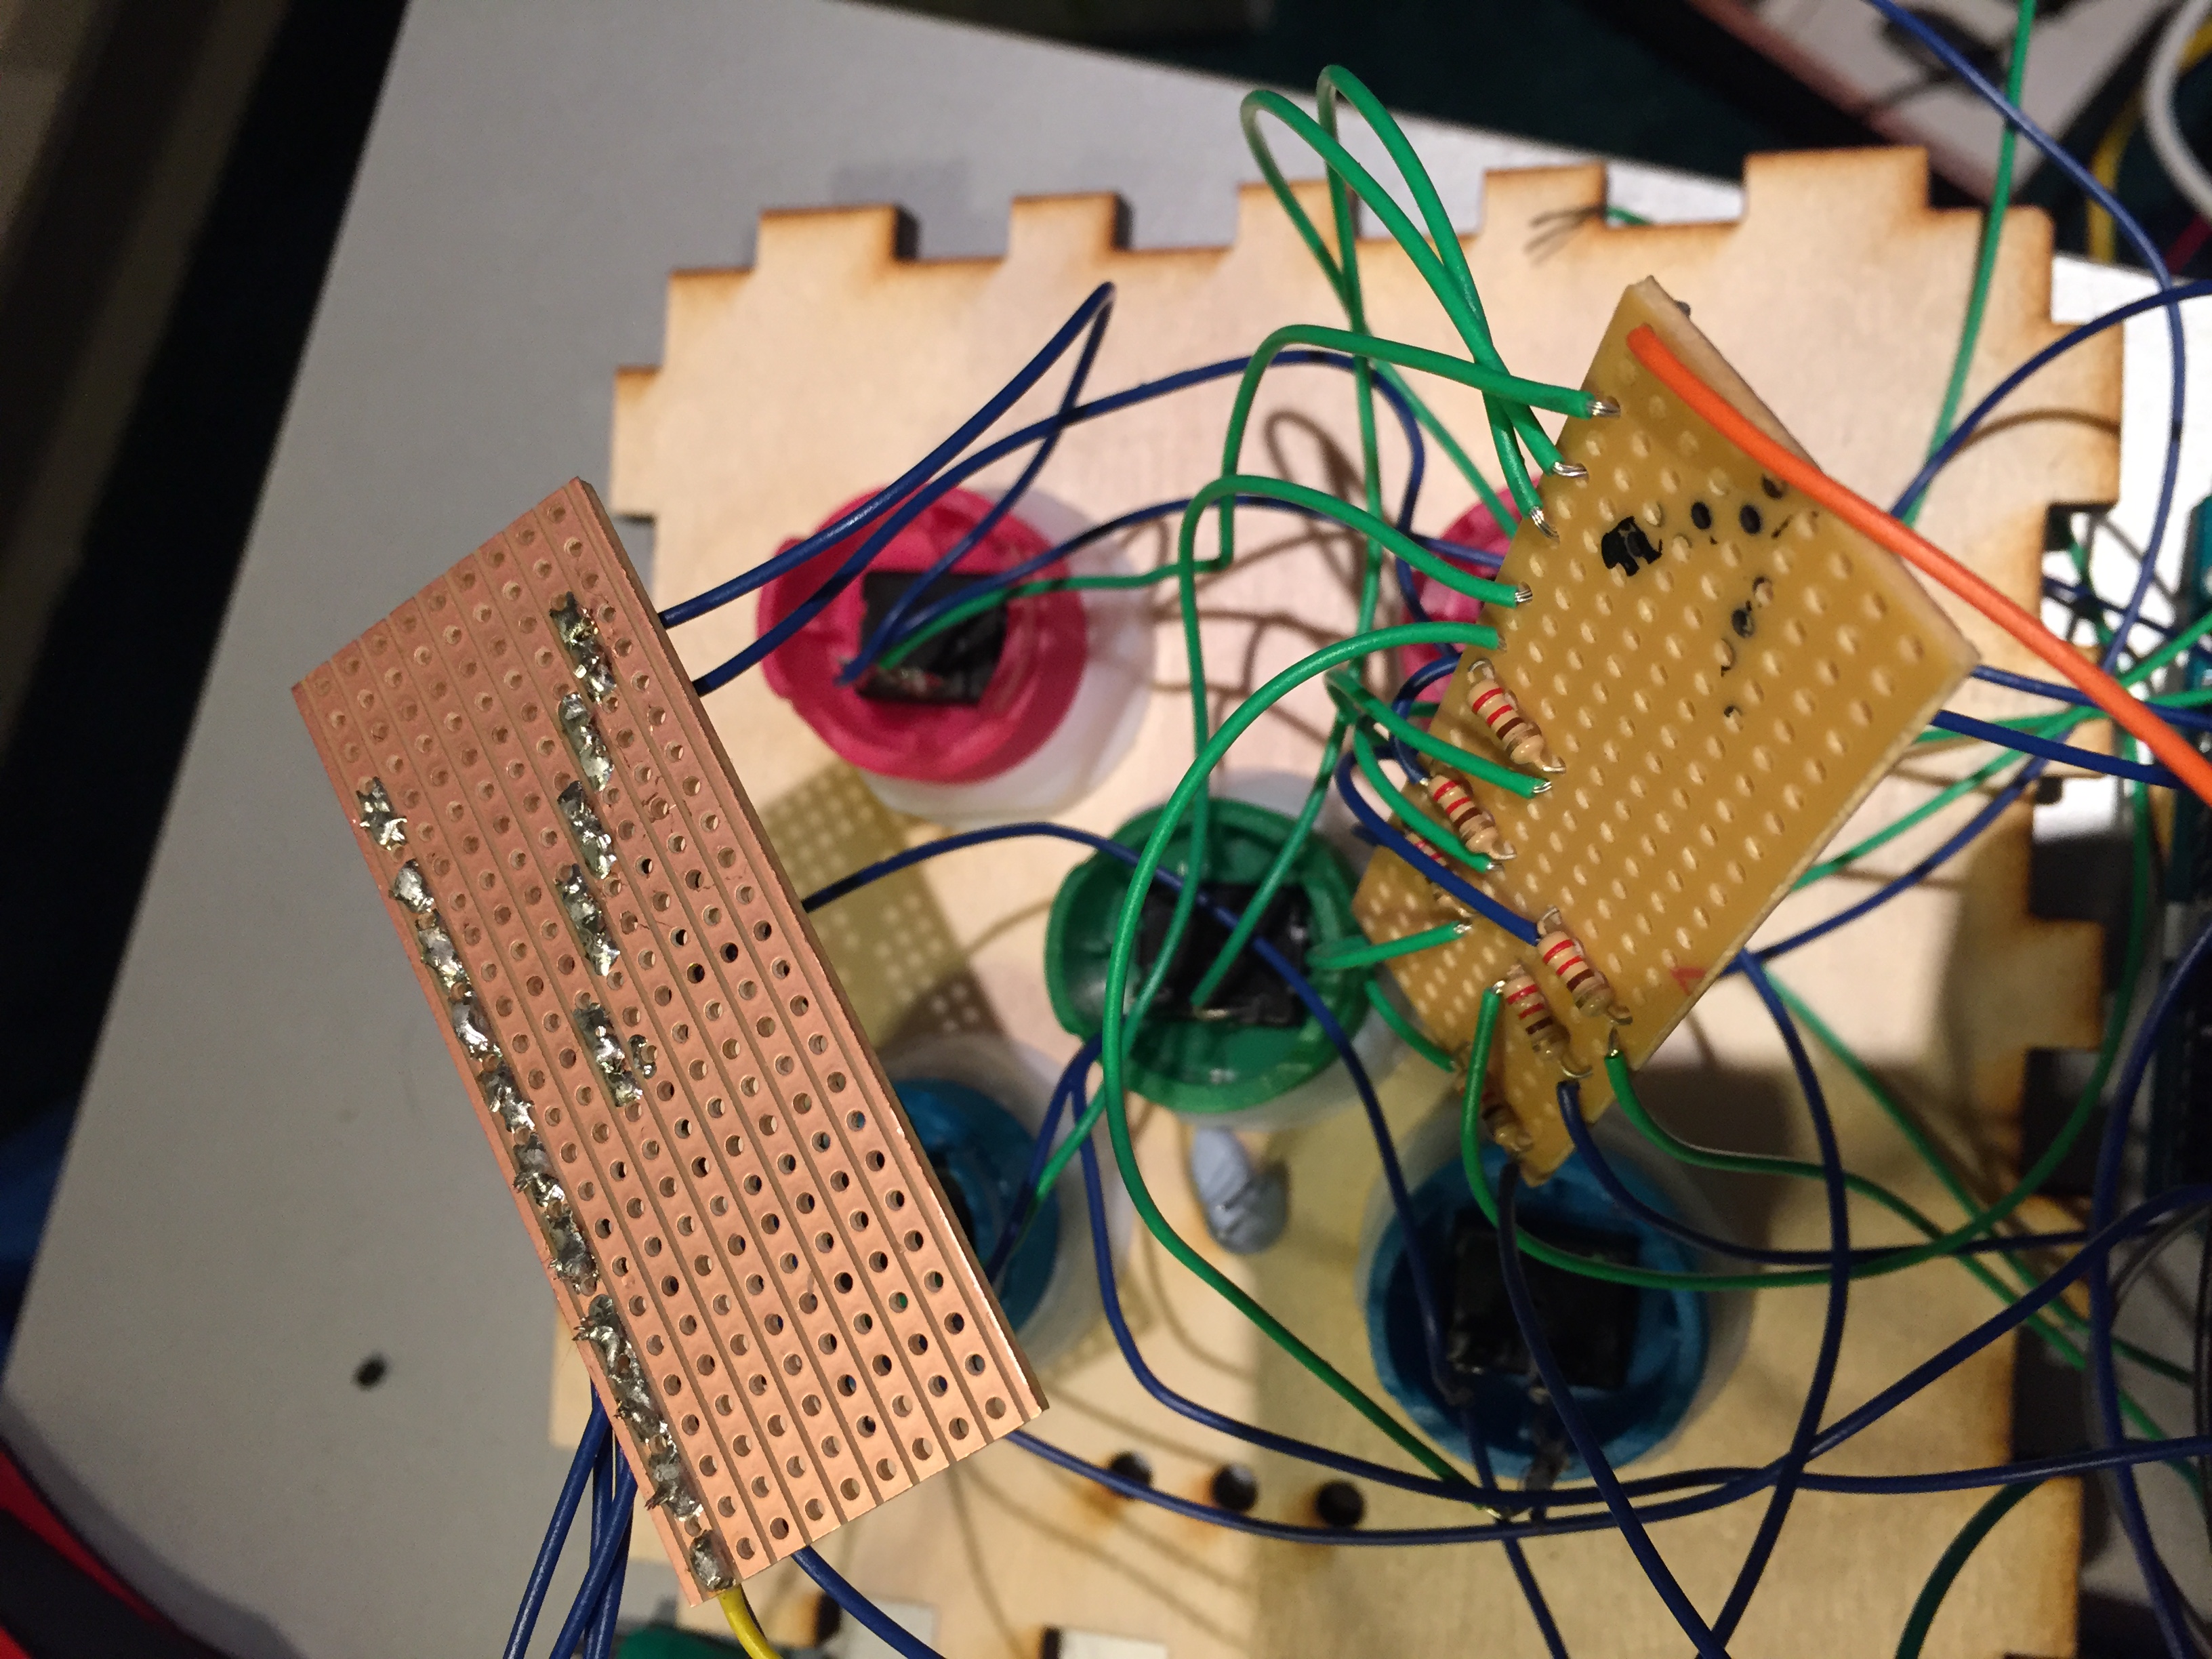
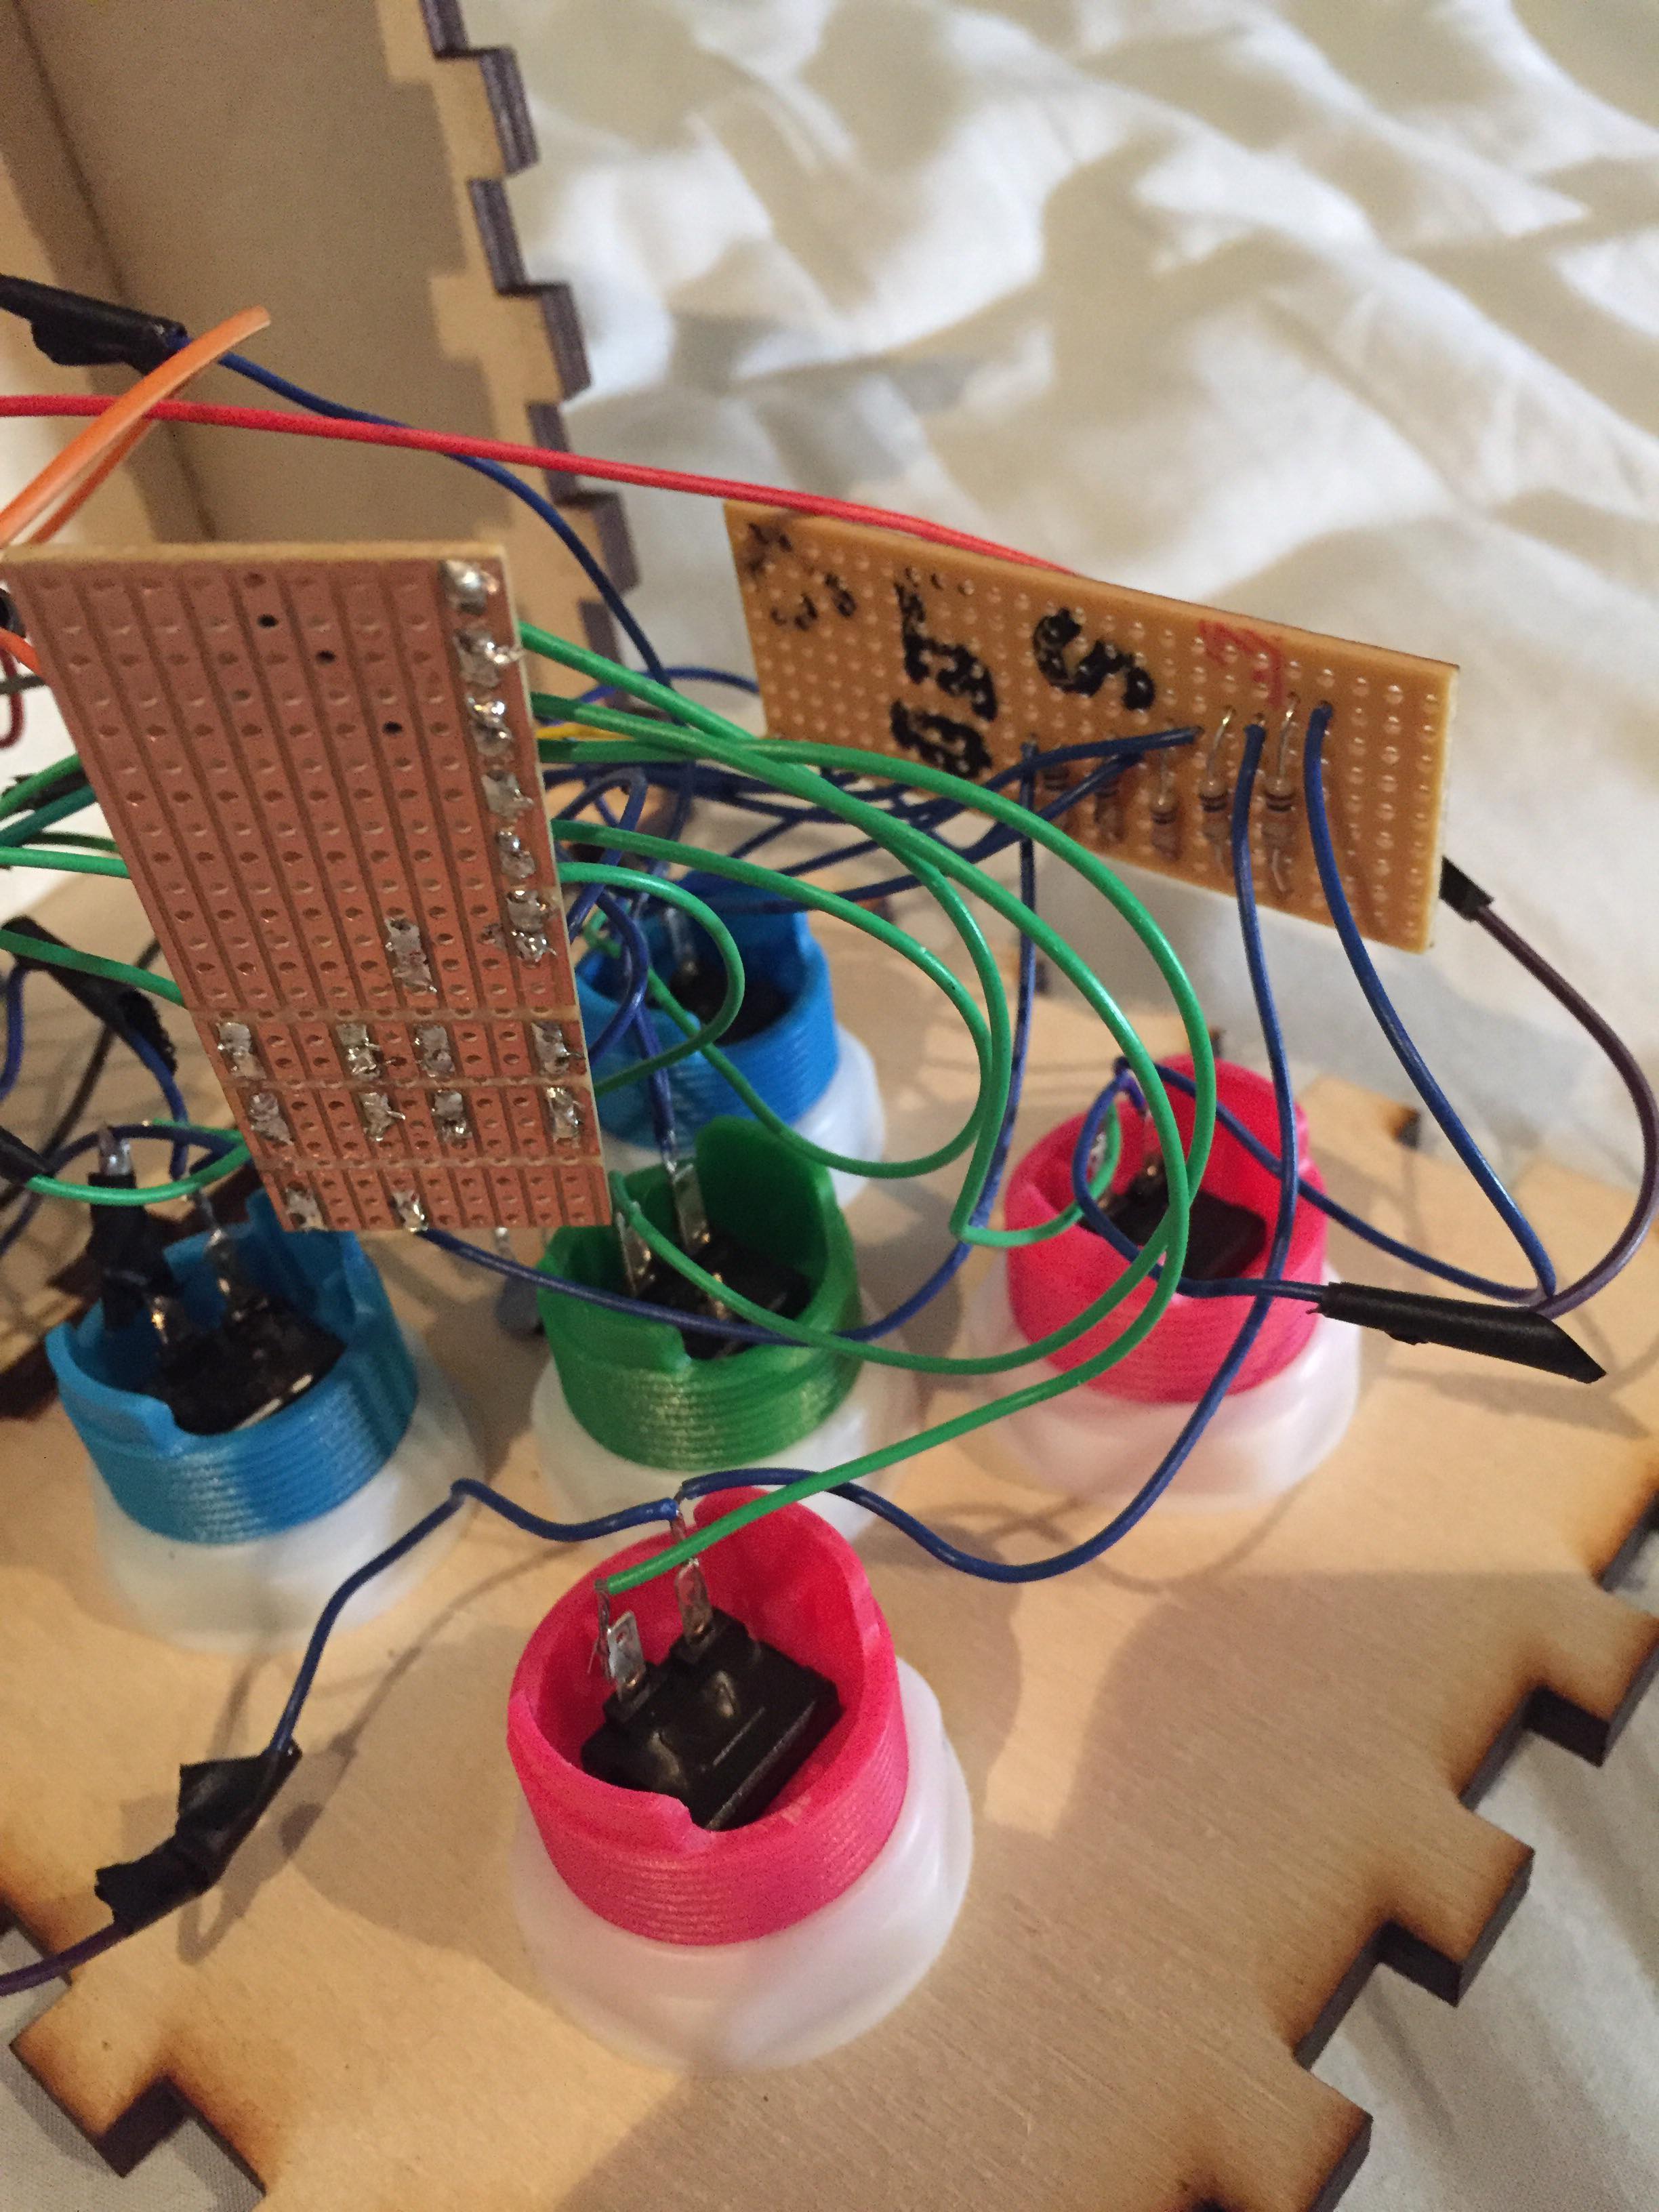
The soldering process was long and laborious, I decided to create two boards using strip board, one for ground and one for 5v and resistors that go from the LED’s to the digital pins. After soldering everything together I realised that it was difficult to plug normal wire into the Arduino. I decided to cut all the wires that should be connected to the Arduino solder male jumper wires to them. This worked very well.
Code Development
In this project, I used the Arduino MIDI Library which is a brilliant resource for using and transferring MIDI data. I started with just a midi output socket and 2 buttons, testing out the scope of what the MIDI library could do. In the code, I wrote a 6 note arpeggiator. I decided to assign tempo controls to each of the two buttons using the ‘delay’ function. Shortening the delay time between each note speeds up the tempo and increasing the delay time slows the tempo.
After creating my basic MIDI synth controller, I wanted to make it a bit more musical. I liked the tempo controls but didn’t want it to just play the same 6 notes. I decided to write a function that would continually change the notes being played but still using the nice 6 note arpeggio I had started with. I set the sequence to drop by 4 notes every time it plays through. I programmed the left pink button to increase by 4 notes and the right pink button to increase by 2 octaves (24 notes) every time the sequence plays through. Finally, I decided to add an on/off button and LED lights which would correspond with their matching coloured buttons.
Conclusion
This project was an excellent learning curve, I learnt a lot about soldering, fabrication and programming a circuit. I would definitely like to develop more on my ideas in future. There is something very rewarding about creating a device from scratch and being able to use it in a real-life application. I am really interested in creating more MIDI devices and synthesisers to compliment my live performances.
References
Here are the sources I used:
http://www.notesandvolts.com/2015/03/midi-for-arduino-build-midi-output.html
https://www.makeuseof.com/tag/make-midi-controller-arduino/
https://playground.arduino.cc/Main/MIDILibrary
http://www.makercase.com/
https://forum.arduino.cc/index.php?topic=114316.0